23/08/2023
The main idea of this setup is to send a message to an API which will analyze the sentiment of it. The API will tell us if the message is positive / neutral or negative. This is very useful as you can use this data for further automation, like set the priority of a ticket.
Sentiment analysis demo
The fastest way to understand what you can achieve with this automation is to watch this short video.
The concept / schema
The concept is pretty simple, first we get the message from a user, then we create a Workflow which will listen new tickets.
This Workflow sends the content of the message to an API, then the API returns the sentiment.
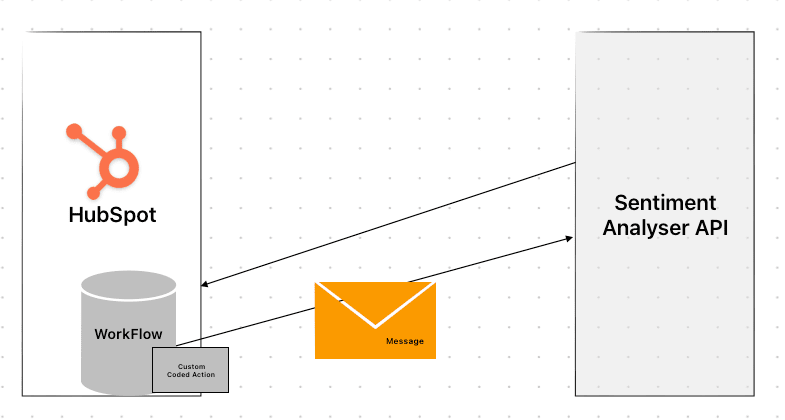
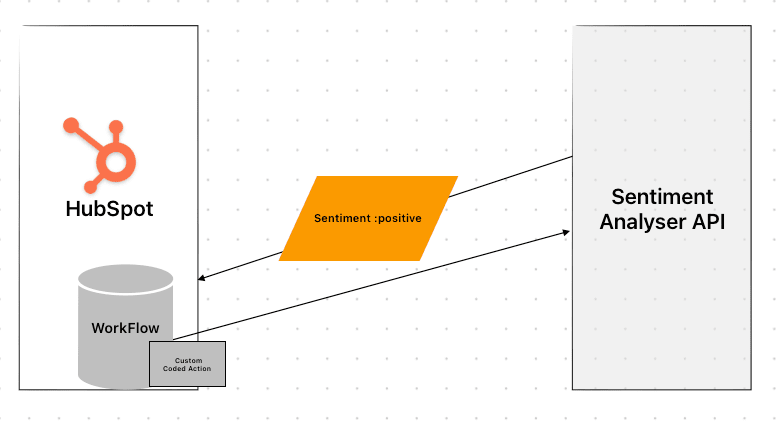
Then we save the sentiment in the ticket.
How to set it up
In this part, I will explain how to create the workflow.
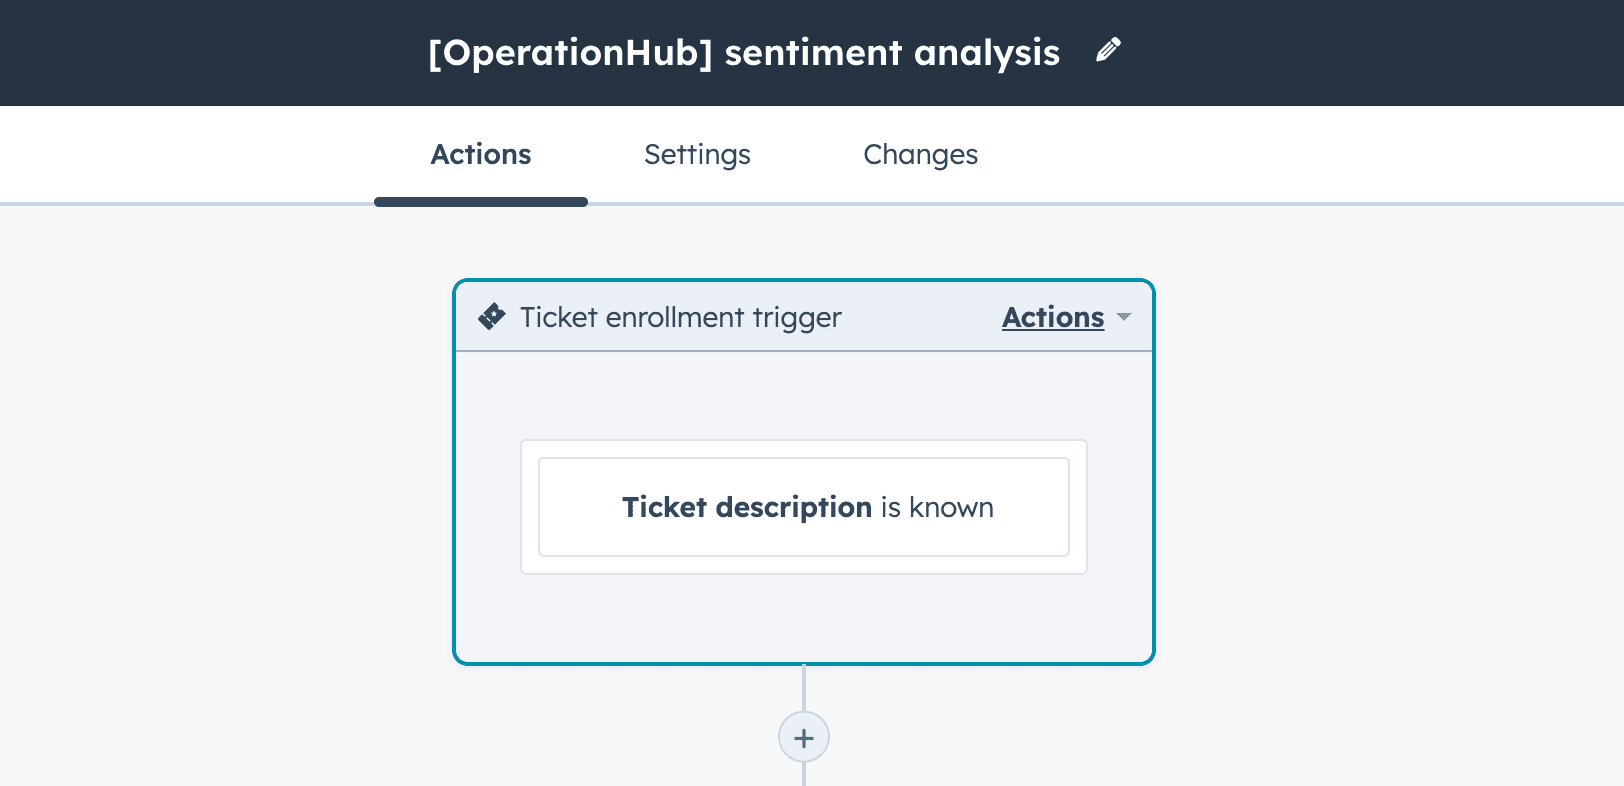
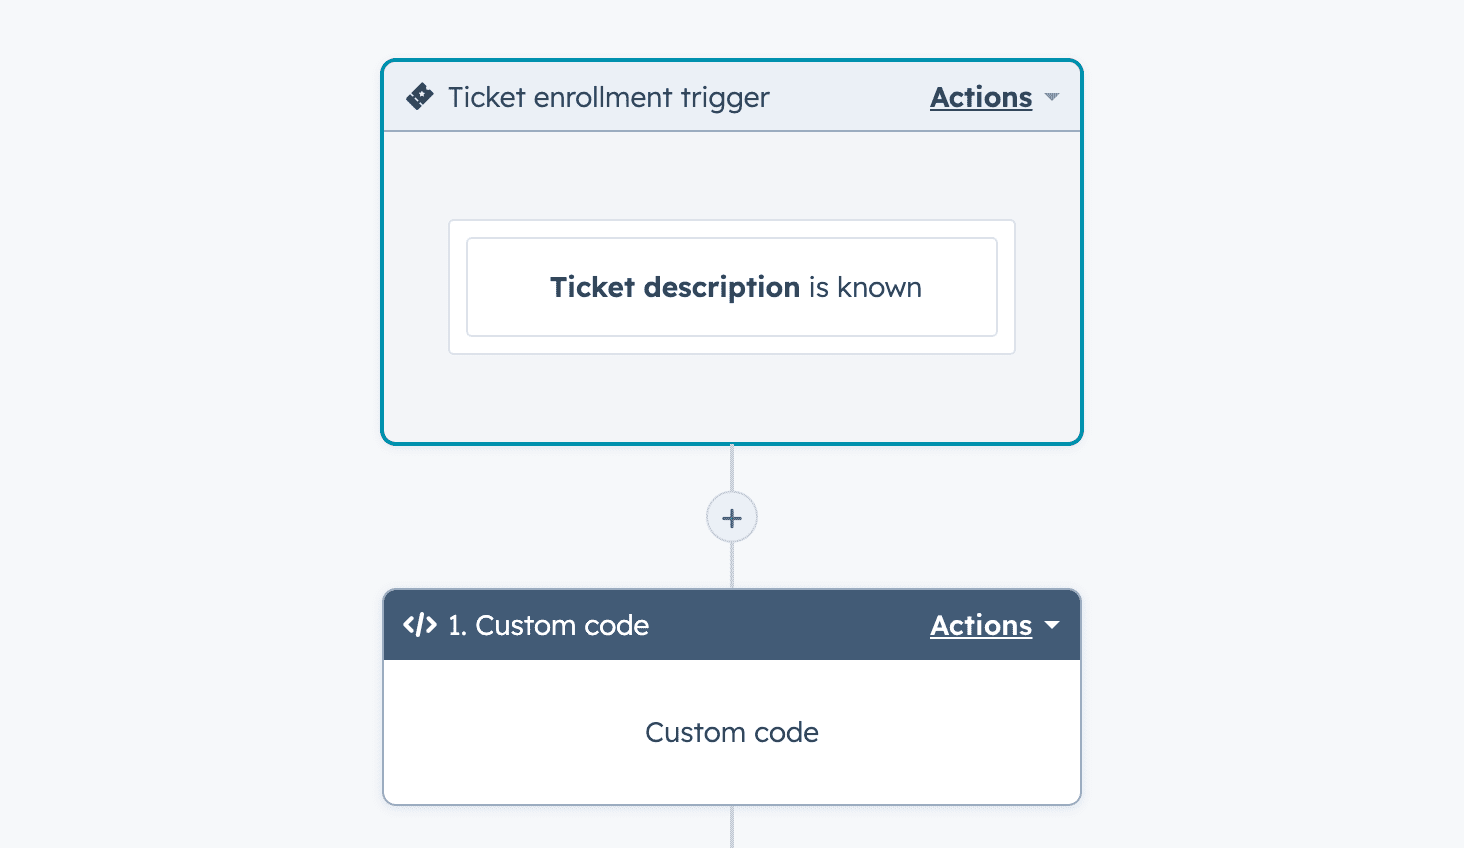
The Workflow trigger
Here’s the Workflow trigger we use is ticket description is known, so when we have a message to analyze.
Send the message to the API
Register to the API and grab an API key
We’re going to use the API Layer sentiment analysis API.
First go on this link and register, then find the Sentiment Analysis API
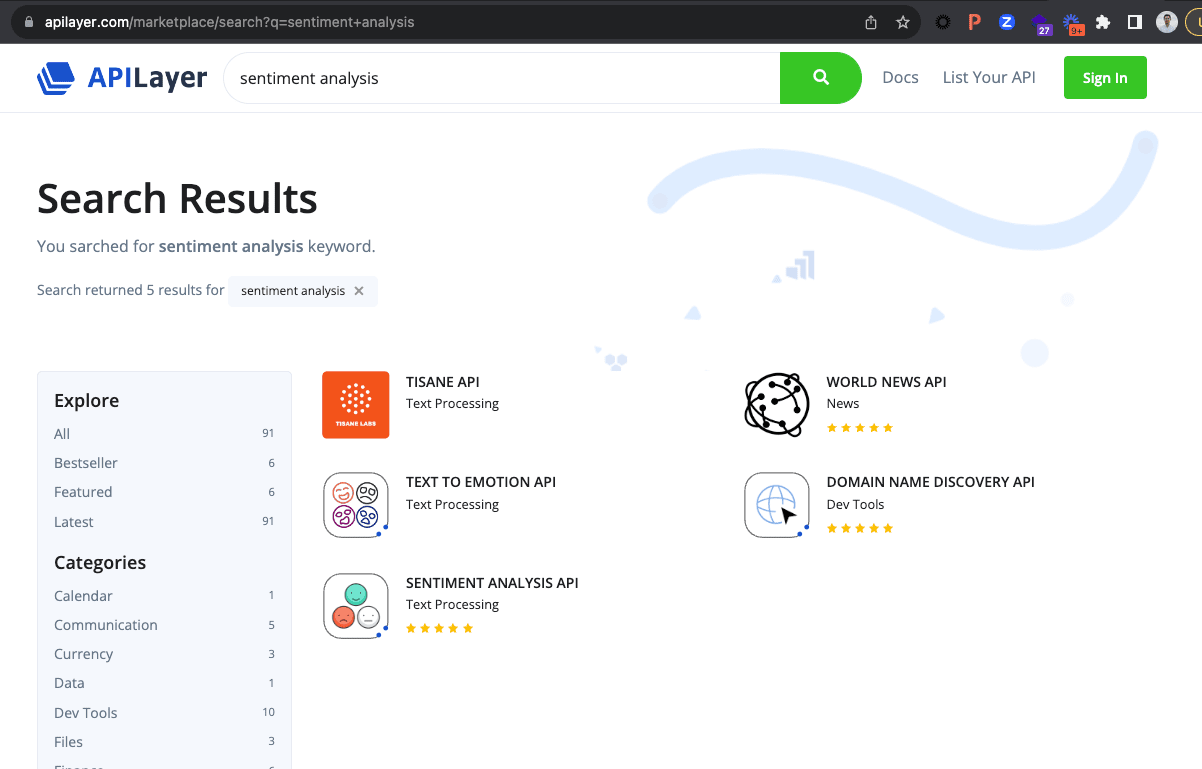
Take the free plan as you can analyze up to 1000 messages per month.
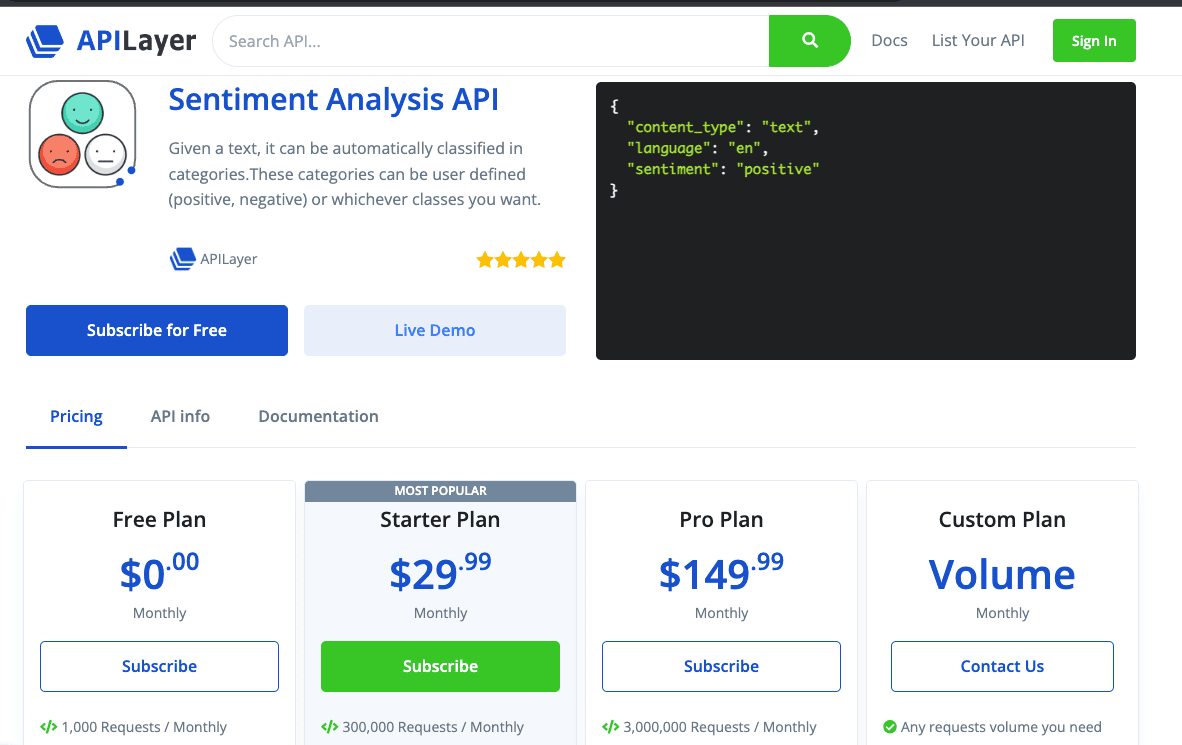
Then Get the API key :

Set up the code in the custom coded action
To send the message to the API, we use the custom code block, so create one.
For the language pick Node.js :
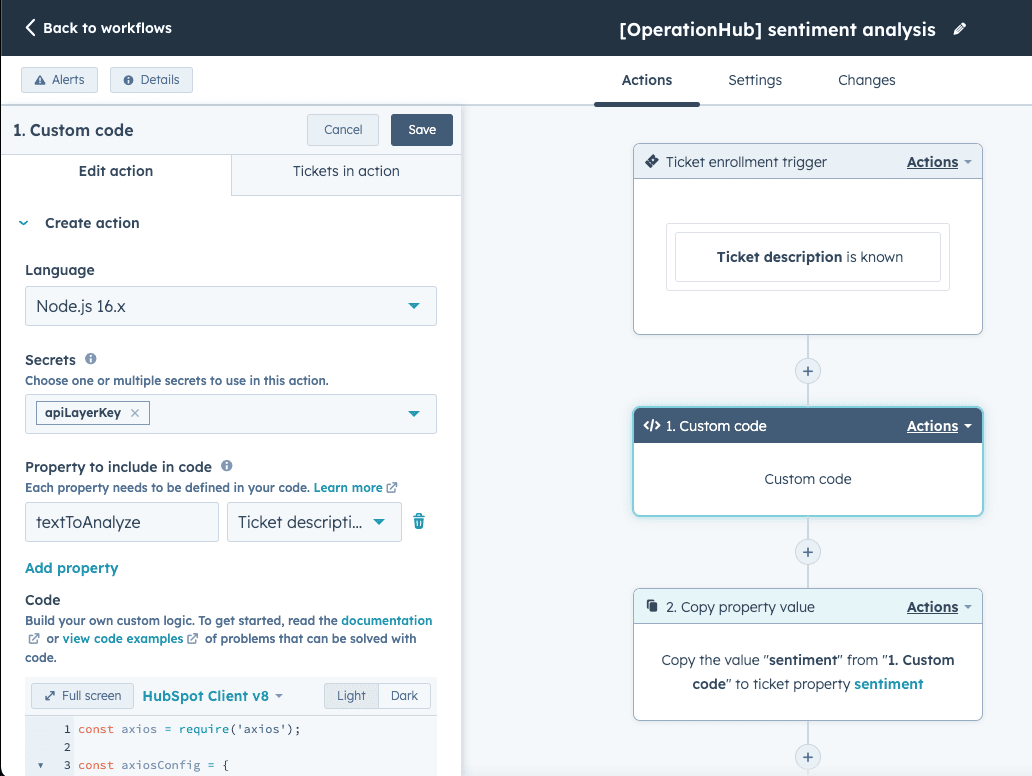
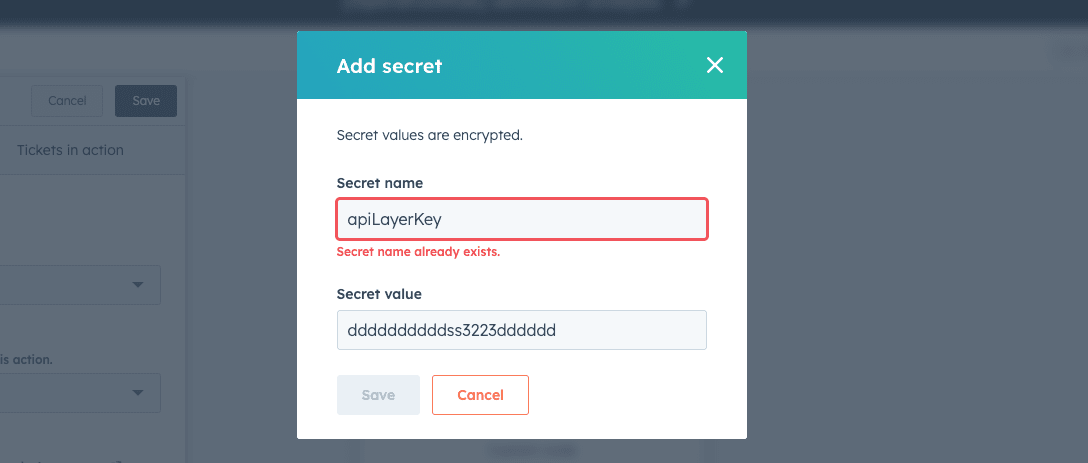
Then add a secret with the name : apiLayerKey , so click on add secret and paste the API key you got from API layer as the value.
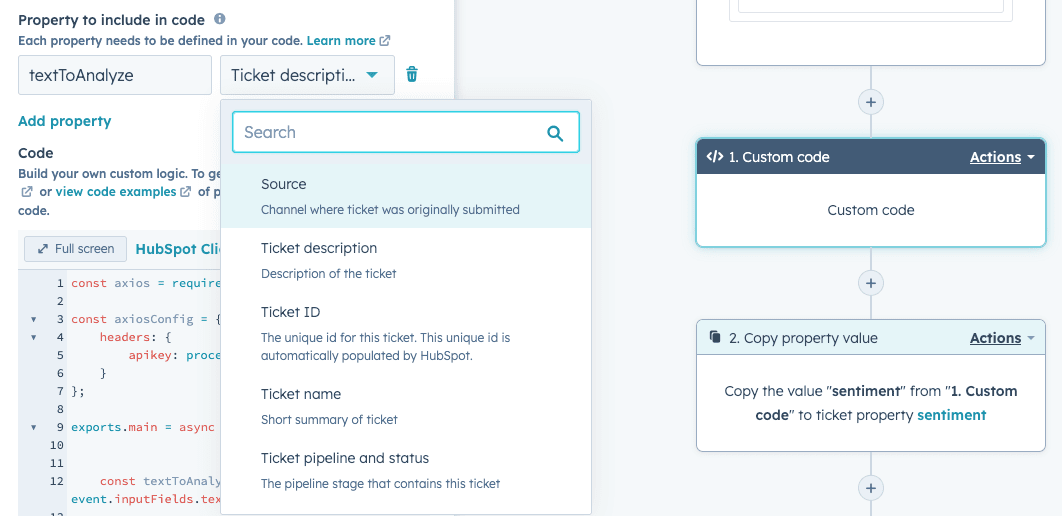
Then add the message you want to analyze here, in my example I would like to analyze the Ticket description so in the section property to include in code I pick the ticket property Ticket description
On the left of the dropdown we have to name our property, put the name : textToAnalyze do not change the casing and do not add extra white spaces.
Paste the code :
In the code section remove everything then paste the following code :
const axios = require('axios');

const axiosConfig = {
    headers: {
        apikey: process.env.apiLayerKey
    }
};

exports.main = async (event, callback) => {


    const textToAnalyze = event.inputFields.textToAnalyze;

    if (!textToAnalyze) throw new Error('textToAnalyze is not set, are you sure you put textToAnalyze in the "properties to include in code" ? ');


    const analysis = await analyzeSentiment(textToAnalyze).catch(axiosErrorHandler)

    if (!analysis.data) throw new Error(`We couldn't grab the analysis infos`);

    const { sentiment, language, confidence } = analysis.data;

    callback({
        outputFields: {
            sentiment,
            language,
            confidence
        }
    });

}


const analyzeSentiment = body => {

    if (!body) throw new Error(`There's no body`);

    const endpoint = `https://api.apilayer.com/sentiment/analysis`;

    return axios.post(endpoint, body, axiosConfig);

}


/**
 * Handles errors thrown by axios requests and logs relevant information.
 *
 * @param {Error} e - The error object thrown by axios.
 */
const axiosErrorHandler = e => {
    console.log("The : ", e.config.method, " call on", e.config.url, "failed");
    console.log("error code retuned ", e.code);
    console.log("error data returned ", e.response.data);
}
Add the output
The Custom Coded Action outputs’ is the data returned by the block to the workflow. In other words, the data other workflow blocks will be capable to use.
So in the output section add the following with the appropriate types (the order doesn’t matter)
string : sentiment
string : language
number : confidence

Test the logic
Now you can save the block, before that you can also give it a try by analyzing one of the existing ticket
Save the result in the ticket
To save the result in the ticket, nothing easier, just use the copy property value block.
Use the sentiment value for the automation
Starting from here, you have the sentiment in your workflow, a so lot of automation can be run based on this. Why not sending an internal message to the contact owner ? This is the power of the workflows, so the automations are up to you.