27/05/2024
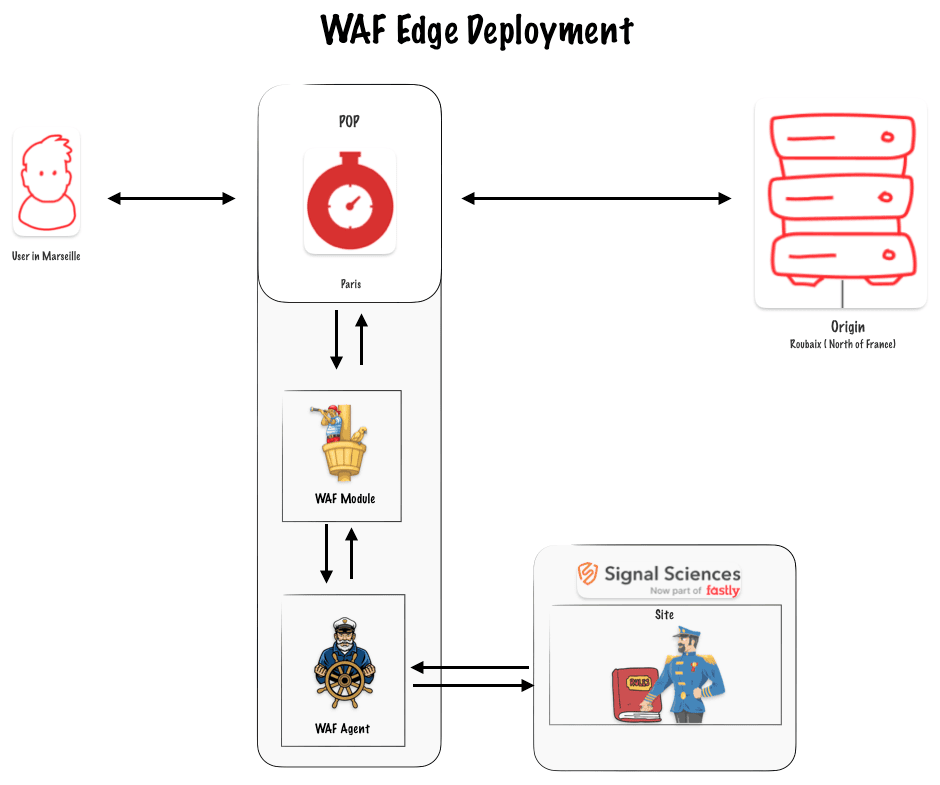
In this article, I will explain how I deployed the Fastly Web Application Firewall (WAF) on the Edge. The process is simple: the WAF module and agent are set up on Fastly's Points of Presence (POPs). The module listens to requests by integrating itself into your CDN configuration using a VCL snippet. The agent runs in the cloud within a compute-at-edge application.
A deployment with CLI
To deploy the WAF on the edge, you need to call the WAF API. The official Fastly documentation provides CURL commands that you can execute in your terminal. Instead of using CURL commands, I decided to create a small CLI program in Node.js.
By the way it’s worth noting you can also deploy the WAF with Terraform.
The CLI
The code for the CLI is available in this GitHub repository. If you look at the code, you’ll see it is straightforward and simply converts the CURL commands into JavaScript HTTP calls.
Prerequisites for the CLI:
- You need to have Node.js installed with npm.
- You need access to your Fastly API key and your Signal Science (WAF) API key.
- You should have a site created on the Signal Science dashboard.
- You need an existing Fastly service for delivery.
Install the CLI
git clone https://github.com/Antoinebr/Fastly-WAF-Edge-deployement.git
Go in the folder :
cd Fastly-WAF-Edge-deployement
Install the dependecies :
npm install
Fill the .env
Copy the .env.sample and rename it .env then fill the informations with your own credentials.
cp .env.sample .env
Replace those (dummy data) with your credentials :
SIGSCI_EMAIL="yourEmail@provider.com"
SIGSCI_TOKEN="3dd2-b927-3fde-349dq-dss922d"
FASTLY_KEY="dsddIIOLddsdbndfqlqs-G92_221_K-o"


corpName = "antoine_lab"
siteName = "faslty.antoinebrossault.com"
fastlySID = "eGdsdddd20002FwuTfjn66"
Run the CLI
npm run cli
Create the security service
Set up a new edge security service by using the edge deployment API. This API call will create a new edge security service linked to your corp and site.
In the CLI choose option 1 :
    -----------------------------------------------------
    Menu
    -----------------------------------------------------

    🌎 : edgeSecurityServiceCreation - [1]

    🔒 : getGetSecurityService - [2]

    🔗 : mapEdgeSecurityServiceToFastly - [3]

    -----------------------------------------------------

Choose an option by inputing the number, then hit enter : 1
If everything went OK it should return the following message :
✅ edgeSecurityServiceCreation : Service created 🌎
Check the security service
To check if the creation worked, you can select the getGetSecurityService - [2] option.
    -----------------------------------------------------
    Menu
    -----------------------------------------------------

    🌎 : edgeSecurityServiceCreation - [1]

    🔒 : getGetSecurityService - [2]

    🔗 : mapEdgeSecurityServiceToFastly - [3]

    -----------------------------------------------------
Choose an option by inputing the number, then hit enter :2
Getting security service for antoine_lab and siteName faslty.antoinebrossault.com
If everything went OK it should return the following message :
{
  AgentHostName: 'se--antoine-lab--65df71.edgecompute.app',
  ServicesAttached: [
    {
      id: 'eGI13sdd922Tfjn66',
      accountID: '5FCbddssSuUxxSa4faLnP',
      created: '2024-05-27T05:22:20Z',
      createdBy: 'antoinebrossault@gmail.com'
    }
  ]
}
Map the Security Service to your Fastly delivery service
    -----------------------------------------------------
    Menu
    -----------------------------------------------------

    🌎 : edgeSecurityServiceCreation - [1]

    🔒 : getGetSecurityService - [2]

    🔗 : mapEdgeSecurityServiceToFastly - [3]

    -----------------------------------------------------

Choose an option by inputing the number, then hit enter :3
You are about to mapEdgeSecurityServiceToFastly, for corpName : antoine_lab, siteName faslty.antoinebrossault.com and fastlySID eGI13FcVmYzg3FwuTfjn66 continue ? [Y/N]y
If everything went OK it should return the following message :
{
  fastlyServices: [
    {
      id: 'eGI13sdd922Tfjn66',
      accountID: '5FCbddssSuUxxSa4faLnP',
      created: '2024-05-27T05:22:20Z',
      createdBy: 'antoinebrossault@gmail.com'
    }
  ]
}
Send the traffic to the WAF
By default, the service will be activated and set to 0% traffic ramping, you can add traffic by updating the Enabled value in a newly created dictionary called Edge_Security
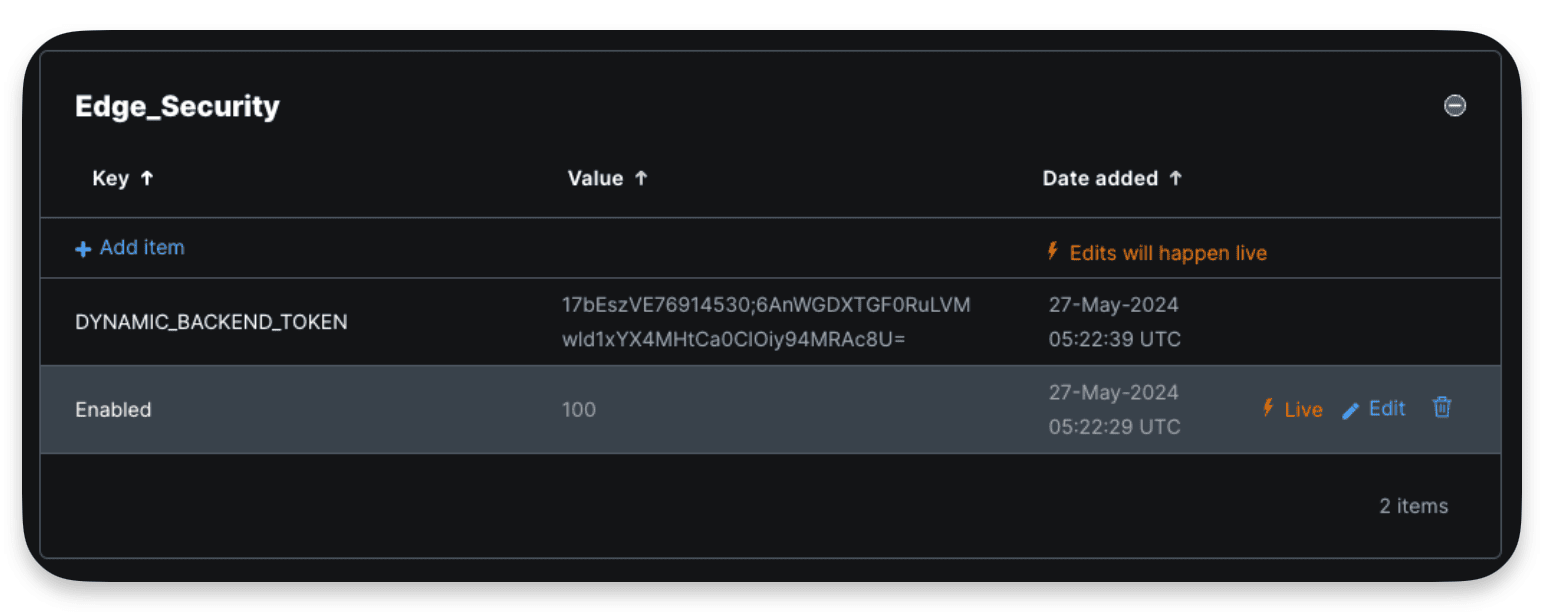
Here the 100% value means I send 100% of the traffic to the WAF, worth noting this modification to the dictionary doesn’t require an activation.
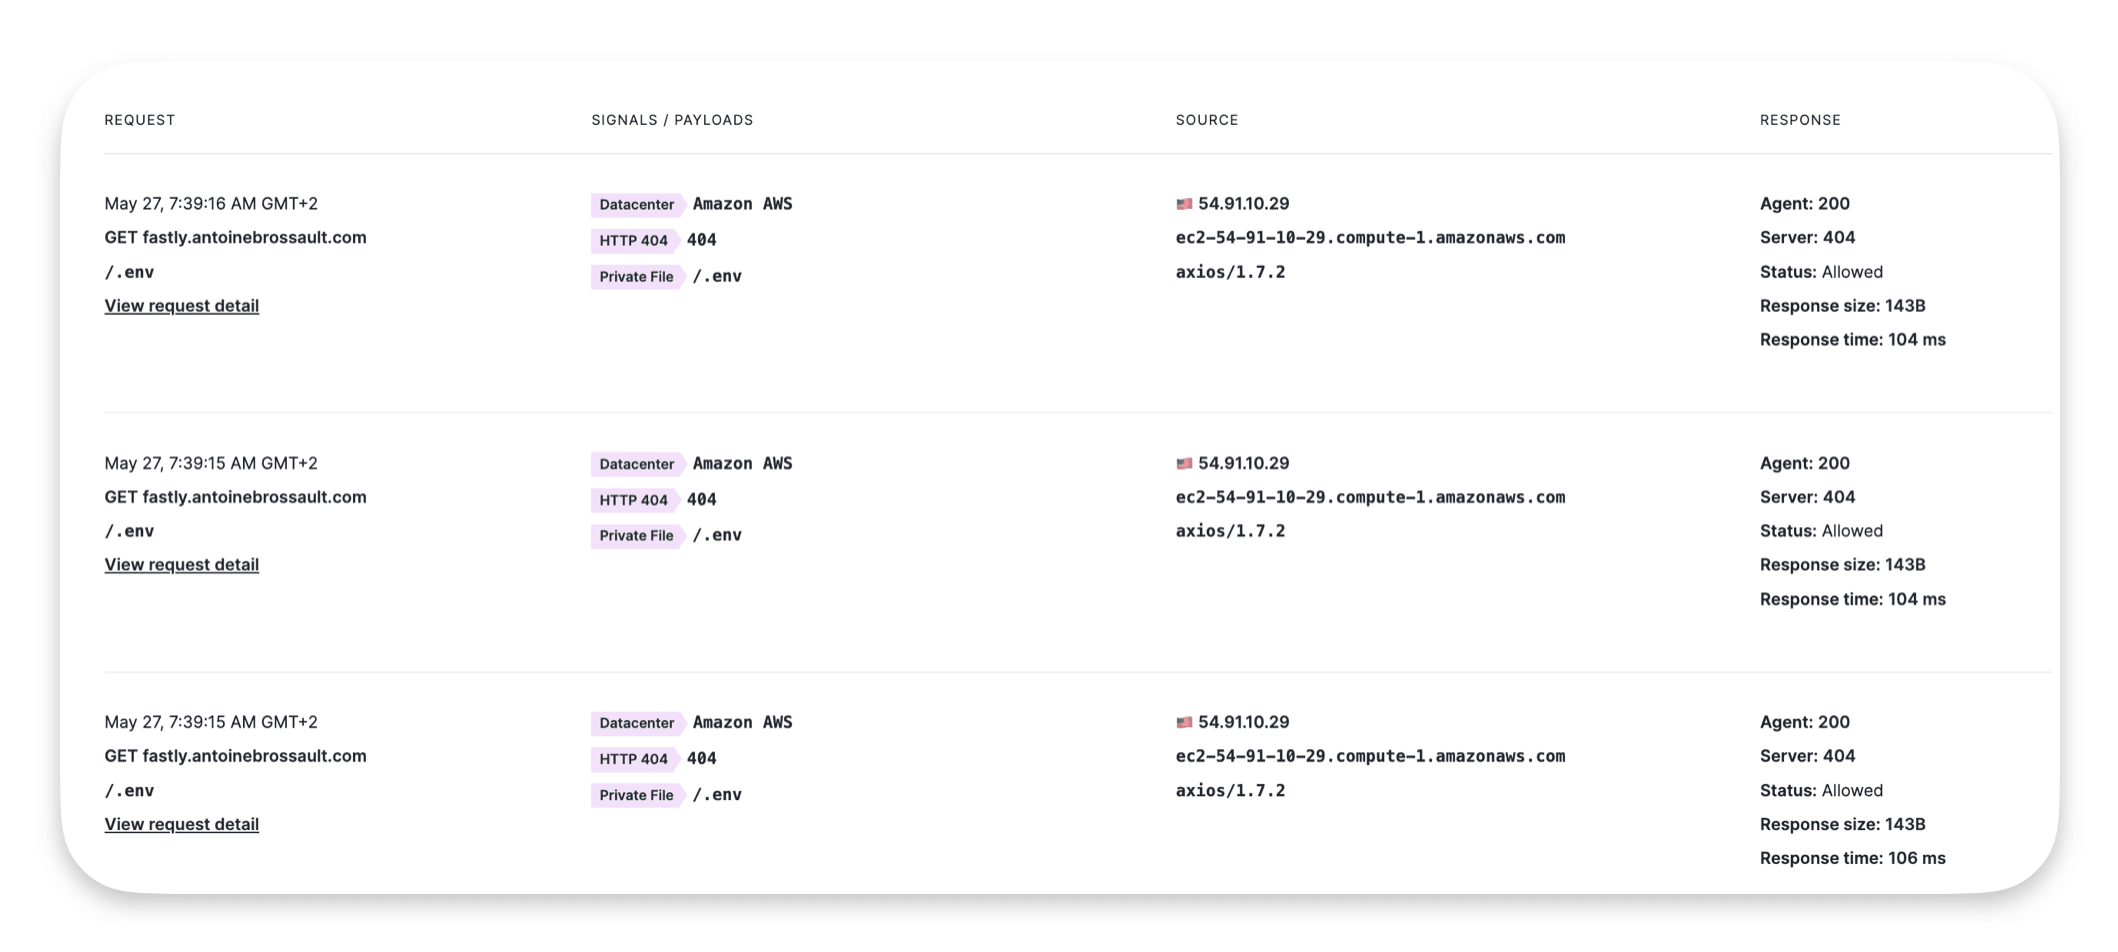
Test the deployment
An easy way to test the deployment is to send malicious requests to your domain to see if the WAF is able to identify them.
An example of such request :
curl https://yourdomain.com/.env
If you run this request multiple time you should get something like this :