06/10/2023
In today's fast-paced business world, efficient customer relationship management (CRM) is crucial for success. HubSpot CRM is a popular choice for managing customer interactions, but handling user assignments, especially during vacations and holidays, can be a challenge. That's where custom solutions come in.
Quick explanation
In this video, I dive into a game-changing solution for efficient user assignment management in HubSpot. Discover how my custom coded action automates user assignments, ensuring tasks are handled seamlessly, even during peak vacation periods. Say goodbye to the complexity of traditional if/then branches and hello to a more efficient CRM workflow.
Comprehensive explanation of the logic
Join me in this comprehensive video as I deep dive into the intricacies of user assignment management within HubSpot CRM. I explore the challenges CRM managers face with traditional if/then branches and unveil my custom coded action. Learn how this solution not only automates assignments but also enhances scalability, reduces errors, and ensures consistent, fair practices. Say goodbye to manual complexities and hello to a more efficient and effective CRM workflow. Watch to discover the future of user assignment management.
The Challenge of Traditional Workflow Branches
Managing user assignments in HubSpot CRM using traditional if/then branches in a workflow can become a complex and time-consuming endeavor. Here’s why:
- Complexity: With a growing number of users, the complexity of creating and managing these conditional branches increases exponentially. It can become a tangled web of conditions and exceptions, making it challenging to maintain and troubleshoot.
-
Resource-Intensive: These traditional workflows require substantial resources in terms of time and human effort. CRM managers need to constantly update and monitor the conditions to ensure that they align with the ever-changing user availability.
-
Scalability Issues: As your business grows and more users are added to the CRM system, the traditional if/then branches approach becomes less scalable. It’s not an efficient way to handle assignments in a dynamic environment.
-
Risk of Overlooking Assignments: In busy periods or during employee vacations, there’s a higher risk of overlooking assignments or assigning tasks to users who are out of the office. This can lead to delays and customer dissatisfaction.
The Advantages of this Custom Coded Action
Now, let’s discuss why Operations Hub pro solution is a game-changer in managing user assignments:
- Automation: The custom solution automates the assignment process, reducing the need for manual intervention. It checks user availability and makes assignments accordingly, even during peak vacation periods.
-
Efficiency: The solution is highly efficient, ensuring that every task is assigned promptly and to an available user. It eliminates the time-consuming process of manually verifying each user’s status.
-
Scalability: This custom solution is highly scalable. It doesn’t matter if you have a dozen users or hundreds; it can handle the assignment process effectively.
-
Error Reduction: With automated checks and backups in place, the risk of overlooking assignments or assigning tasks to unavailable users is drastically reduced. This leads to improved task management and enhanced customer satisfaction.
-
Flexibility: The system is adaptable. It can handle different scenarios, such as identifying a backup user when the primary user is out of the office or selecting an available team member if needed.
-
Time and Resource Savings: By automating the assignment process, CRM managers save a significant amount of time and effort that can be redirected toward more strategic tasks.
-
Consistency: The solution ensures consistent and fair assignment practices. There’s no room for bias or oversight in the process.
In conclusion, this custom code solution offers a superior approach to managing user assignments in HubSpot CRM, particularly when dealing with many users. Its automation, efficiency, scalability, and error reduction capabilities make it a valuable tool in streamlining your CRM workflow. By eliminating the complexities and resource demands associated with traditional if/then branches, it provides a reliable and consistent method for managing user assignments and ultimately improving customer relationship management.
How to implement ?
You will need :
- A private App Token with read and write access to the object you need to manage. The private app also needs to read the teams
- An access key to the Google spreadsheet API
- Operations Hub Pro
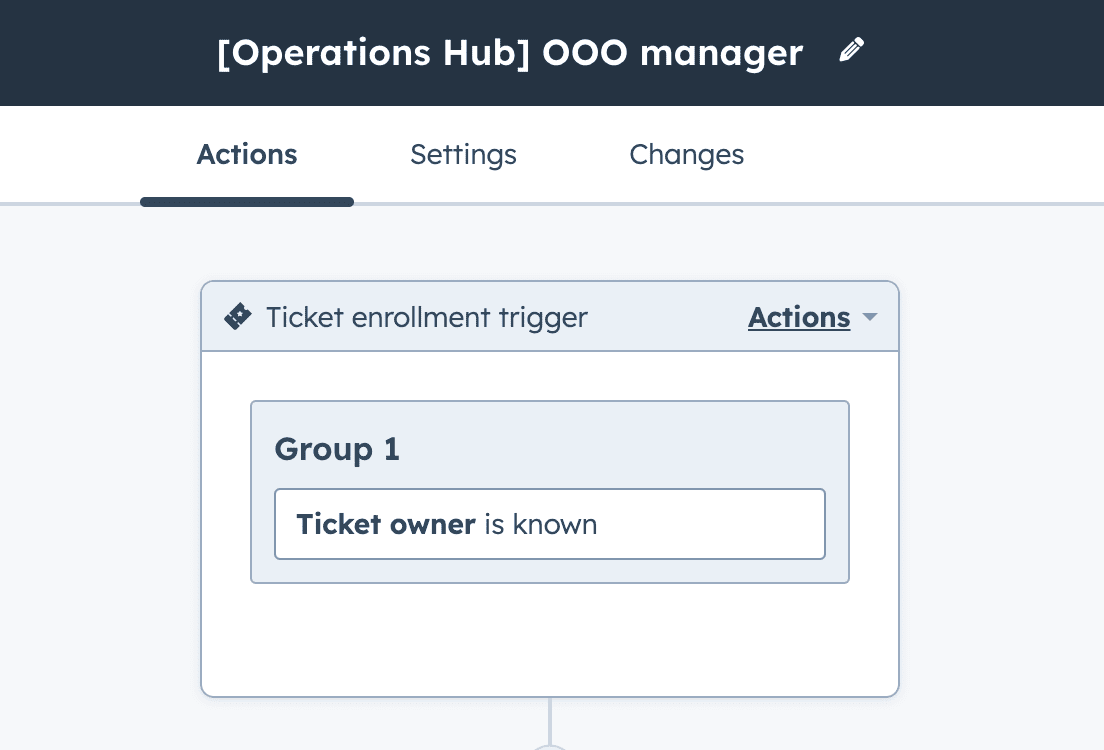
Create a Workflow based on the object you want to re-assign
In this example, I’m going to use a ticket based WorkFlow. Create a WorkFlow based on ticket with the filter : ticket owner is known.
It should look like this :
Copy the following spreadsheet
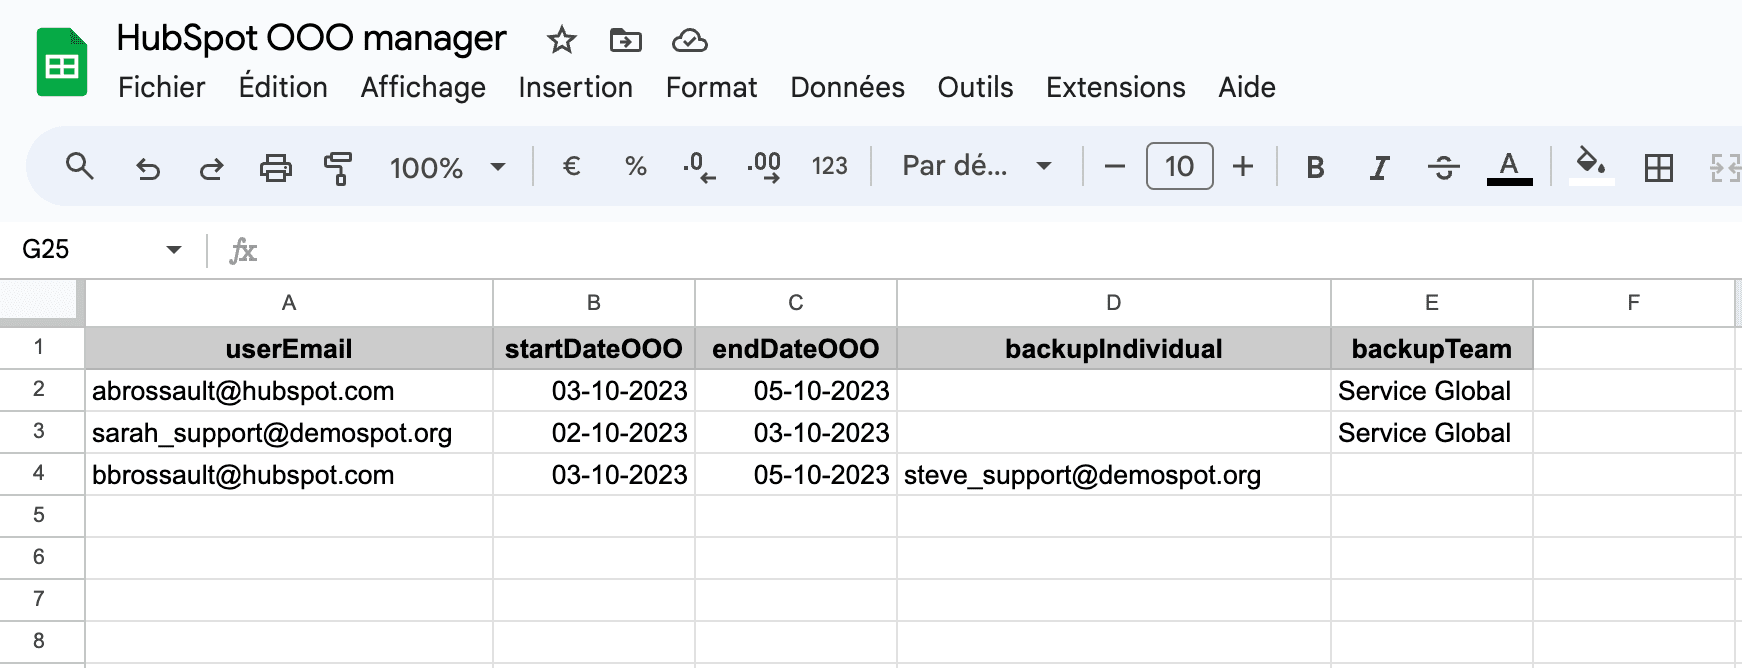
( Click on the picture to open the spreadsheet )
Create API access for the Google Sheet API
To be able to connect the spreadsheet with HubSpot you need Google Sheet API tokens. Here’s how to get a key :
Go on the Google spreadsheet API page
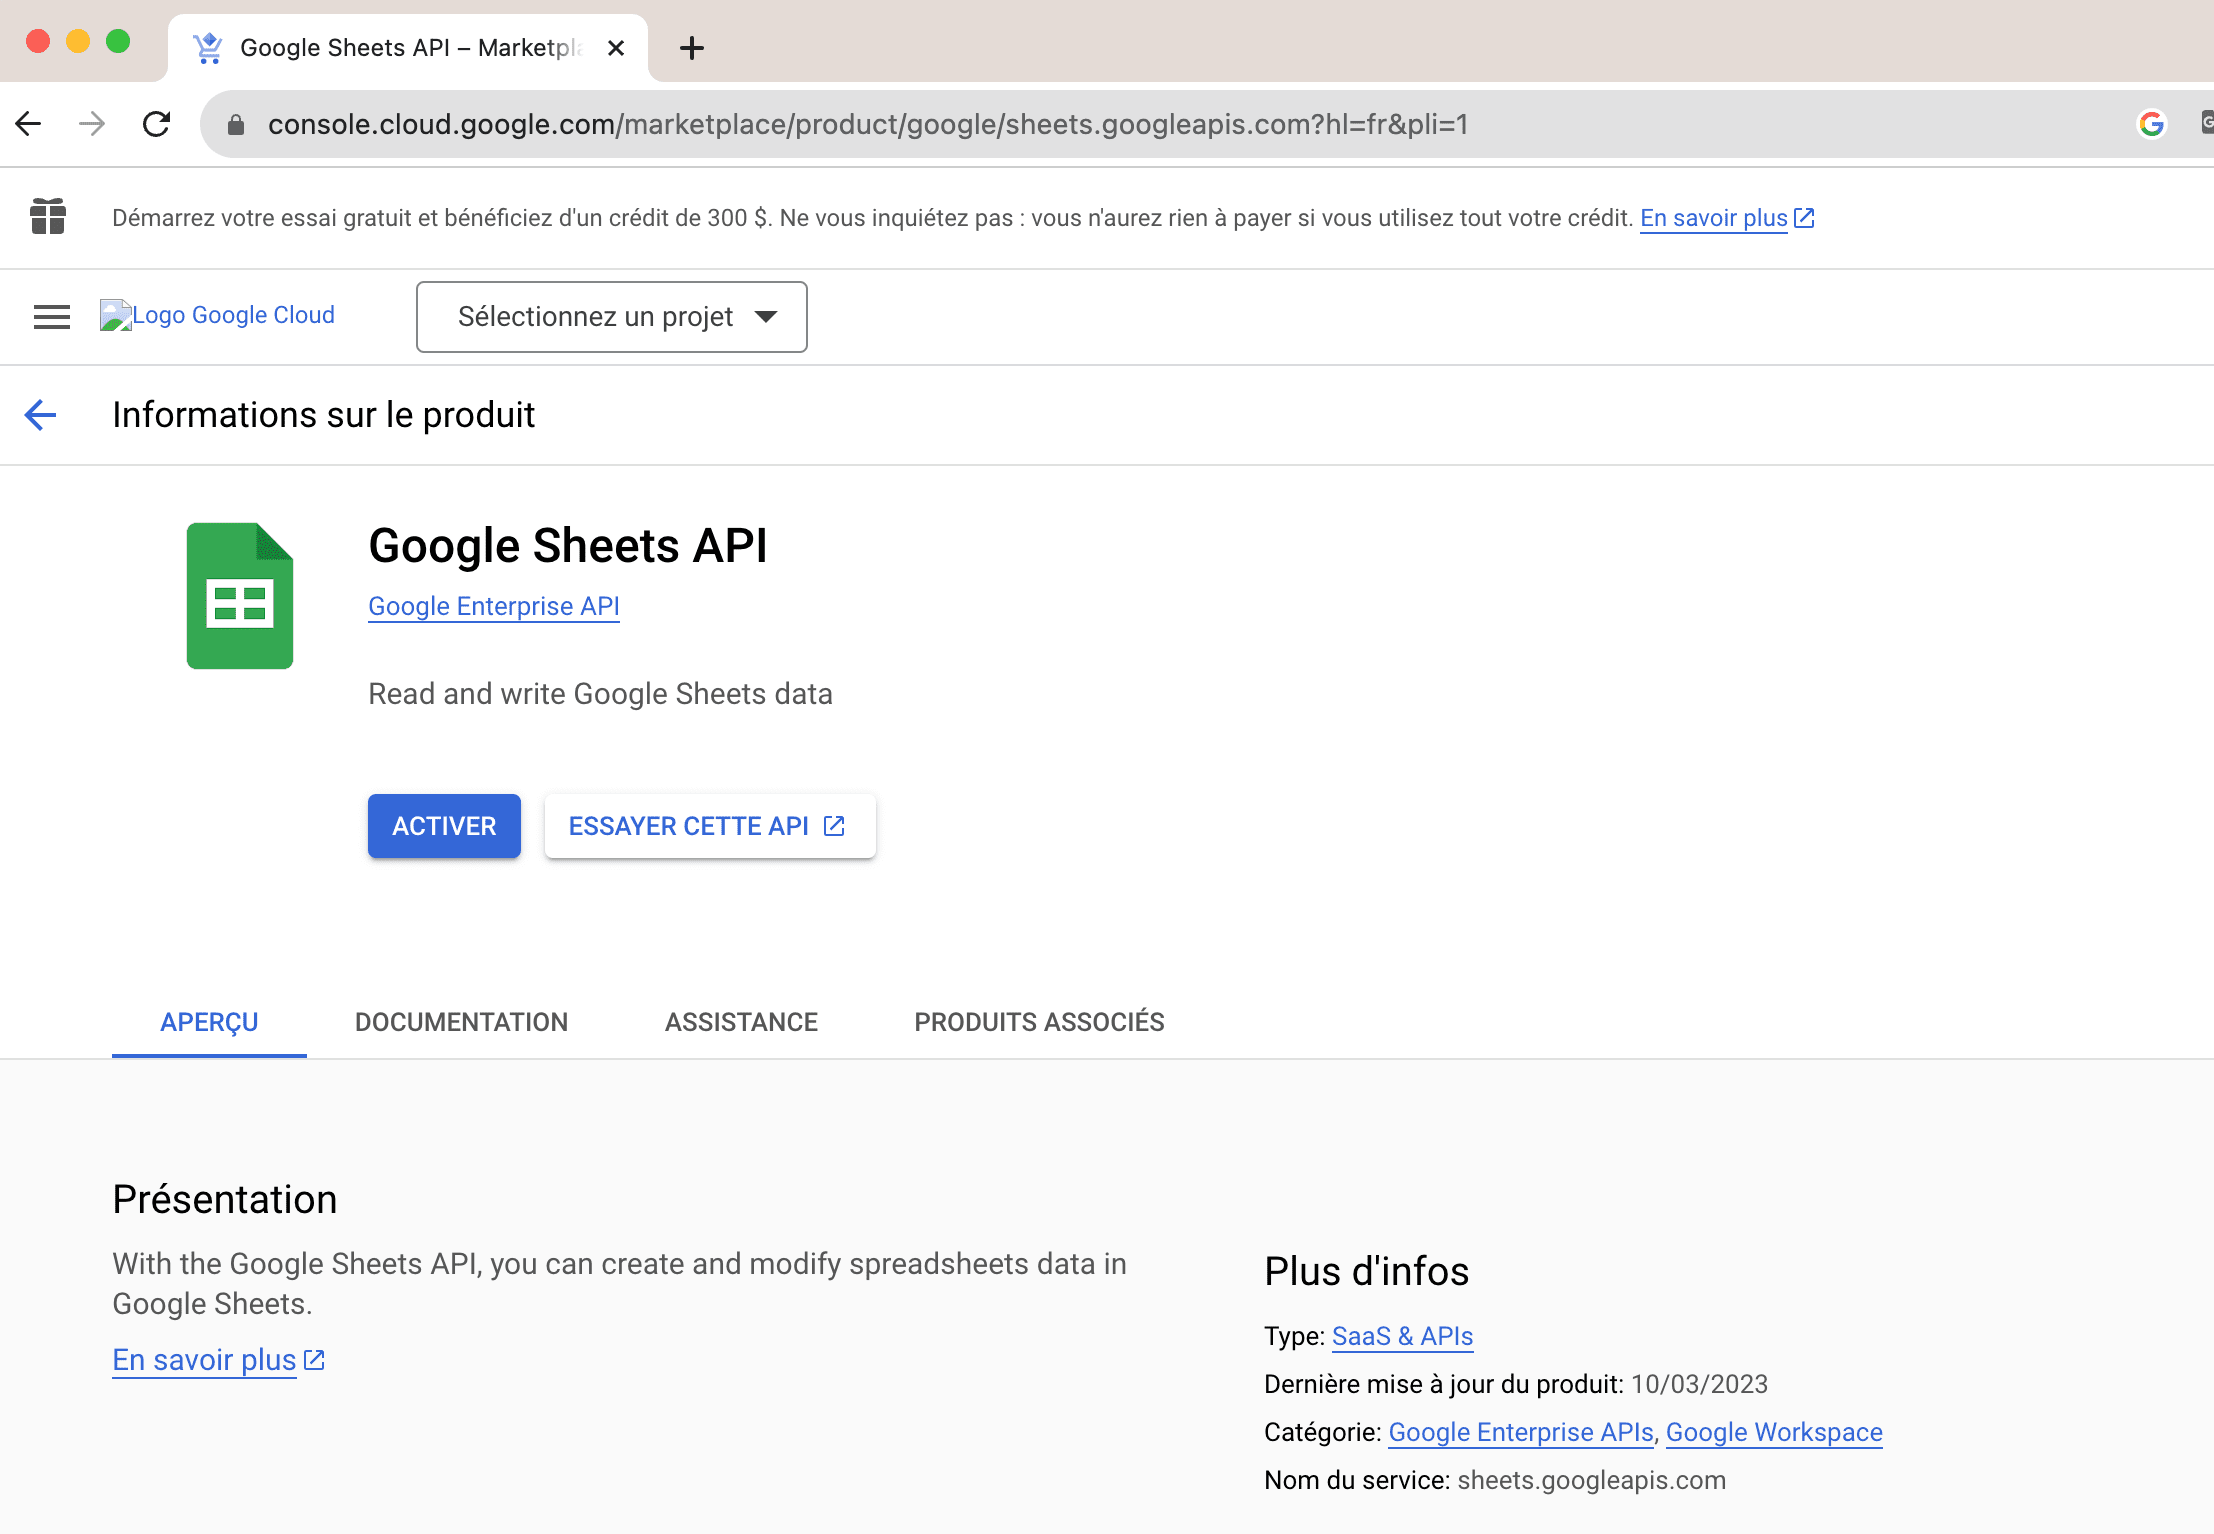
Click on activate
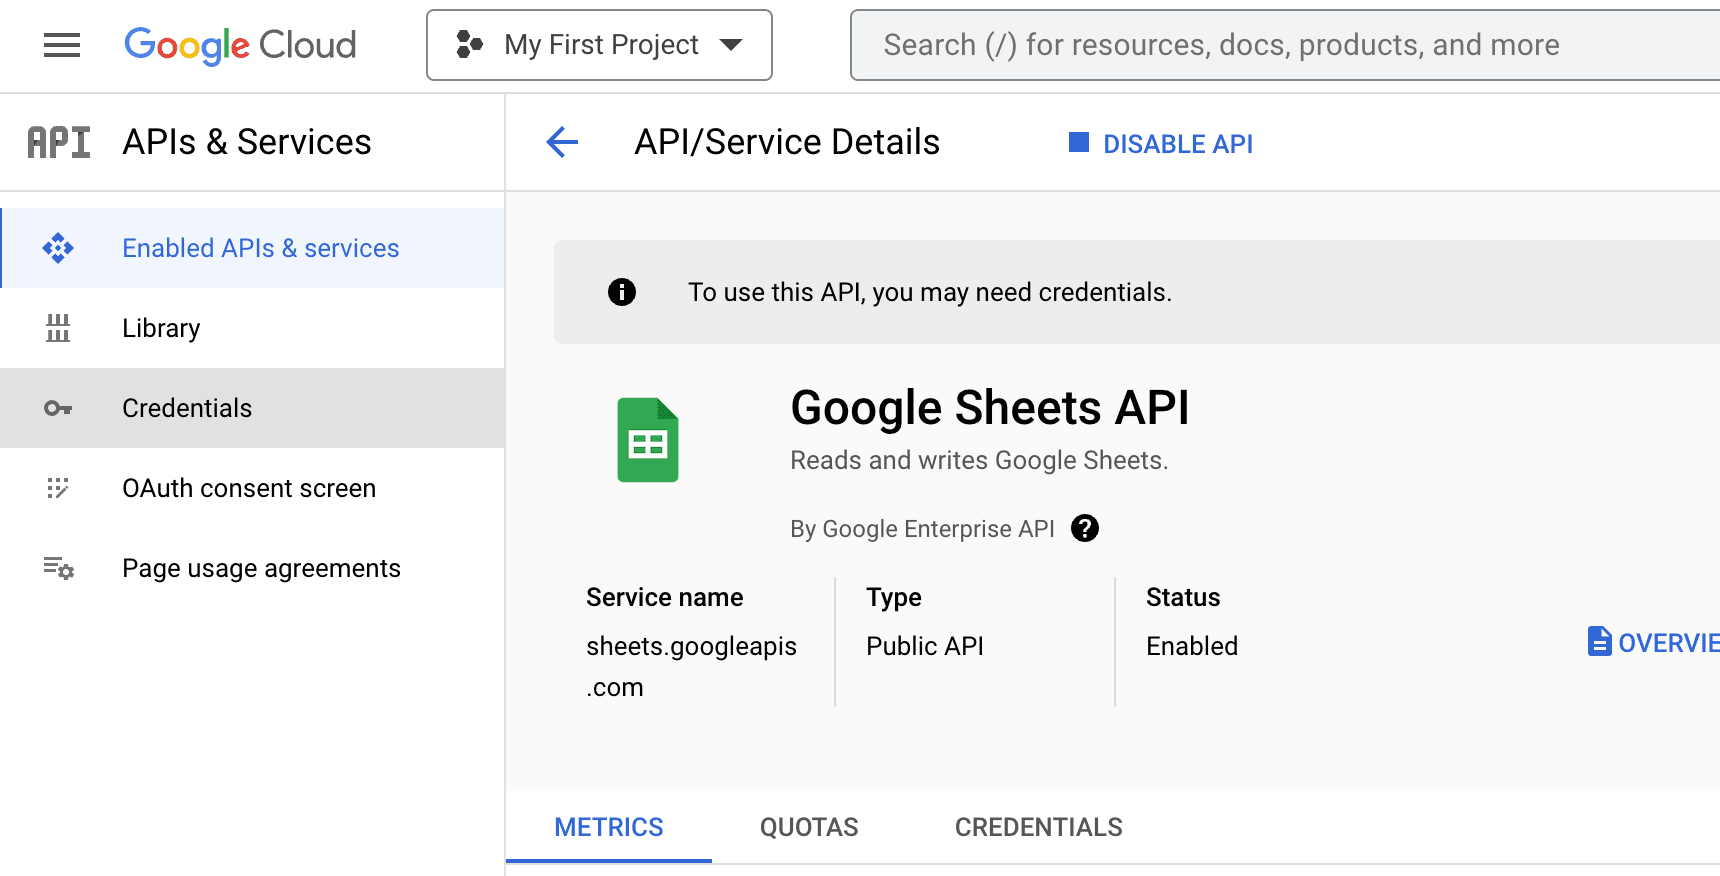
Click on credentials
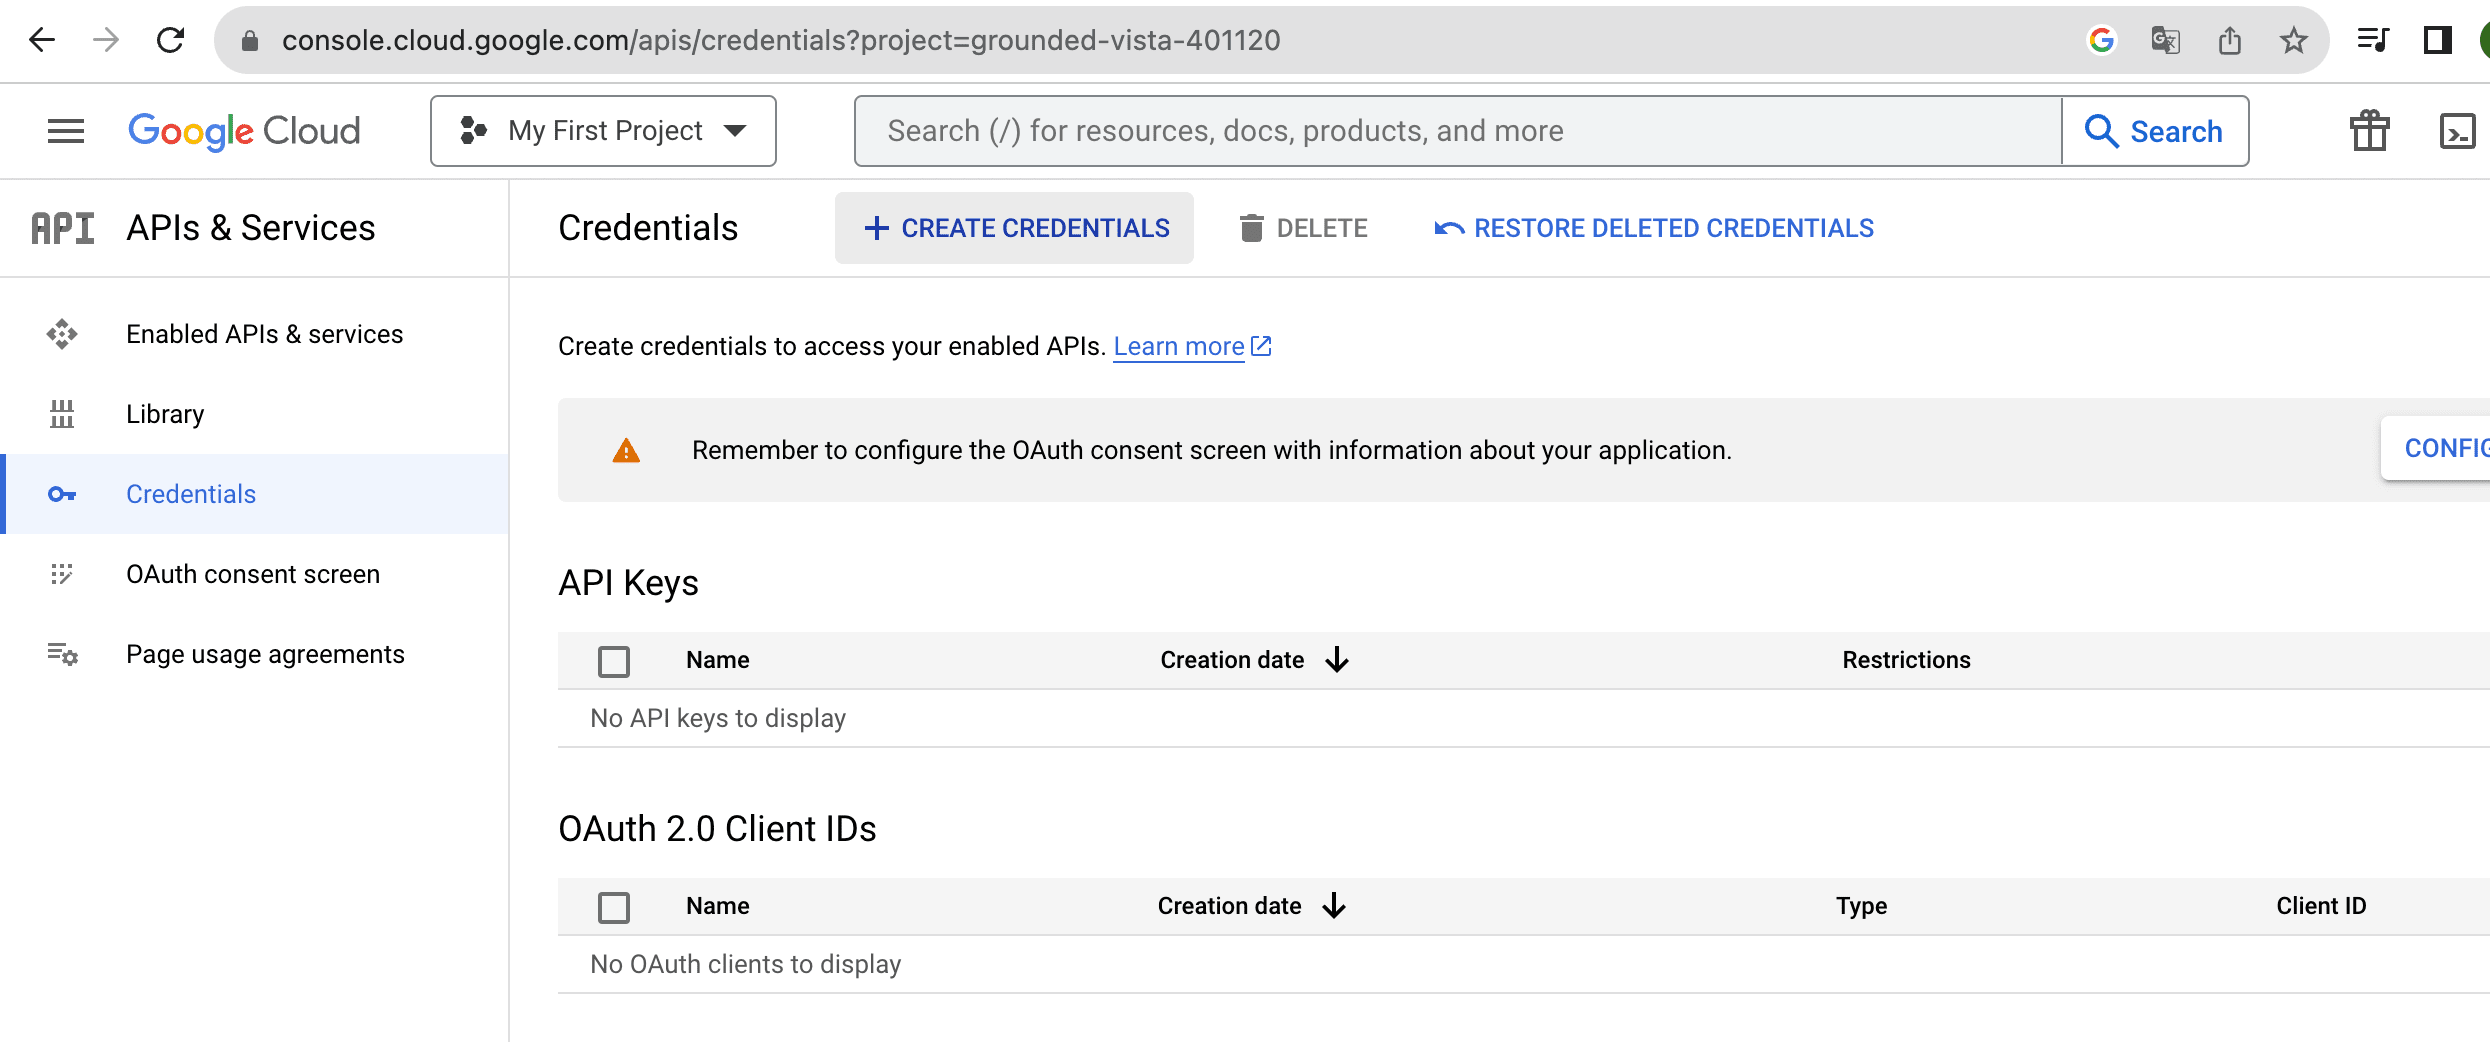
Click on Create Credentials
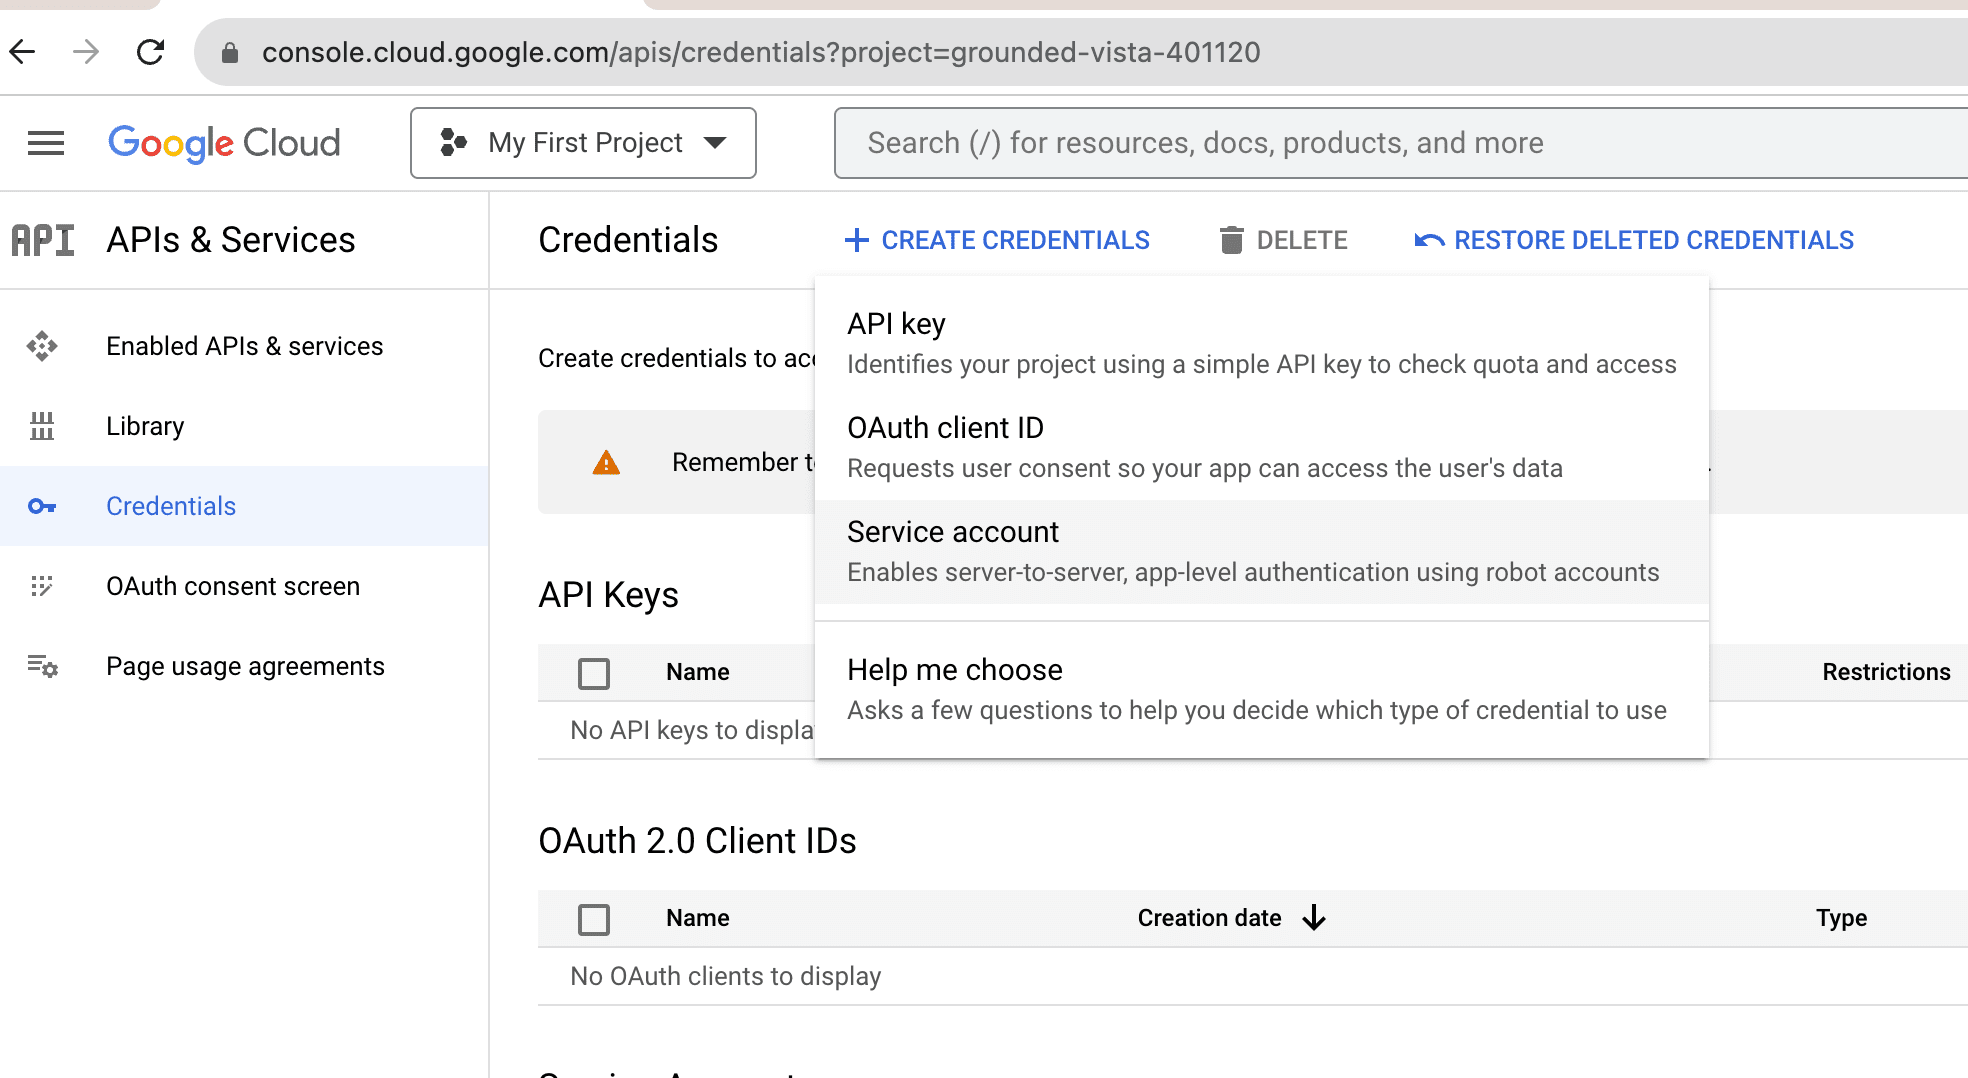
Click on Service account
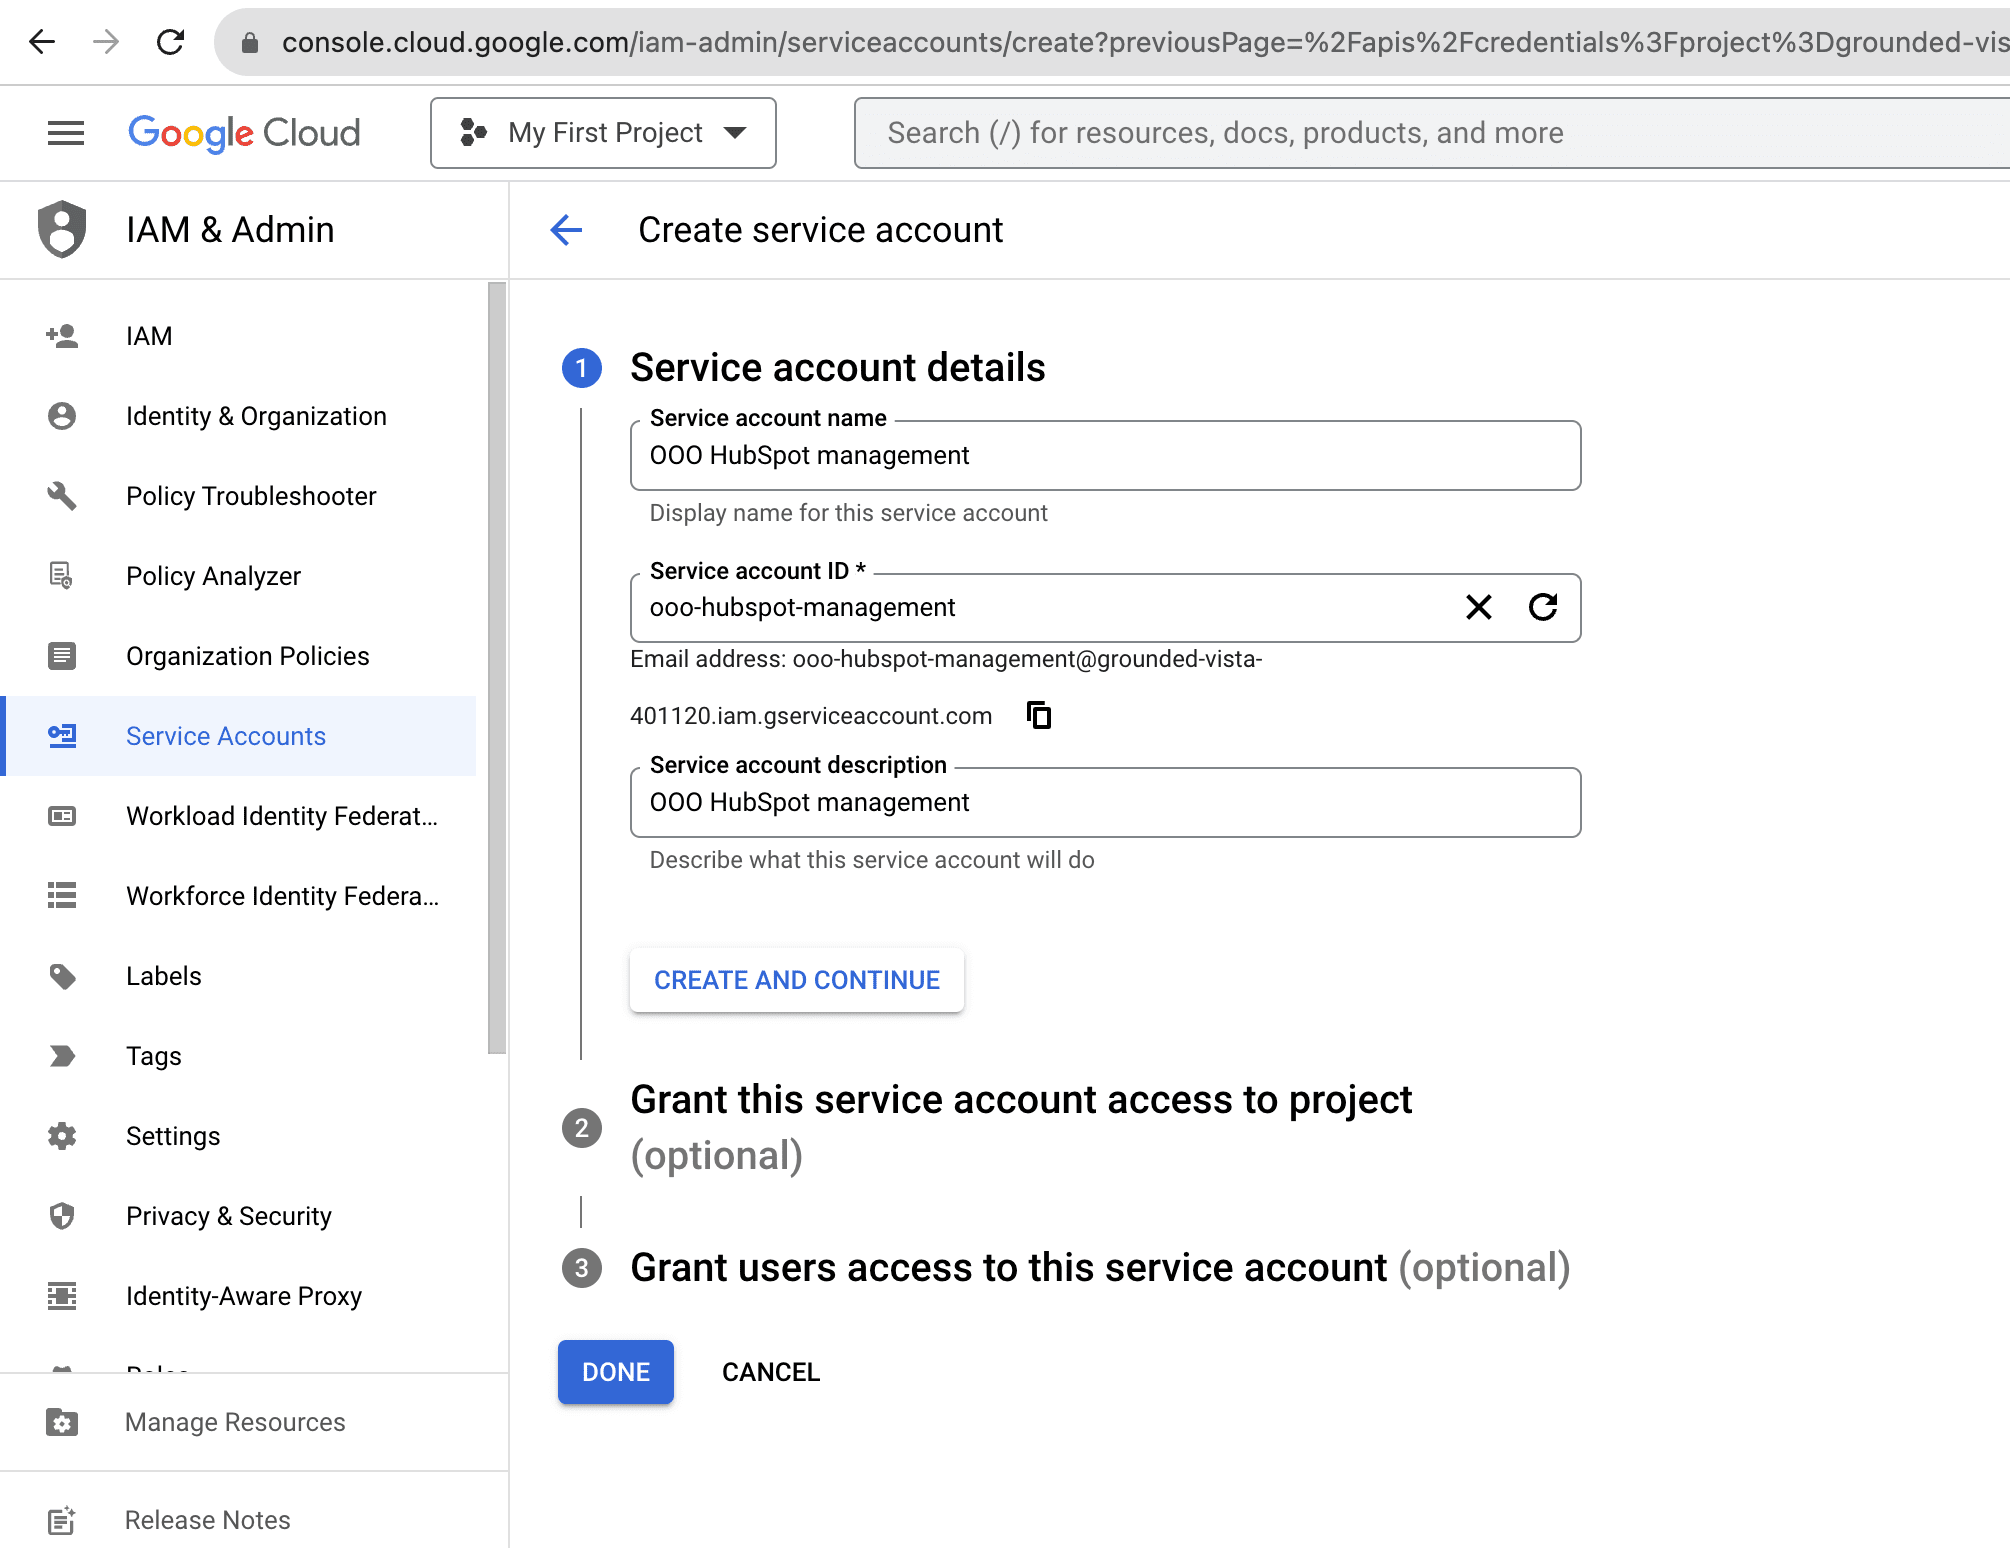
Enter the name you want in Service Account Name
Click on the service account you just created
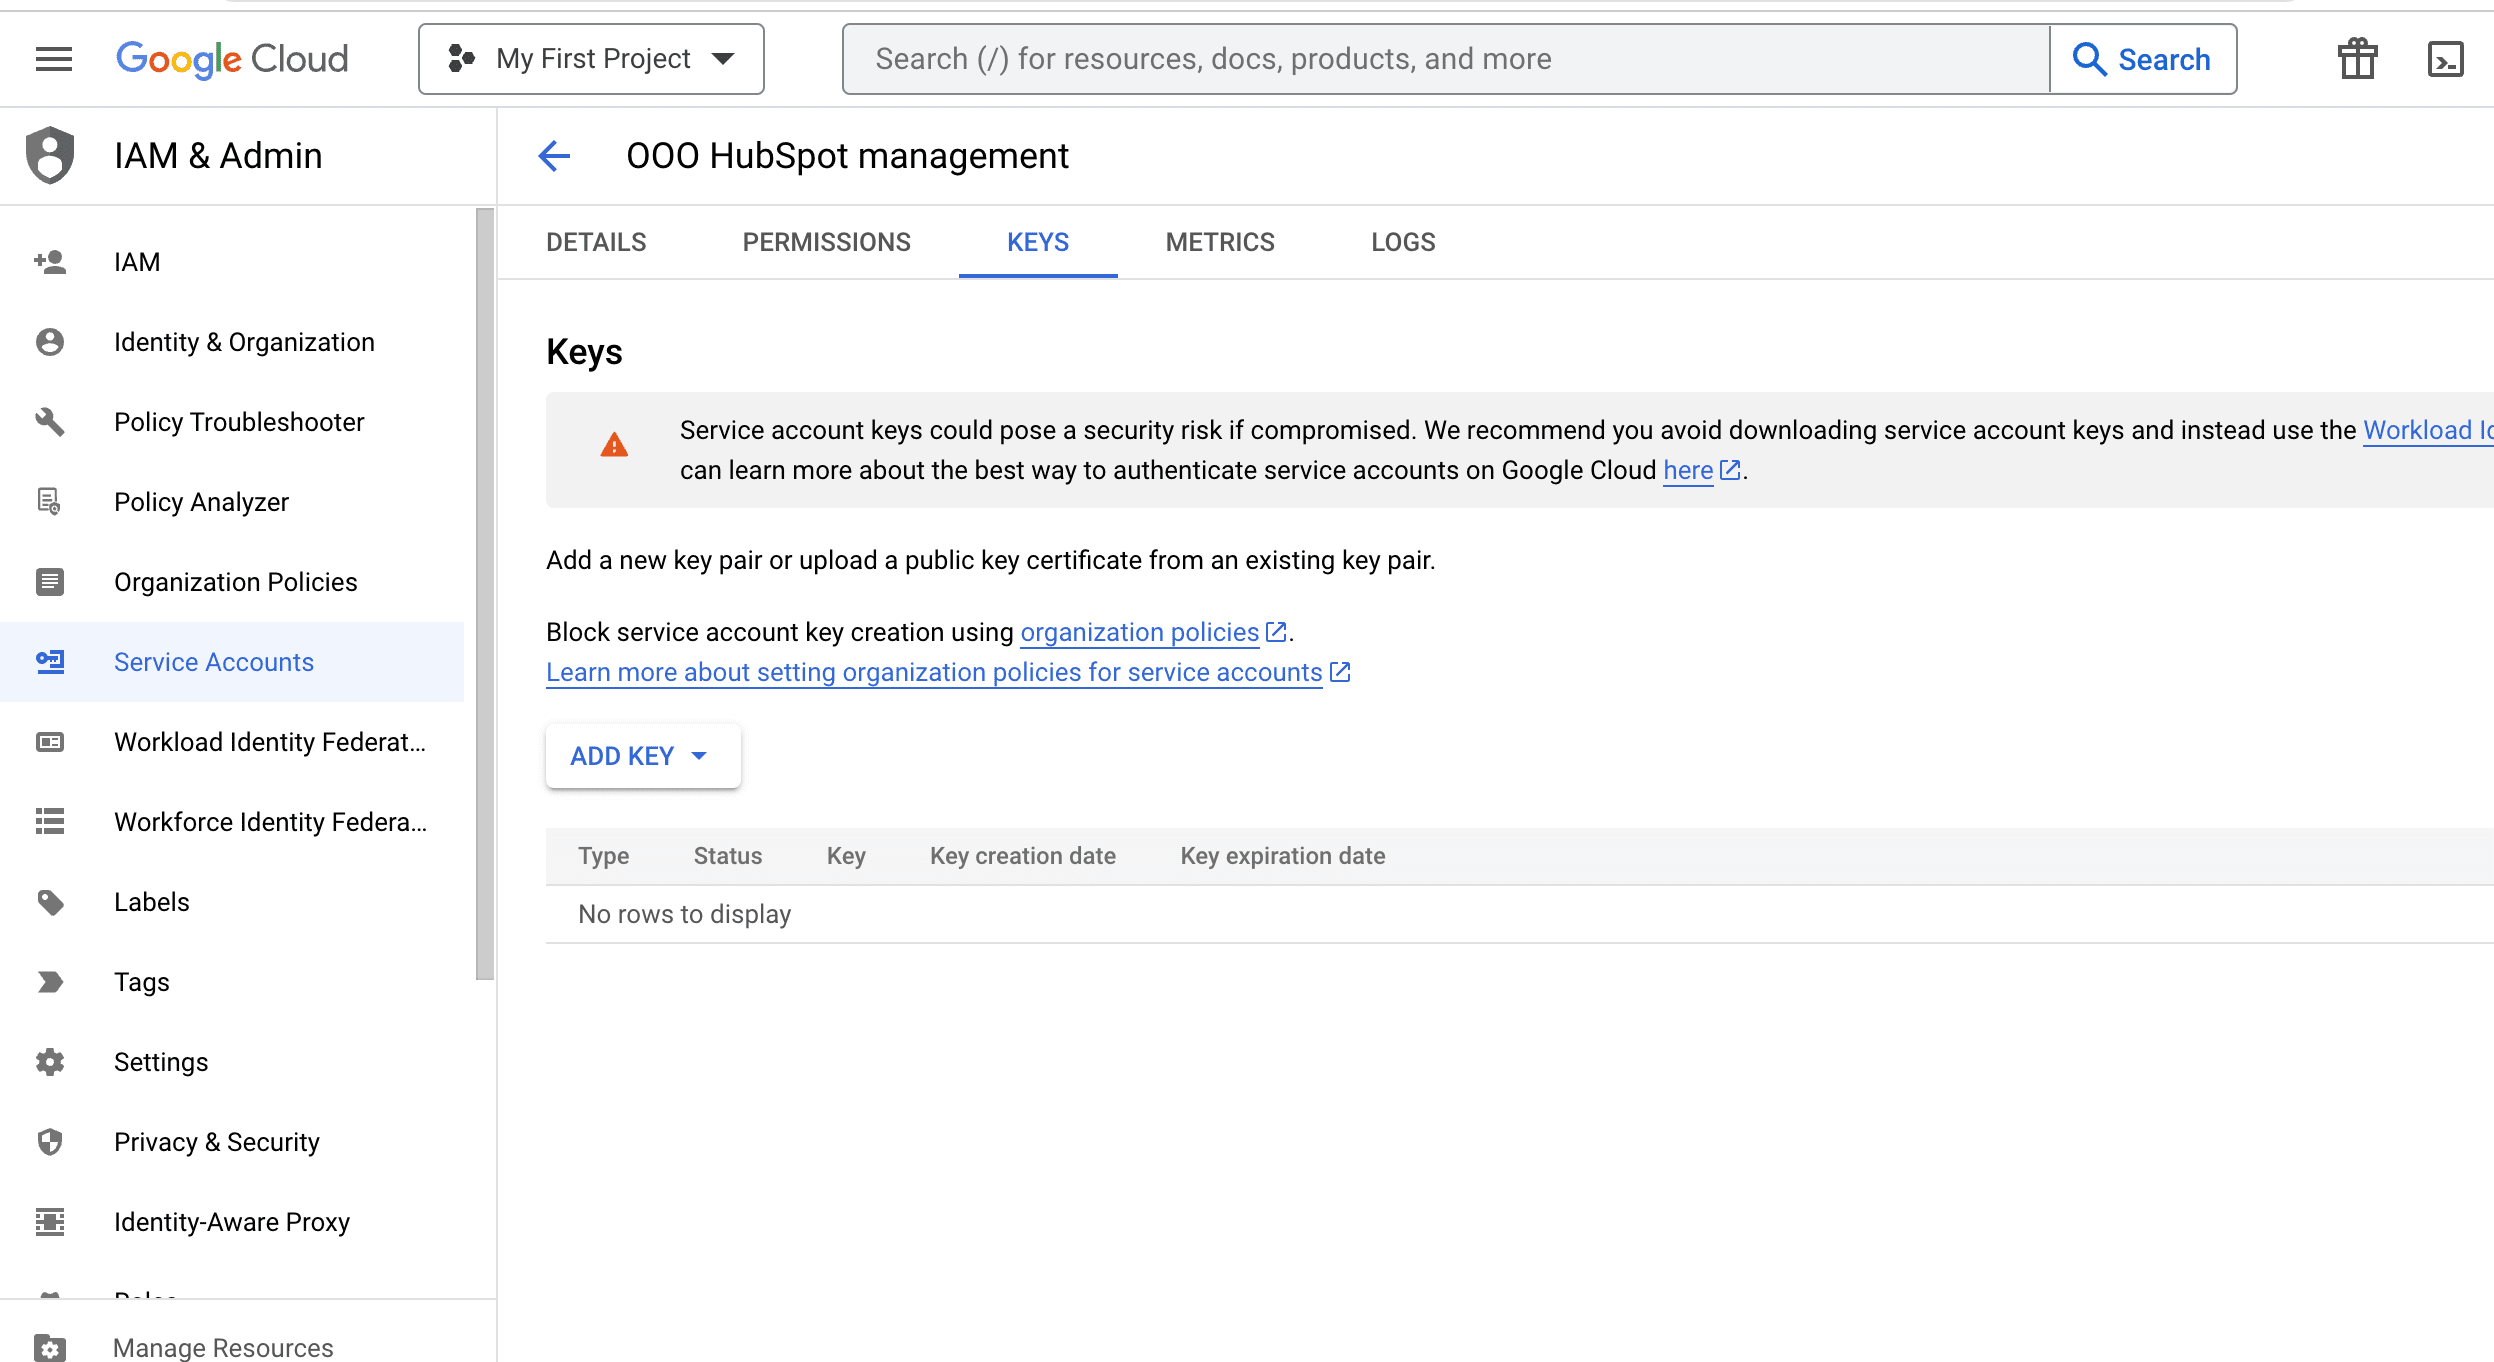
Click Add Key
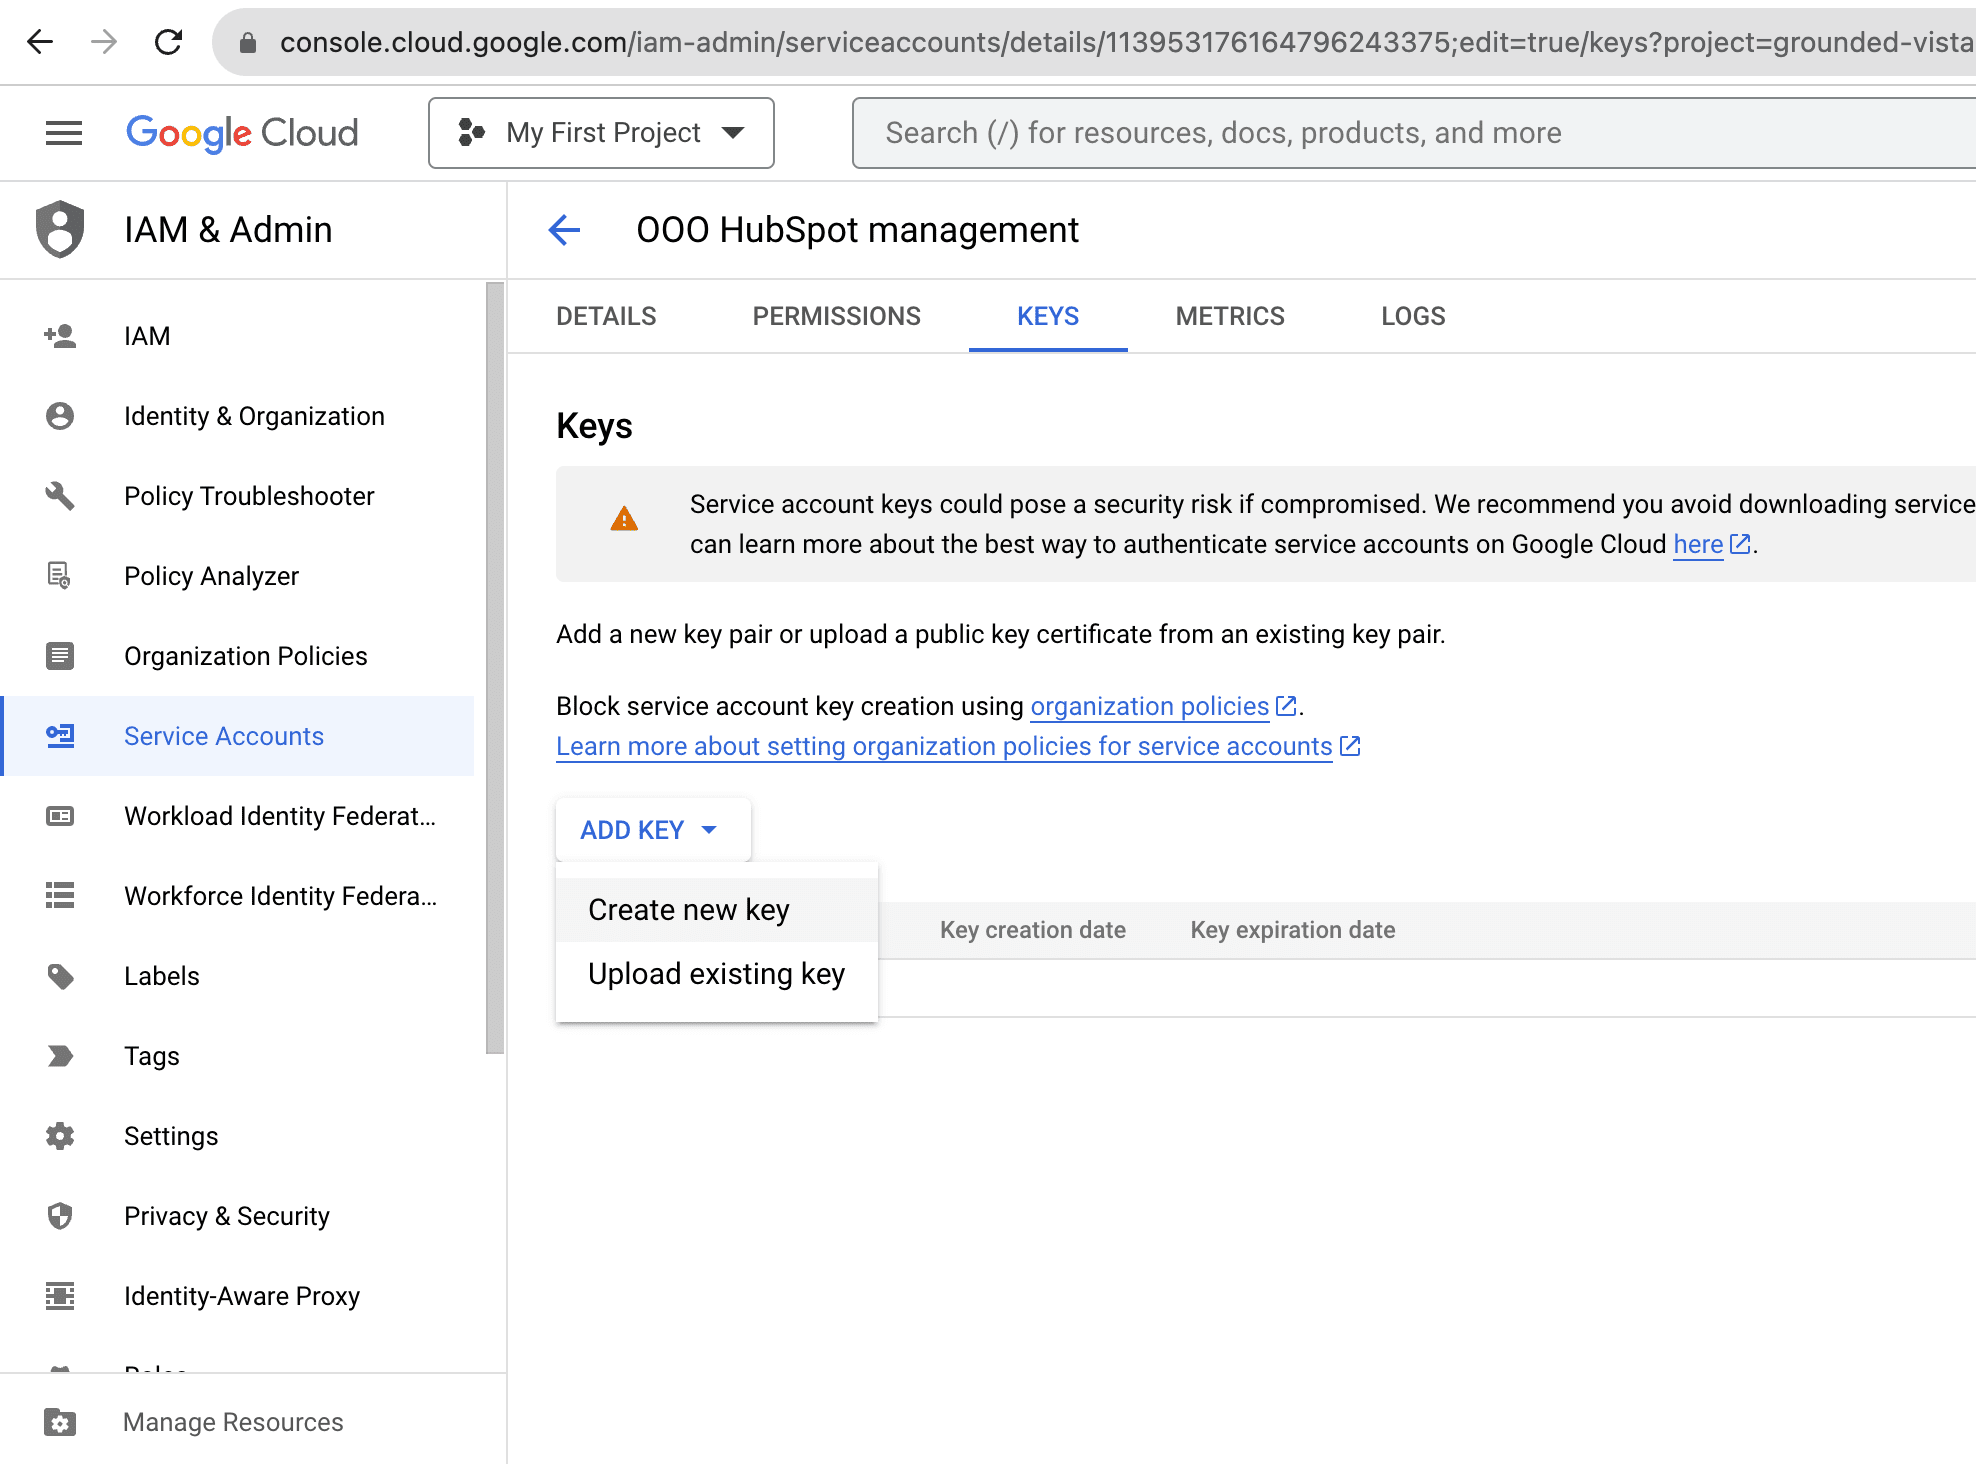
Click Create new Key
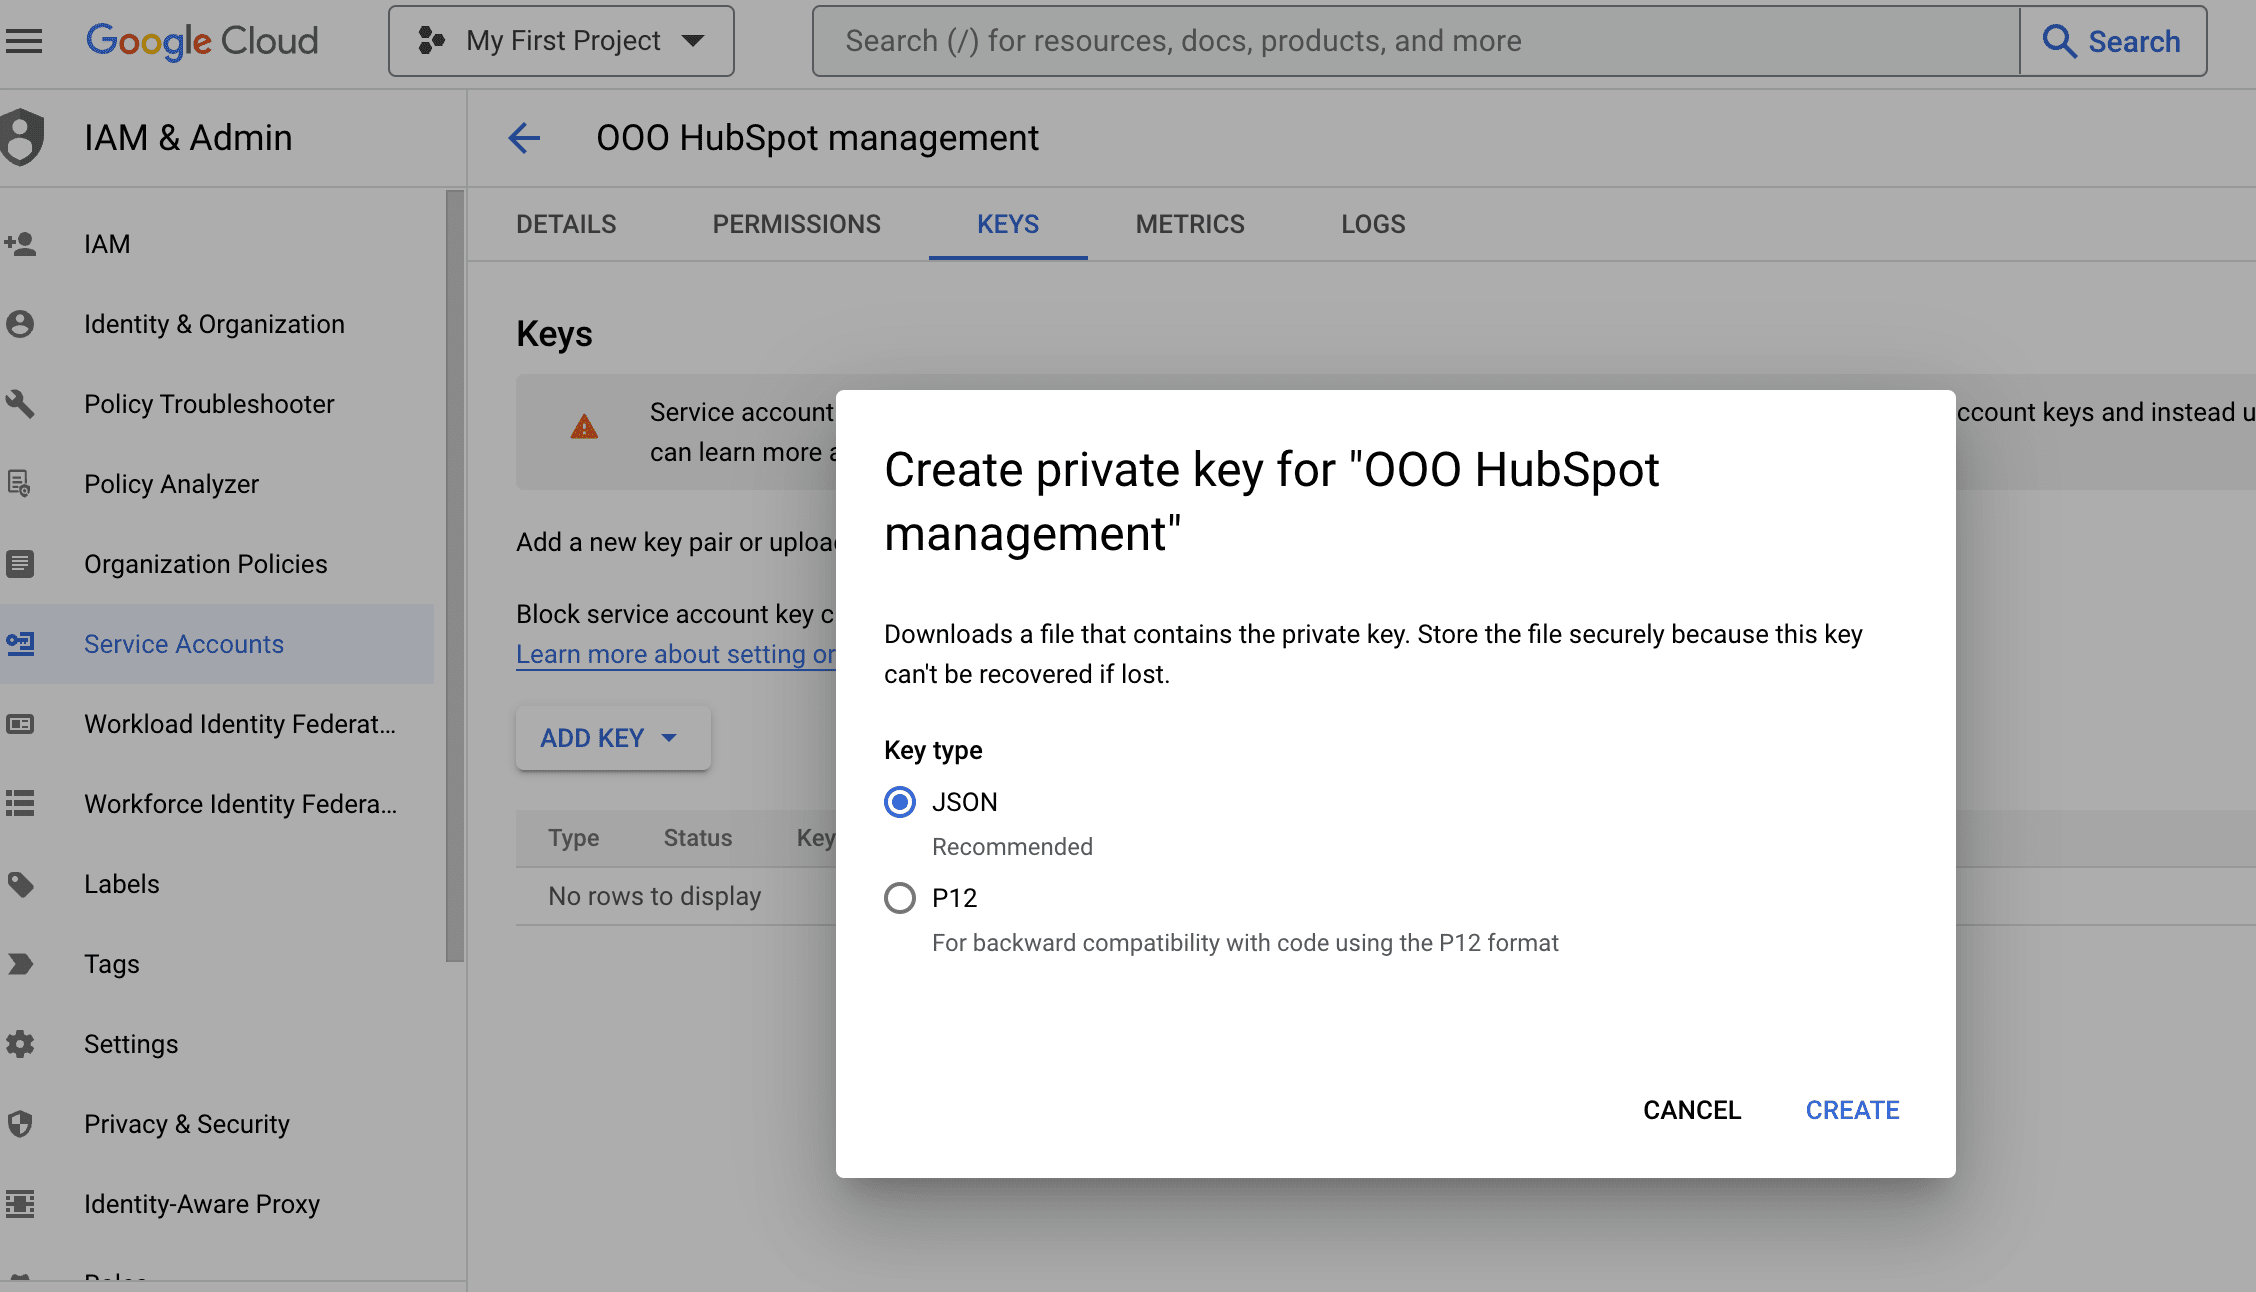
Select JSON and click create, the key will be downloaded to your computer.
Get the data from the key
To open a JSON file manually and copy the values for the privateKey and client_email keys without using a code editor, you can use a text editor or a viewer that allows you to open and read JSON files. Here’s how you can do it manually:
Using a Text Editor (e.g., Notepad on Windows or TextEdit on macOS):
- Locate the JSON you just downloaded to open.
- Right-click on the file and choose « Open with » or « Open » (depending on your operating system).
- Select a text editor from the list of available programs (e.g., Notepad on Windows or TextEdit on macOS).
- The JSON file will open in the text editor.
- Manually locate the « privateKey » and « client_email » keys in the JSON file, and copy their corresponding values.
Using a Web Browser (e.g., Chrome):
- Open Google Chrome.
- Drag and drop the JSON file into a new tab in your Chrome browser.
- Chrome will display the JSON file in a readable format.
- Manually locate the « privateKey » and « client_email » keys in the displayed JSON, and copy their corresponding values.
So you should end-up with something like this :
"-----BEGIN PRIVATE KEY-----\nMIIEvQIBADANBgkqhkiG9w0BAQEFAASCBKcwggSjAgEAAoIBAQDiNjl5cU33NjqJ\nb/PHMkE9EGd0HYfBuOe65yis4xJZtIf8tiEuA0kVb5uApE4P5cS9RPli1rr8zOPP\nNWolFqVhaIKeZQRoq2d3m73ea99AHOFXtg/zajAEOSe1MNMIVQc3jCQXEAN/RMua\n1ADgaYLyhLs2fhrxEg42Ld4GUWmSbX3uGMvio9JxEYWtJIuhPJCNpd5bgQd86D9M\nzF2EimVtYnXGon4i+w7YafRX2c7CooAEt00tM/jQgMSU1D2gr30bOfJJMDZ1QwIq\n9O473tIDXy3YTusm/yRSss0o/xm8Va9CXqQ3IBqytSev1ufXaQbo8+TxJ+Ospp4c\nURSyuLm7AgMBAAECggEAYpd2kk8HR5UriyYvjiSBmY8yP8H1HsIrwWKpcDyhjVZp\nJIPuzyKgckbL9BPob/ZZOpK6zNDA+5iDO5bQtex6VQubTlTByKrX9CH9bVj/mu5b\naoKPziv8VILiow5uE8YXWKbsPd79XzVJNihrX2OtLm0aOWRZ8rLHXea8y20lQatE\nP1uhWDgwYPJm9r5sjszALzNlETivrbxOVxpso+hqybj370eJzblLgXadwBOhdx3u\nv3UGzfX9i/qVnY5ywEZUd7G/Tmrx97LC5y2pCYOr7p1wdVt4ukdgsAkG59VaQ3WC\n9y8Pc5Yg3n1Y+8Hp+ih3b/IkMurdiT6l2UGcv8ZkJQKBgQDyLMSIRX2NkBQ02nPO\nVFvV5HnXYH/z4D6Uw32PHb3hkHhM7Dku8BiG+emeto1cVDyfkMxliwUXtCDBn6X8\n5ZRg0Ru7oPj/qPMcBpWD4hqdqf5N+IQ+v7lW+8uE8Eaz8WbpgJBpadEQRKS6NYnF\napVX0cYteqBlYRE3I/Ph5/IdfwKBgQDvICq0CByrWs9CH4tyxU76EiPR2Ggfqs5C\nYlUD3BzjkCmBSc1H2yww/SygnzhrgWiGwdkzmYSrDvBo6eoM0E0sO8tGTwA2WUNZ\nwRTL20ErPsLPucFqGMBZ2YHis0MXW/PGNBO6ZADX67iE8xXOk27tQ5wB+gIlOHgt\n4CE9RAl5xQKBgF3mU9HOt+7i1aLkrRBsjysxKrkC9rnV0g4WeqG6U3yZarvQwB9e\nAvSbBCWA/PC2zMbF+yrIK5JUSnso7tBPKCgeDFXFBacDmDfeqax4R/+oAS20VXqL\nFk8O1IvYKmHtEQ0qx1PILsLTCtgUmDXOrNdfRCswJ+8HIwixTQfjynH7AoGAYJth\nRTylwIC+jRtLbkHSh2s+t2+zmV+bVux9JkMOFM3QRuB3I9mjP+N43SeWVrCAdzjn\ntFYIaEdvzyL5oNWi6AT8Odp+3nYvpJpB+Z4J9Ru0/tEwF9oKFAKw29LKfyxyDxhJ\nBBuUz6b29Bd1LvEXdpnC9HV52mm2++m55BORtHUCgYEAwcXk0P0WqcgEOnuoR7xQ\nEwsjskxqf5Zs/NL2clleJ1qnlrkFqZUKP8J0agTGTjCoR6qPJ15fv9afBDAaCXRw\nr7OIJc0BEJgTeicu6JrXUhk7bsLW9DqtY3GHKHkkZAQgoryBDWD5jeIoiLWBrFVo\nOef8OpRPaC5A/7Me+9prkGs=\n-----END PRIVATE KEY-----\n"
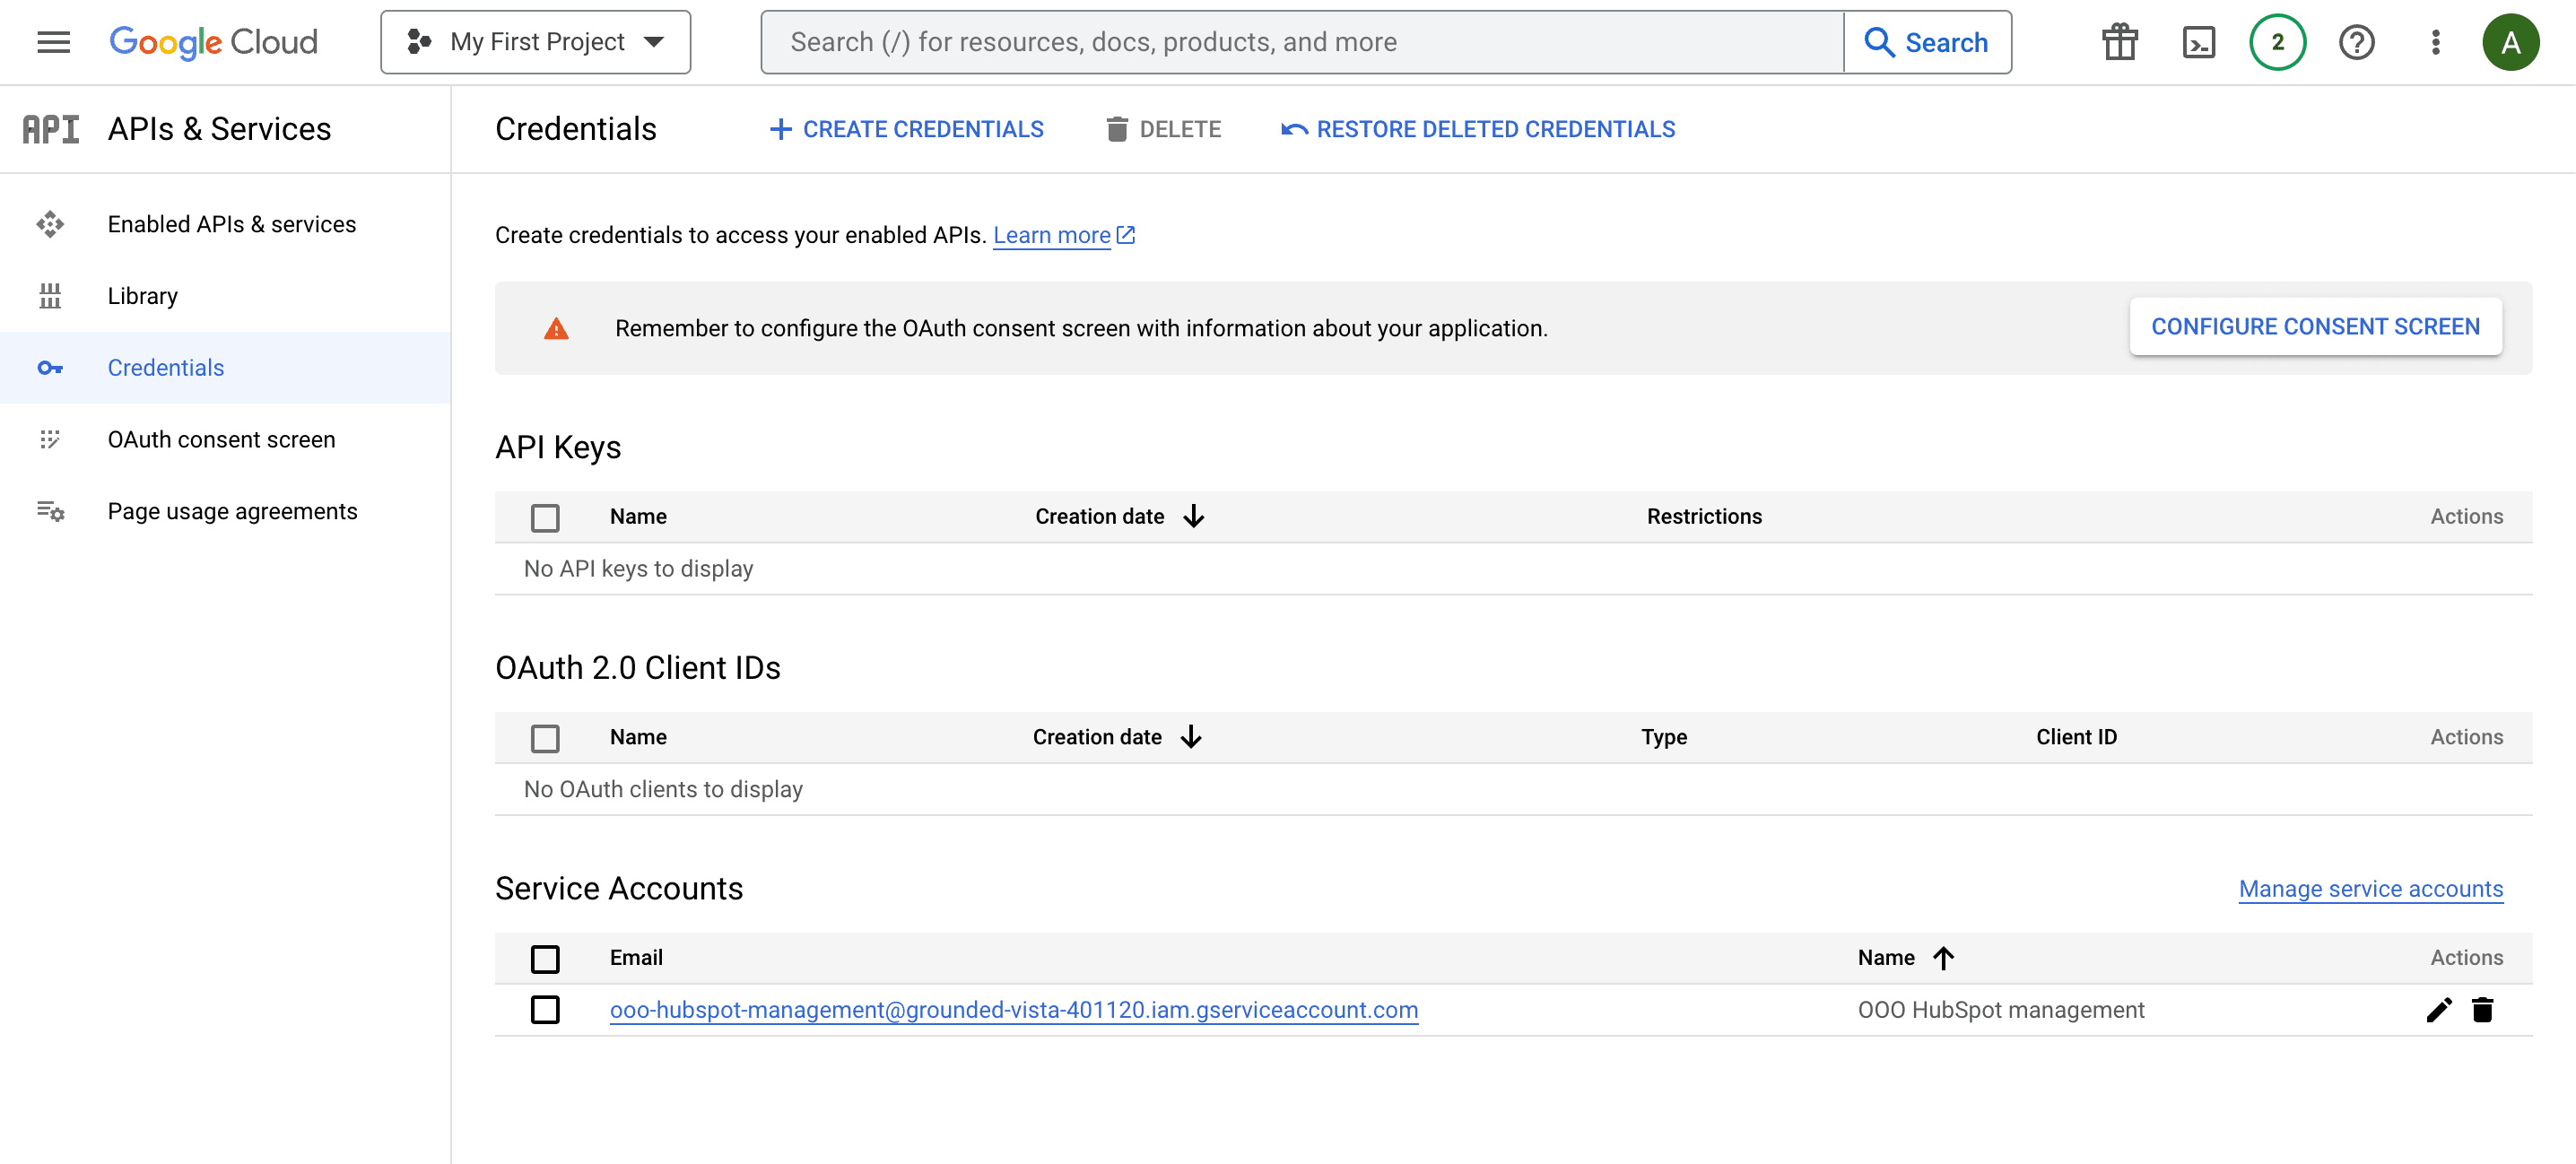
"ooo-hubspot-management@grounded-vista-401120.iam.gserviceaccount.com"
Once you have those the key and the email address. Create a custom code block in the WorkFlow
Create a custom code block to store our credentials
In that Custom Coded Action block paste the following code :
const sheetId = "";

const privateKey  = "";

const clientEmail = ""


exports.main = async (event, callback) => {

    if(!sheetId) throw new Error(`sheetId has to be set !`);
    if(sheetId === "") throw new Error(`sheetId can't be empty !`);


    if(!privateKey) throw new Error(`privateKey has to be set !`);
    if(privateKey === "") throw new Error(`privateKey can't be empty !`);


    if(!clientEmail) throw new Error(`clientEmail has to be set !`);
    if(clientEmail === "") throw new Error(`clientEmail can't be empty !`);


    callback({
        outputFields: {
            sheetId,
            privateKey,
            clientEmail
        }
    });

}
In this code we are going to set our credentials.
Follow the video to see how to create this block
So you should end-up with this :
const sheetId = "1FtQiR3k1nYSW2oiVenq0UwdSCRJauf_Q3gT9vkyeH1k";

const privateKey  = "-----BEGIN PRIVATE KEY-----\nMIIEvQIBADANBgkqhkiG9w0BAQEFAASCBKcwggSjAgEAAoIBAQDiNjl5cU33NjqJ\nb/PHMkE9EGd0HYfBuOe65yis4xJZtIf8tiEuA0kVb5uApE4P5cS9RPli1rr8zOPP\nNWolFqVhaIKeZQRoq2d3m73ea99AHOFXtg/zajAEOSe1MNMIVQc3jCQXEAN/RMua\n1ADgaYLyhLs2fhrxEg42Ld4GUWmSbX3uGMvio9JxEYWtJIuhPJCNpd5bgQd86D9M\nzF2EimVtYnXGon4i+w7YafRX2c7CooAEt00tM/jQgMSU1D2gr30bOfJJMDZ1QwIq\n9O473tIDXy3YTusm/yRSss0o/xm8Va9CXqQ3IBqytSev1ufXaQbo8+TxJ+Ospp4c\nURSyuLm7AgMBAAECggEAYpd2kk8HR5UriyYvjiSBmY8yP8H1HsIrwWKpcDyhjVZp\nJIPuzyKgckbL9BPob/ZZOpK6zNDA+5iDO5bQtex6VQubTlTByKrX9CH9bVj/mu5b\naoKPziv8VILiow5uE8YXWKbsPd79XzVJNihrX2OtLm0aOWRZ8rLHXea8y20lQatE\nP1uhWDgwYPJm9r5sjszALzNlETivrbxOVxpso+hqybj370eJzblLgXadwBOhdx3u\nv3UGzfX9i/qVnY5ywEZUd7G/Tmrx97LC5y2pCYOr7p1wdVt4ukdgsAkG59VaQ3WC\n9y8Pc5Yg3n1Y+8Hp+ih3b/IkMurdiT6l2UGcv8ZkJQKBgQDyLMSIRX2NkBQ02nPO\nVFvV5HnXYH/z4D6Uw32PHb3hkHhM7Dku8BiG+emeto1cVDyfkMxliwUXtCDBn6X8\n5ZRg0Ru7oPj/qPMcBpWD4hqdqf5N+IQ+v7lW+8uE8Eaz8WbpgJBpadEQRKS6NYnF\napVX0cYteqBlYRE3I/Ph5/IdfwKBgQDvICq0CByrWs9CH4tyxU76EiPR2Ggfqs5C\nYlUD3BzjkCmBSc1H2yww/SygnzhrgWiGwdkzmYSrDvBo6eoM0E0sO8tGTwA2WUNZ\nwRTL20ErPsLPucFqGMBZ2YHis0MXW/PGNBO6ZADX67iE8xXOk27tQ5wB+gIlOHgt\n4CE9RAl5xQKBgF3mU9HOt+7i1aLkrRBsjysxKrkC9rnV0g4WeqG6U3yZarvQwB9e\nAvSbBCWA/PC2zMbF+yrIK5JUSnso7tBPKCgeDFXFBacDmDfeqax4R/+oAS20VXqL\nFk8O1IvYKmHtEQ0qx1PILsLTCtgUmDXOrNdfRCswJ+8HIwixTQfjynH7AoGAYJth\nRTylwIC+jRtLbkHSh2s+t2+zmV+bVux9JkMOFM3QRuB3I9mjP+N43SeWVrCAdzjn\ntFYIaEdvzyL5oNWi6AT8Odp+3nYvpJpB+Z4J9Ru0/tEwF9oKFAKw29LKfyxyDxhJ\nBBuUz6b29Bd1LvEXdpnC9HV52mm2++m55BORtHUCgYEAwcXk0P0WqcgEOnuoR7xQ\nEwsjskxqf5Zs/NL2clleJ1qnlrkFqZUKP8J0agTGTjCoR6qPJ15fv9afBDAaCXRw\nr7OIJc0BEJgTeicu6JrXUhk7bsLW9DqtY3GHKHkkZAQgoryBDWD5jeIoiLWBrFVo\nOef8OpRPaC5A/7Me+9prkGs=\n-----END PRIVATE KEY-----\n";

const clientEmail = "ooo-hubspot-management@grounded-vista-401120.iam.gserviceaccount.com";


exports.main = async (event, callback) => {

    if(!sheetId) throw new Error(`sheetId has to be set !`);
    if(sheetId === "") throw new Error(`sheetId can't be empty !`);


    if(!privateKey) throw new Error(`privateKey has to be set !`);
    if(privateKey === "") throw new Error(`privateKey can't be empty !`);


    if(!clientEmail) throw new Error(`clientEmail has to be set !`);
    if(clientEmail === "") throw new Error(`clientEmail can't be empty !`);


    callback({
        outputFields: {
            sheetId,
            privateKey,
            clientEmail
        }
    });

}
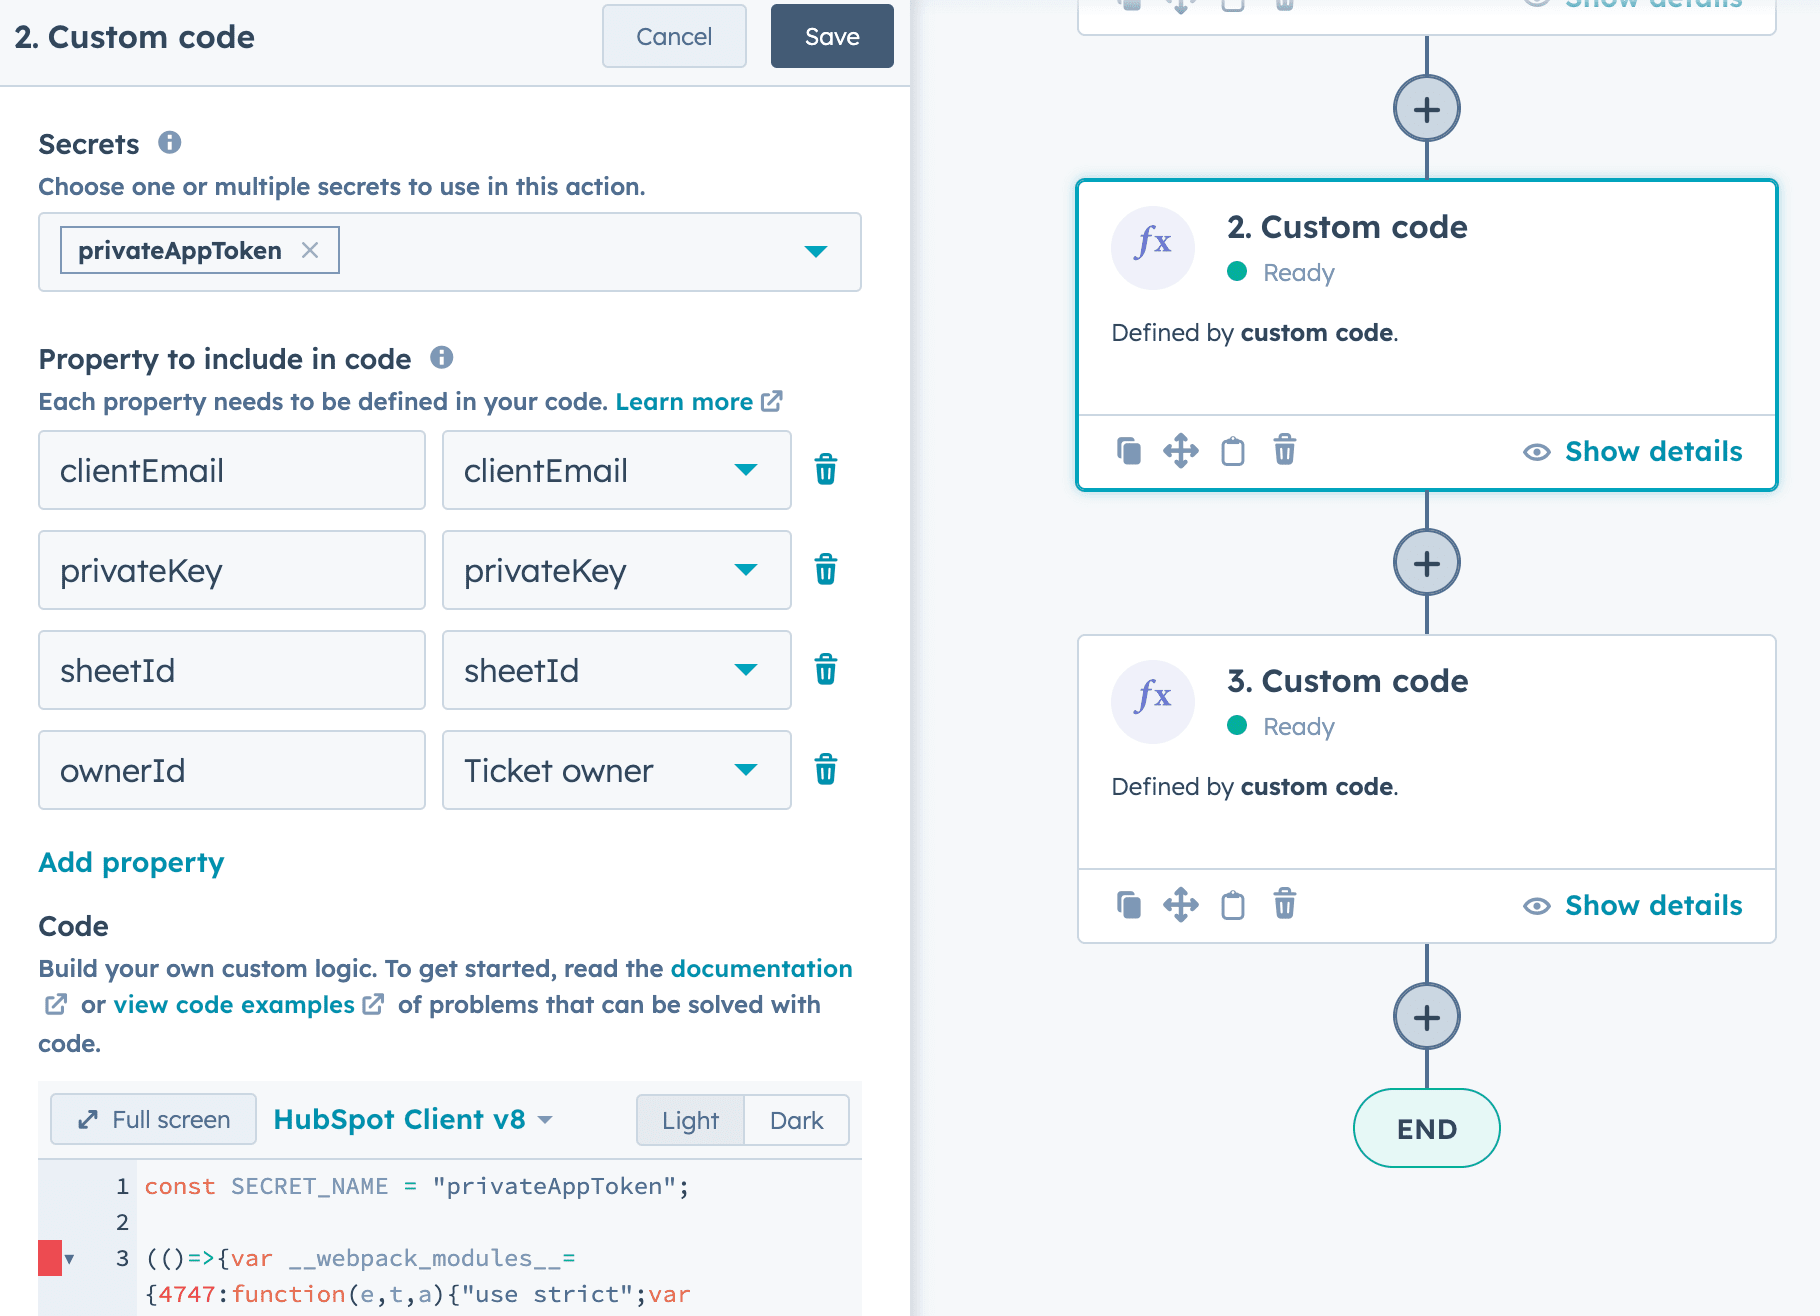
Add a second custom code block for our logic
The code is available on this link you can use the copy button on the top right corner.
Important after you pasted the code add the following line on top of the file
const SECRET_NAME = "privateAppToken";
Between the quote put the name of your token, in my case my token is named privateAppToken but if yours is different edit it.
So the Secret selected and the SECRET_NAME should match like what we have on this screenshot :
Add a third block to assign
/*
 *
 * Edit your Secret Name here
 */
const SECRET_NAME = "privateAppToken"


const OBJECTS_TYPE = "tickets"
/*
 *
 *
 * Only edit below this line if you know what you are doing
 *
 *
 */

const axios = require('axios');

const SECRET_NAME_TO_USE = SECRET_NAME ? SECRET_NAME : "privateAppToken";

const axiosConfig = {
    headers: {
        authorization: `Bearer ${process.env[SECRET_NAME_TO_USE]}`
    }
};

exports.main = async (event, callback) => {

    const ownerId = event.inputFields.ownerId;

    if (!ownerId) throw new Error('ownerId is not set, are you sure you put ownerId in the "properties to include in code" ? ');

    const objectId = event.object.objectId;

    const user = await getUserDataById(ownerId).catch(axiosErrorHandler);

    if(!user.data) throw new Error(`Error when getting ${ownerId} infos`)

    const {email,id} = user.data;

    const update = await updateOwnerId(objectId,id).catch(axiosErrorHandler)

    if (!update.data) throw new Error(`We couldn't update the object owner`);


    if(update.data.id) console.log(`Association worked ! ${email} is now the owner`)


    callback({
        outputFields: {
            newOwner : update.data && update.data.id ? email : null
        }
    });

}

/**
 * From a userId we can get an owner id
 * @param {*} userId
 * @returns
 */
const getUserDataById = async (ownerId) => {
    const endPoint = `https://api.hubapi.com/crm/v3/owners/${ownerId}?idProperty=userId`;
    const data = await axios.get(endPoint, axiosConfig);
    return data;
}


const updateOwnerId = async (objectId,ownerId) => {

    if (!ownerId) throw new Error('ownerId is not set as a parameter');
    if (!objectId) throw new Error('objectId is not set as a parameter');

    const endpoint = `https://api.hubapi.com/crm/v3/objects/${OBJECTS_TYPE}/${objectId}`;

    return axios.patch(endpoint, {
        "properties": {
            "hubspot_owner_id": ownerId
        }
    }, axiosConfig);
}


/**
 * Handles errors thrown by axios requests and logs relevant information.
 *
 * @param {Error} error - The error object thrown by axios.
 */
const axiosErrorHandler = error => {
    if (error.response) {
        // The request was made and the server responded with a status code
        // that falls out of the range of 2xx
        console.log(error.response.data);
        console.log(error.response.status);
        console.log(error.response.headers);
    } else if (error.request) {
        // The request was made but no response was received
        // `error.request` is an instance of XMLHttpRequest in the browser
        // and an instance of http.ClientRequest in node.js
        console.log(error.request);
    } else {
        // Something happened in setting up the request that triggered an Error
        console.log('Error', error.message);
    }
}