03/11/2025
This comprehensive, step-by-step guide shows you how to build a true GitOps CI/CD pipeline from scratch. We’ll use GitHub Actions to automatically build and publish your app’s Docker image, and then configure ArgoCD to watch your Git repo and automatically deploy every change to your K3s cluster
Let’s do this step-by-step. We’ll break it into two main phases:
- Phase 1: Continuous Integration (CI). We’ll set up a workflow where
git pushautomatically builds and publishes your app’s Docker image. -
Phase 2: Continuous Deployment (CD). We’ll install a tool in K3s that watches your Git repo and automatically updates your cluster when you push changes
Phase 1: Continuous Integration (Git to Docker Image)
Our goal here is to make a simple Node.js app, push it to GitHub, and have GitHub Actions automatically build the Docker image and push it to a registry.
Step 1.1: Create a Simple Node.js App
First, let’s create a super-simple « Hello World » Express app on your local machine.
- Create a new folder (e.g.,
k8s-hello-world) and go into it. -
Run
npm init -yto create apackage.json. -
Install Express:
npm install express. -
Create a file named
index.jsand add this code:
const express = require('express');
const app = express();
const port = process.env.PORT || 3000;
// A "VERSION" variable we can change later
const VERSION = '1.0.0';
app.get('/', (req, res) => {
res.send(`Hello from Kubernetes! Version: ${VERSION}`);
});
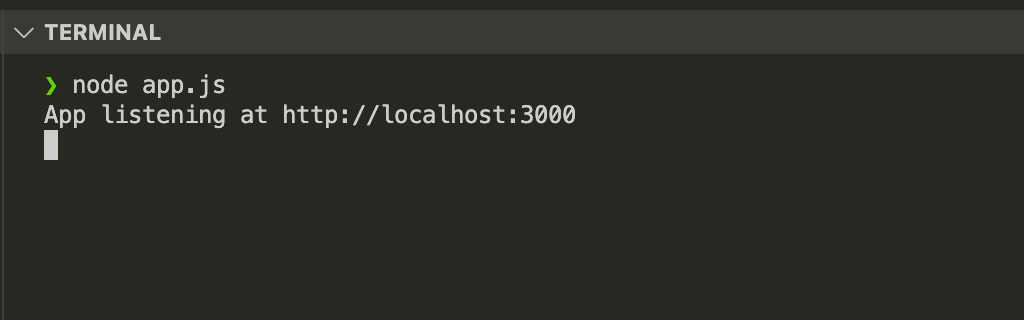
app.listen(port, () => {
console.log(`App listening at http://localhost:${port}`);
});
Add a start script to your package.json. It should look something like this:
{
  "name": "k8s-hello-world",
  "version": "1.0.0",
  "description": "",
  "main": "index.js",
  "scripts": {
    "start": "node app.js"
  },
  "keywords": [],
  "author": "",
  "license": "ISC",
  "dependencies": {
    "express": "^4.18.2"
  }
}
You can test it locally by running npm start. You should be able to see the message at `http://localhost:3000`.
Step 1.2: Create the Dockerfile
Now, let’s add the « recipe » for Docker to build this app.
Create a file named Dockerfile (no extension) in the same folder:
# Stage 1: Build the app
FROM node:18-alpine AS builder
WORKDIR /app
COPY package*.json ./
RUN npm install
COPY . .

# Stage 2: Create the final, small image
FROM node:18-alpine
WORKDIR /app
COPY --from=builder /app .

# Set the port
ENV PORT=3000
EXPOSE 3000

# Run the app
CMD [ "npm", "start" ]
Plain English: This is a « multi-stage build. » It uses one container to install all the dev dependencies and build the app, then copies only the necessary files into a fresh, clean container. This makes your final image much smaller and more secure.
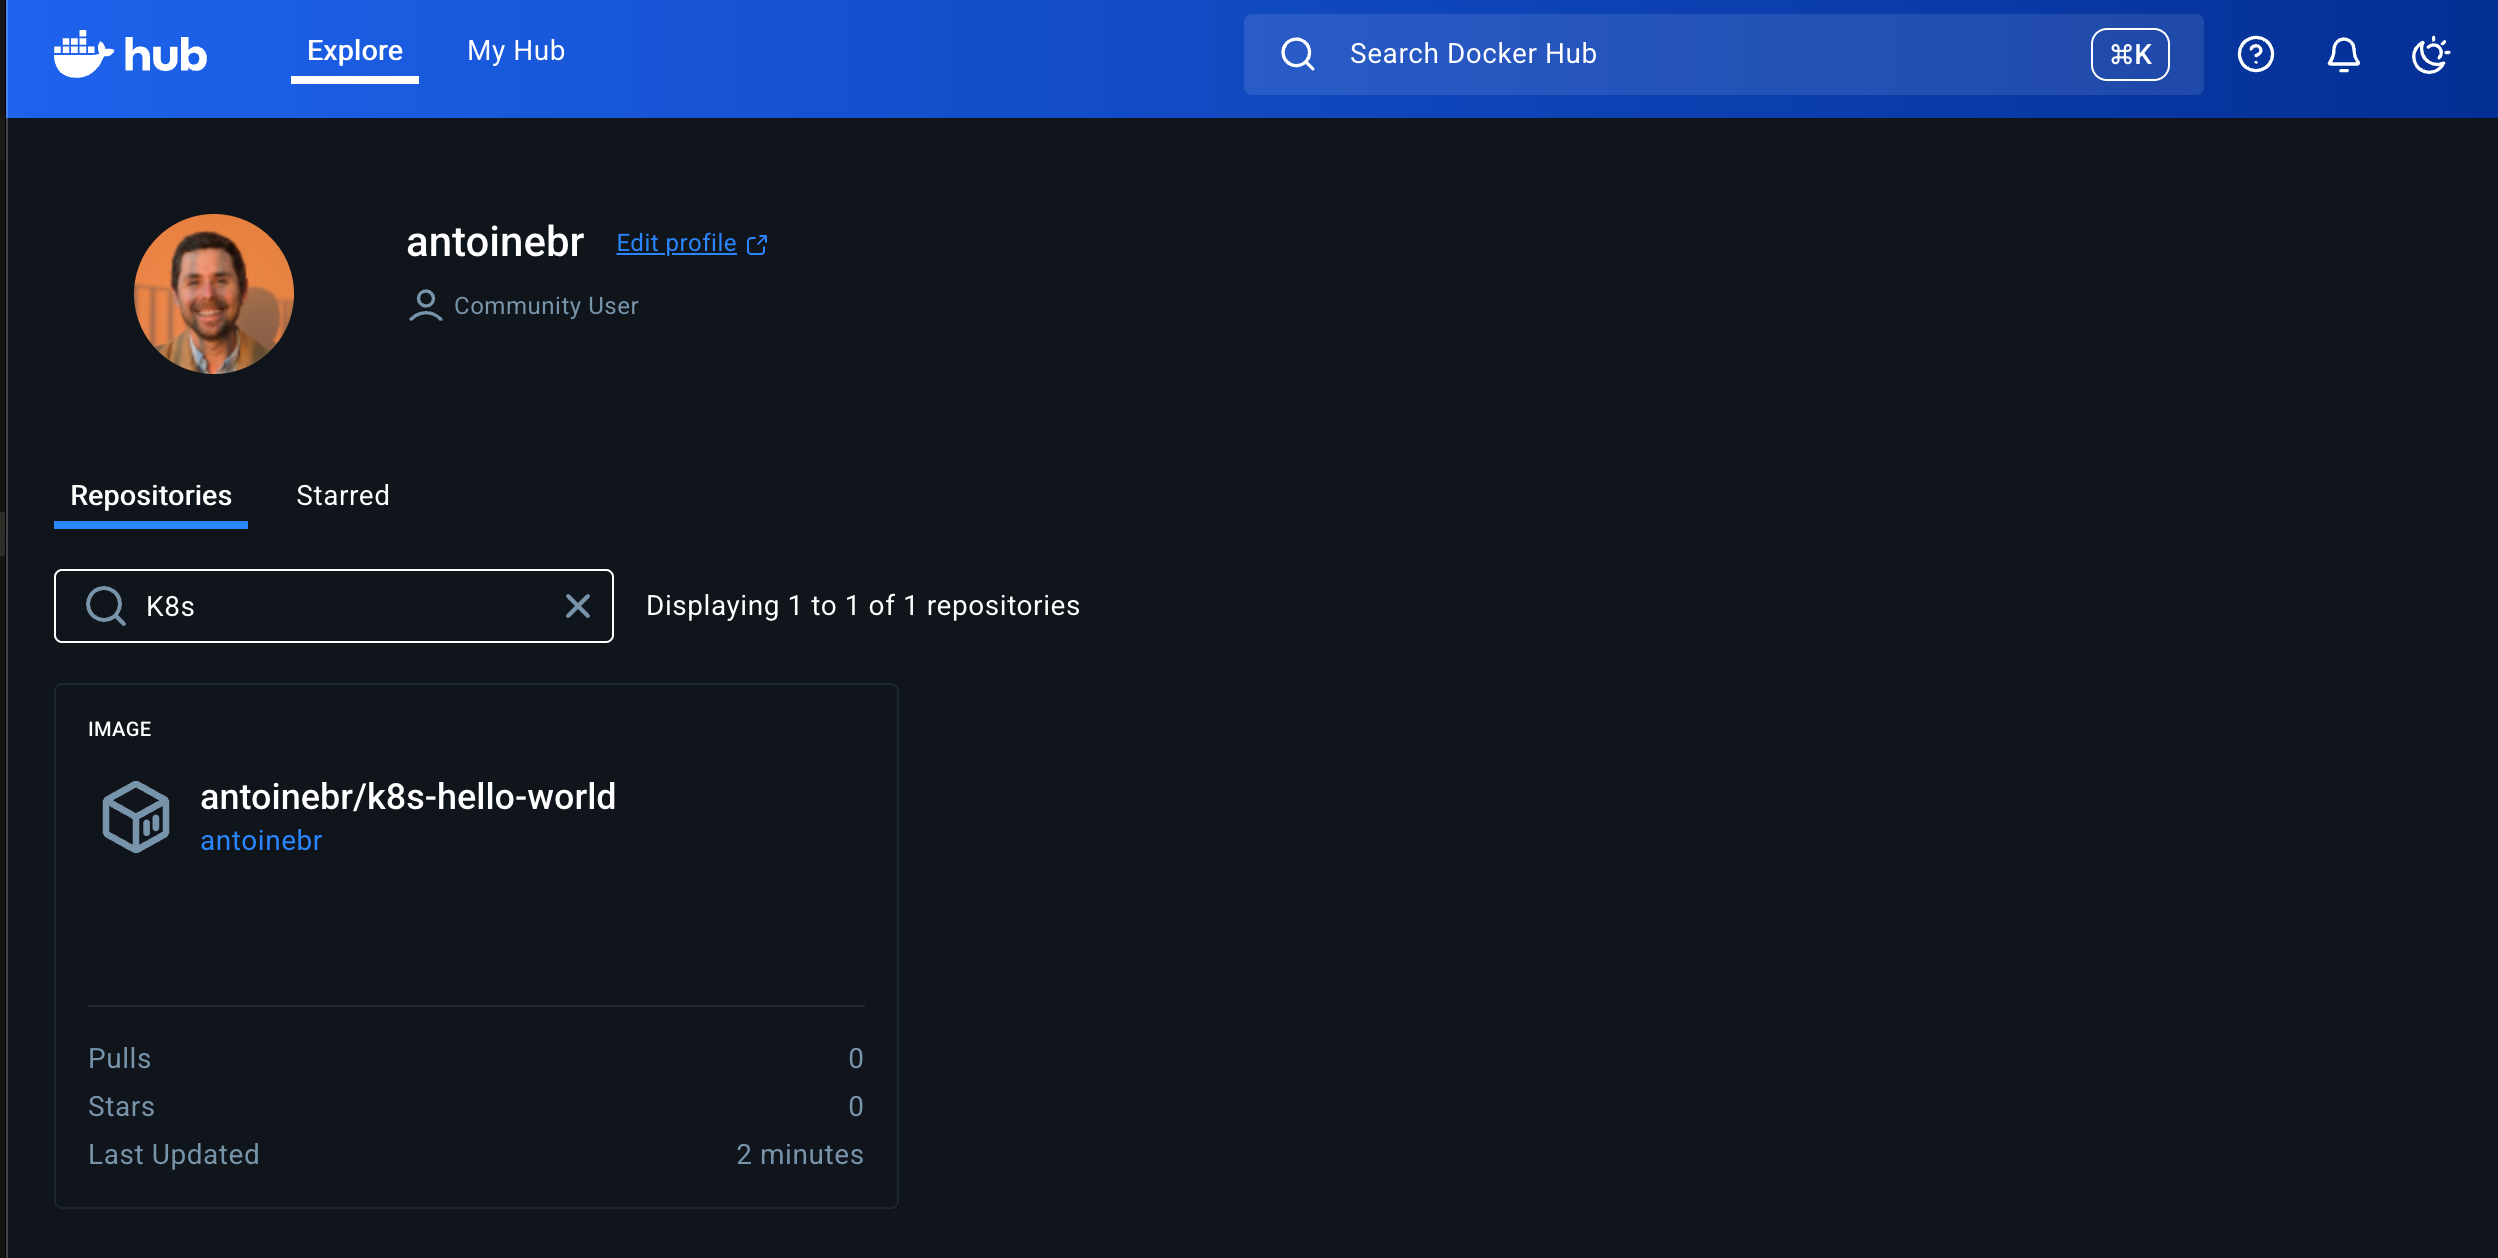
You can test your image is working by building your image locally :
docker build -t antoinebr/k8s-hello-world .
And run it to verify :
docker run -d -p 3001:3000 antoinebr/k8s-hello-world
1.3: Set up the GitHub Repo
This is the central hub for our project.
- Go to GitHub and create a new public repository (e.g.,
k8s-hello-world). -
On your local machine, initialize Git and push your code
# Create a .gitignore file
echo "node_modules" > .gitignore

# Initialize git
git init
git add .
git commit -m "Initial commit: hello world app + Dockerfile"

# Link it to your new GitHub repo (replace with your URL)
git remote add origin https://github.com/YOUR_USERNAME/k8s-hello-world.git
git branch -M main
git push -u origin main

1.4: Set up GitHub Actions (The CI Workflow)
This is the magic. We’ll tell GitHub to run a job every time we push to the main branch.
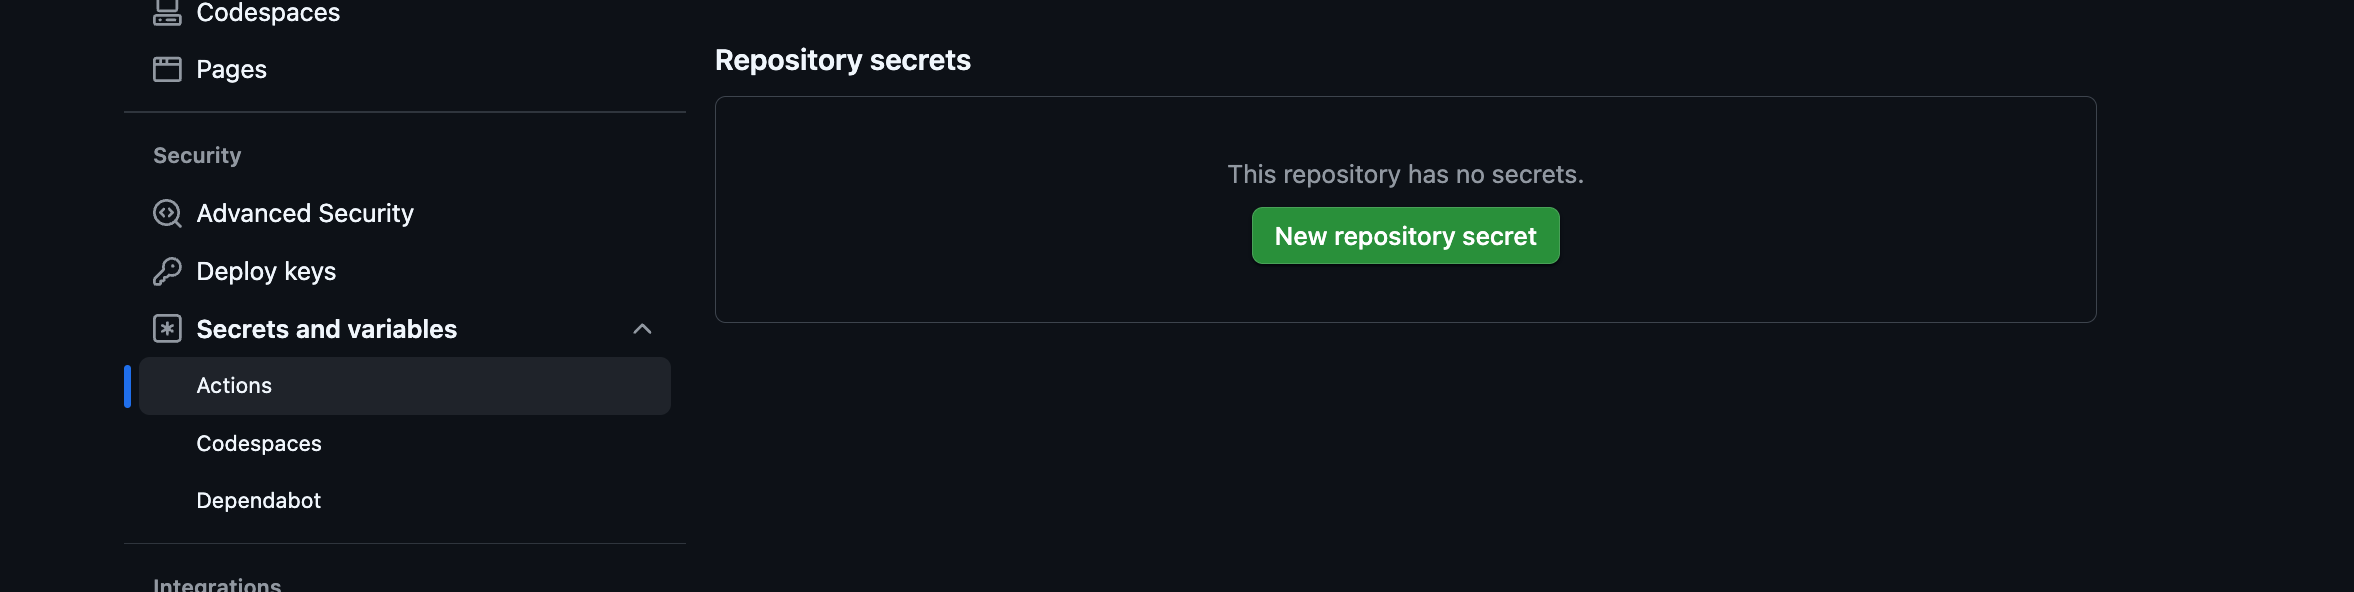
- Add Secrets: The GitHub Action will need to log in to Docker Hub to push your image.
- Go to your GitHub repo’s page.
- Click on Settings > Secrets and variables > Actions.
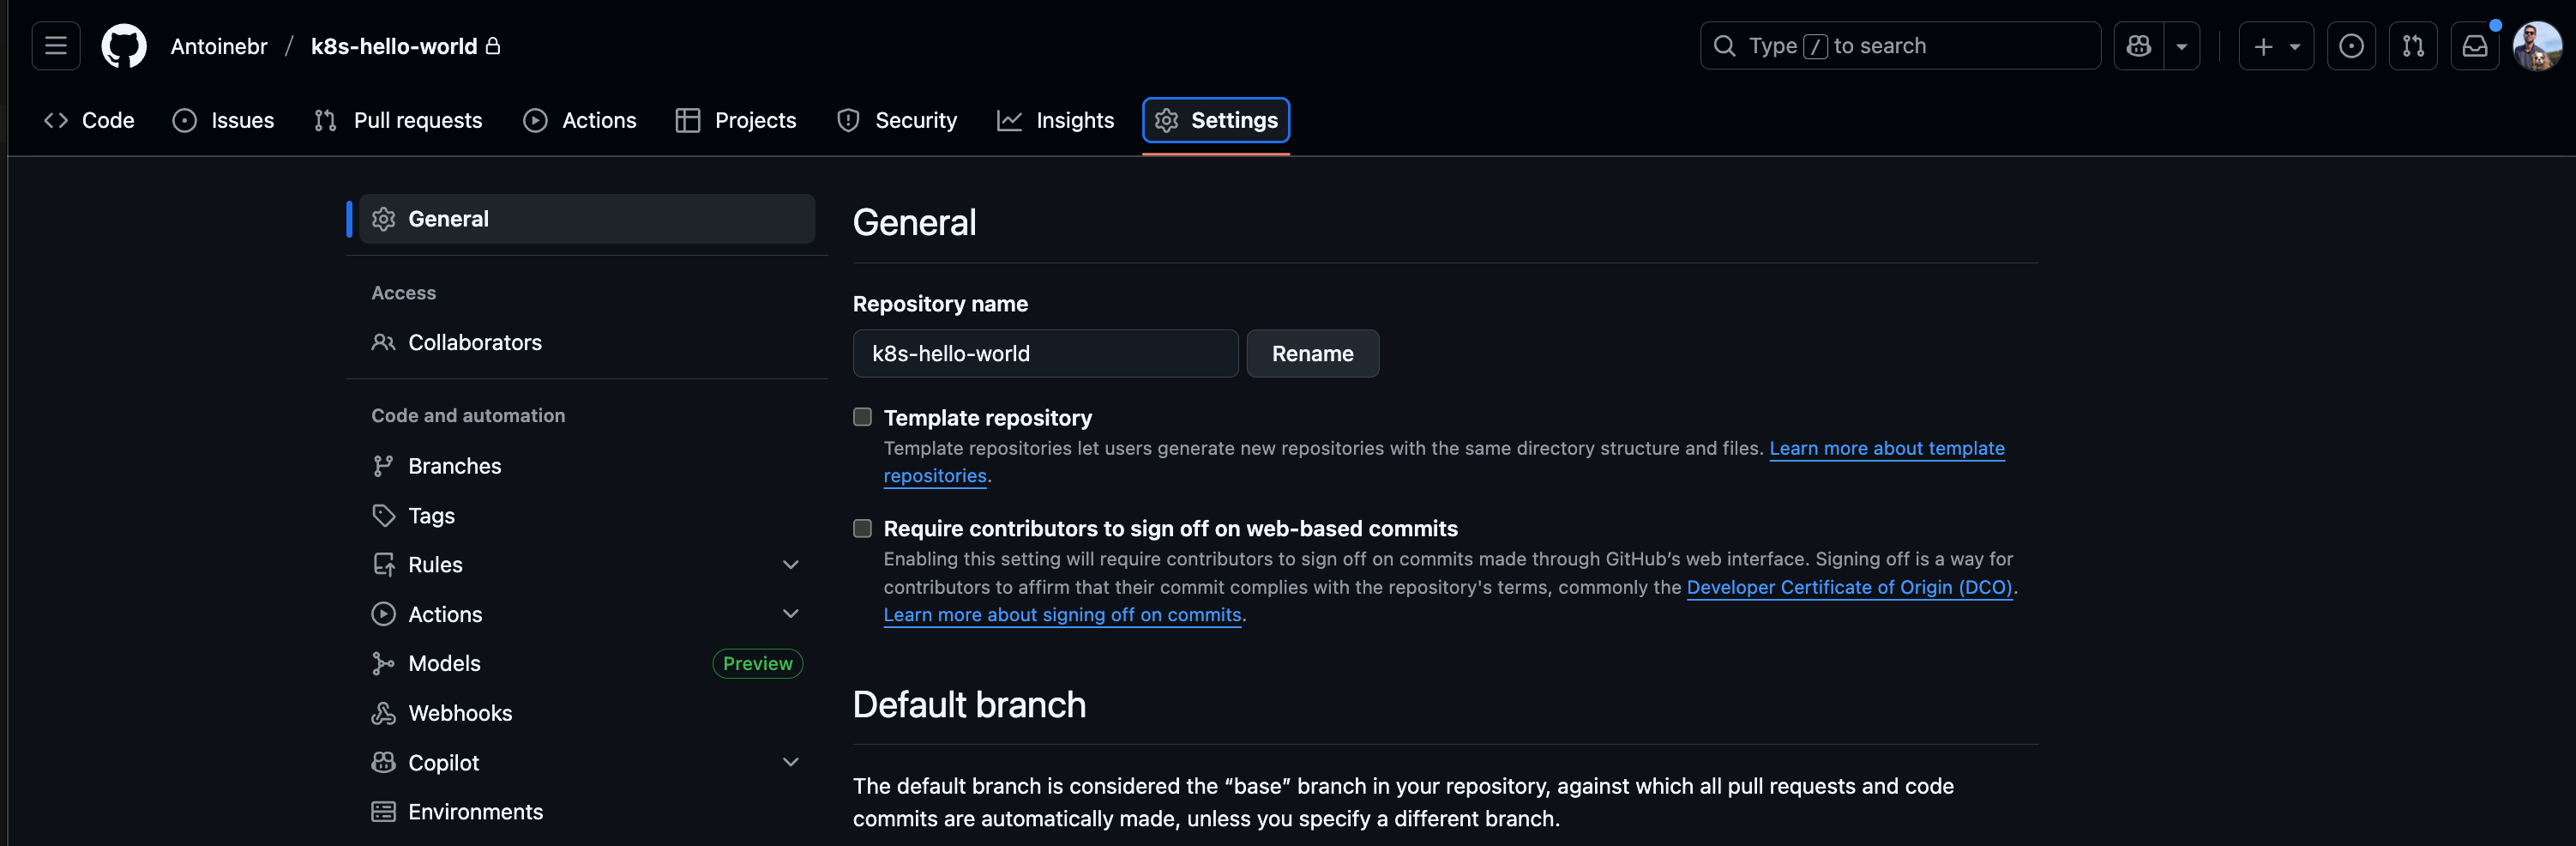
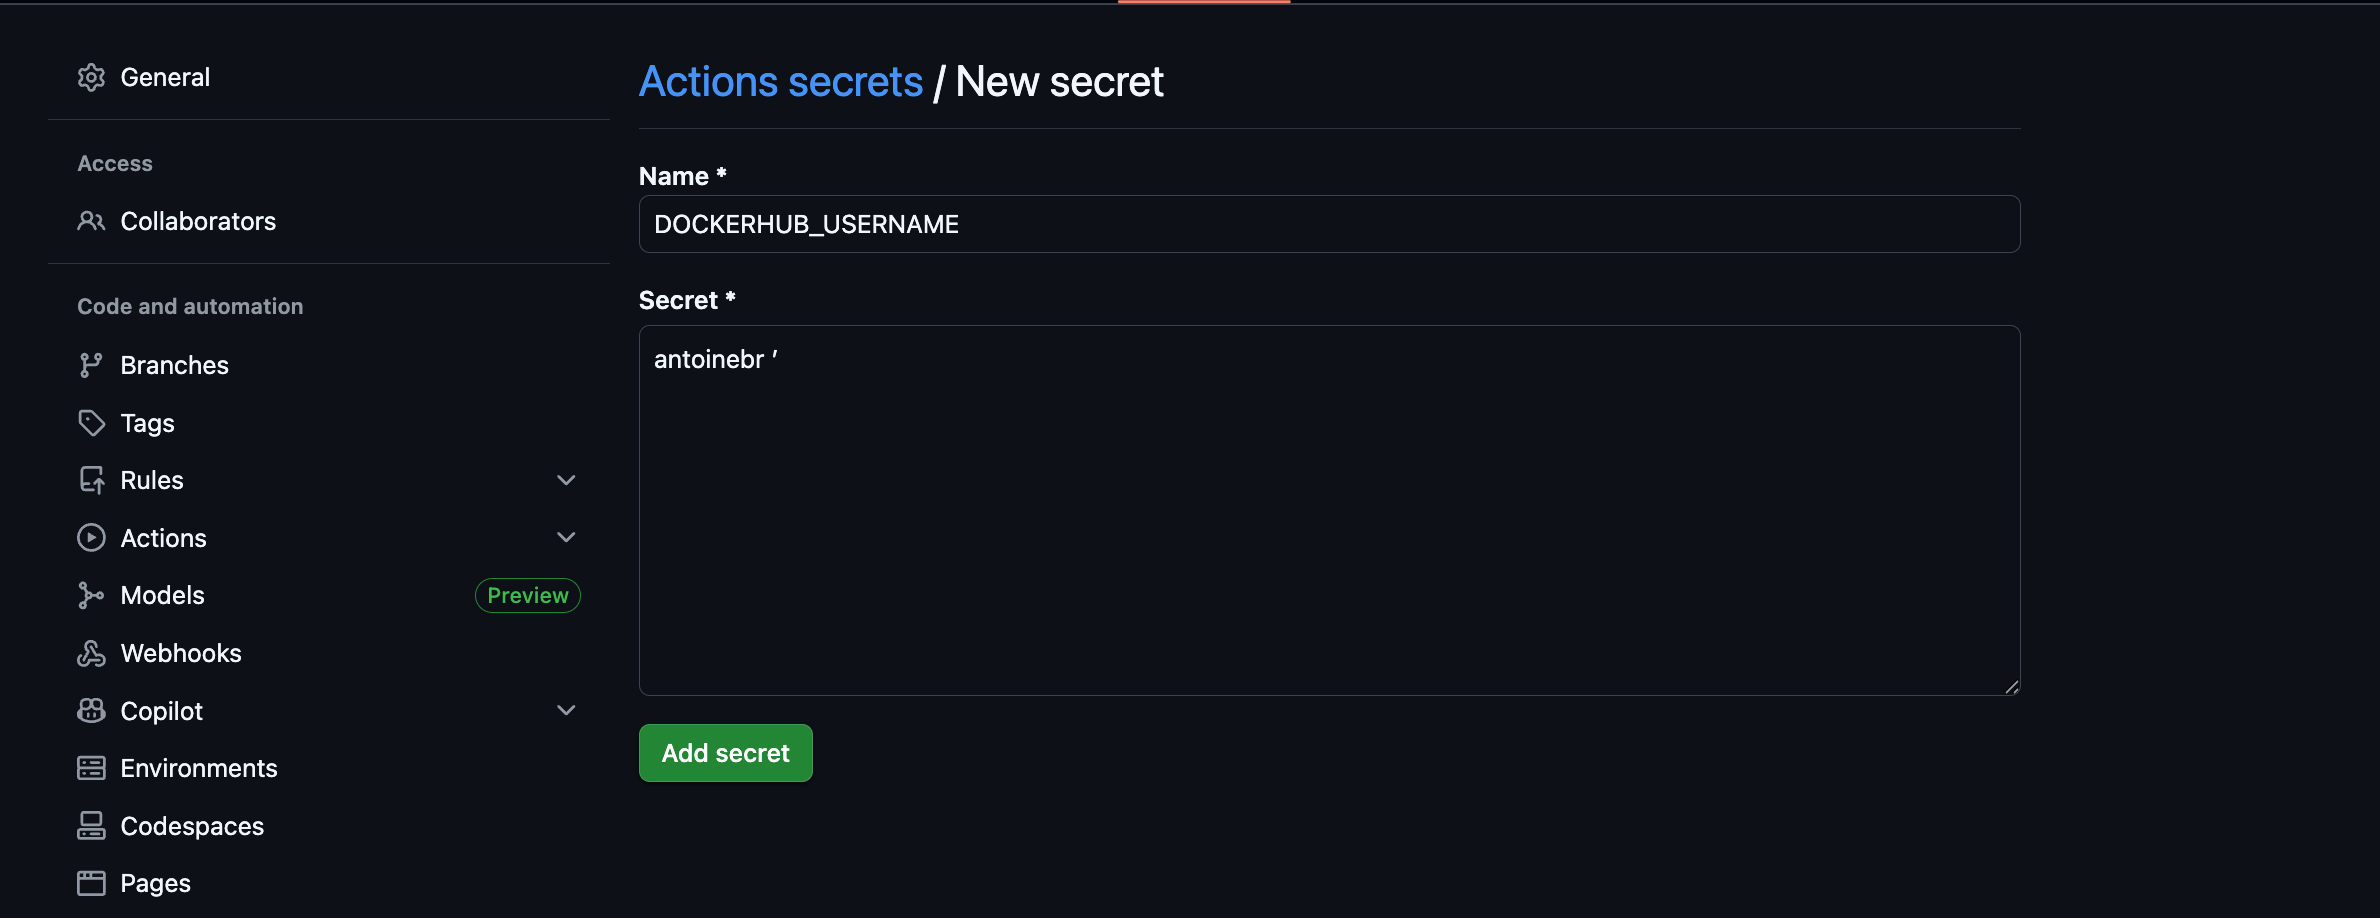
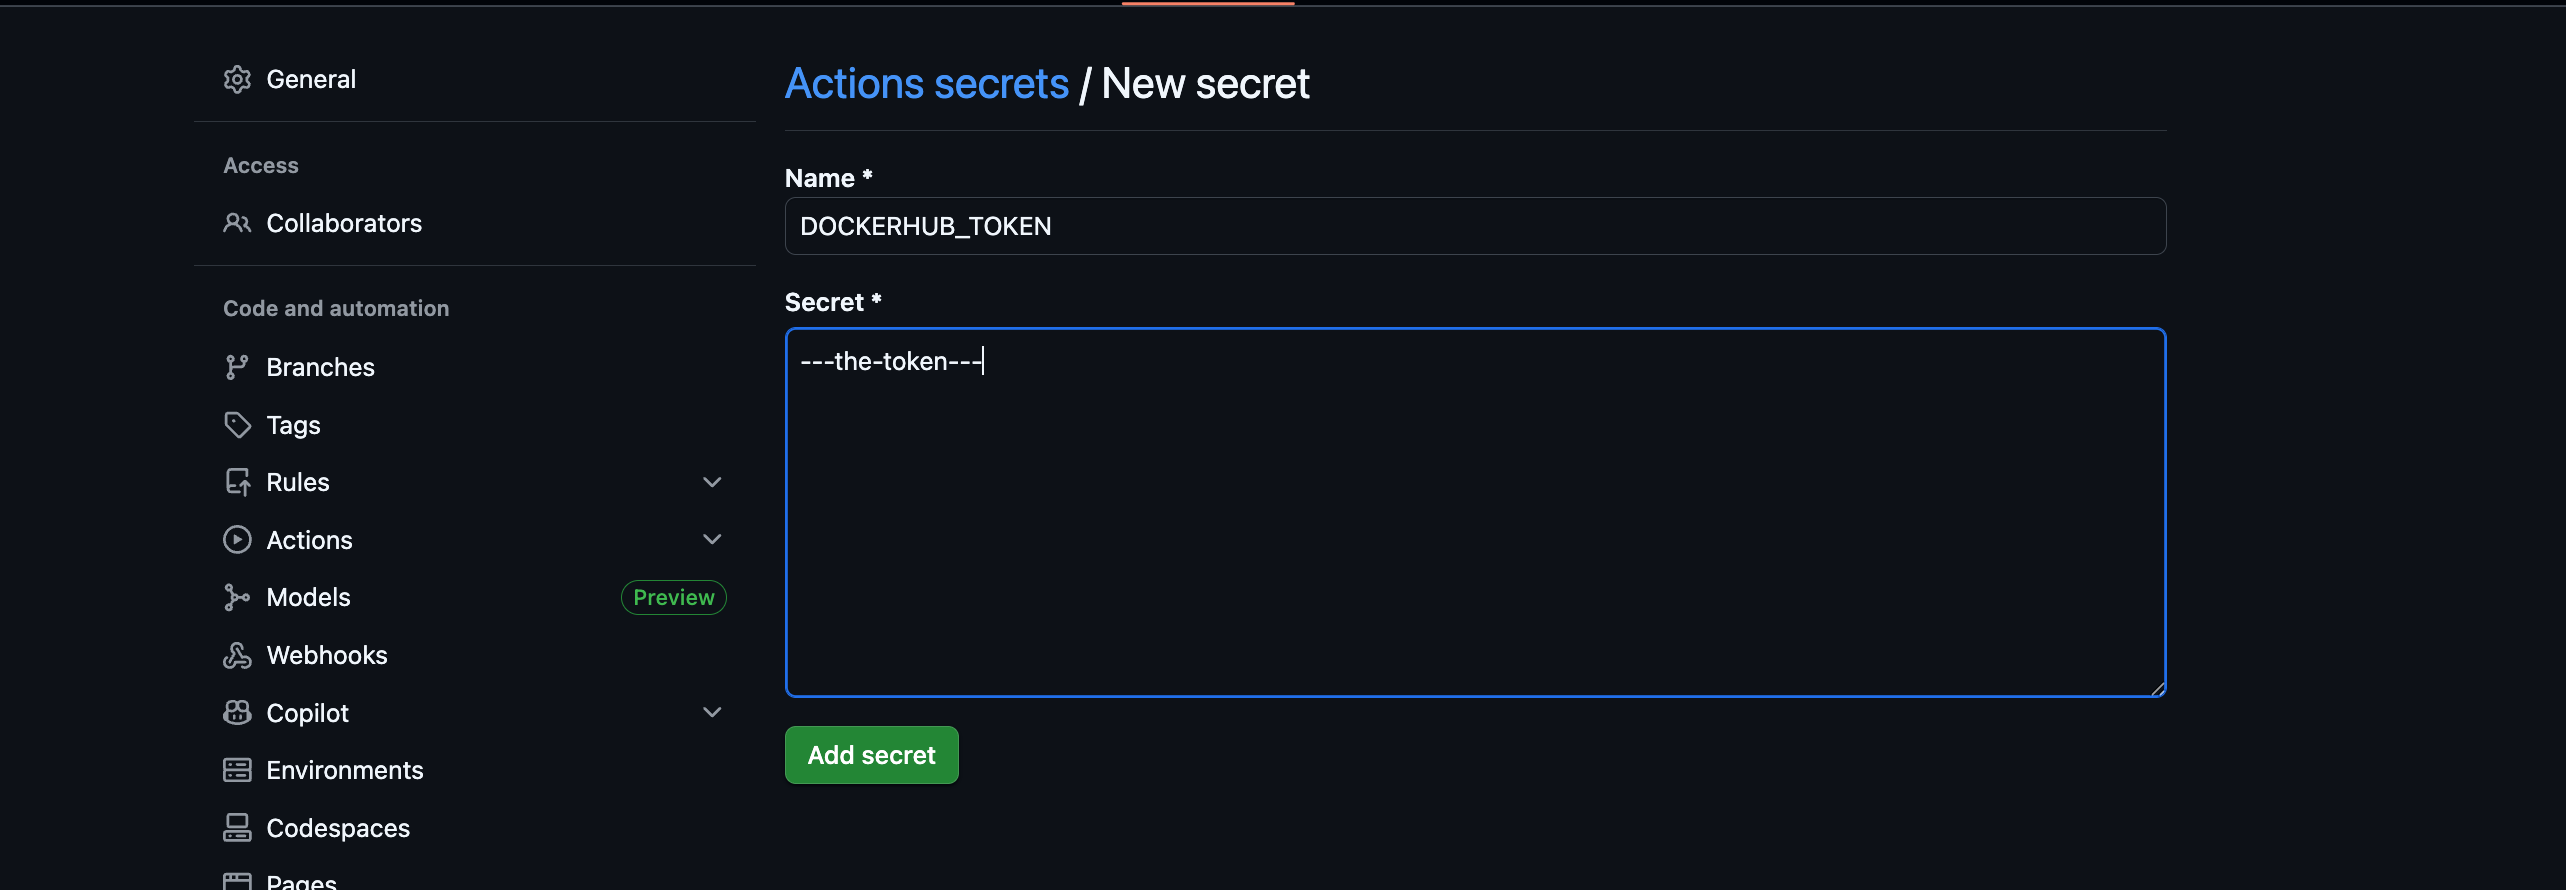
Click New repository secret for each of these:
DOCKERHUB_USERNAME: Your Docker Hub username.
DOCKERHUB_TOKEN: As weird as it looks, you have to use your password as a token. This is from the official GitHub documentation https://docs.github.com/en/actions/tutorials/publish-packages/publish-docker-images
Create the Workflow File: On your local machine, create a new folder path: .github/workflows
mkdir -p .github/workflows
Inside that folder, create a file named build-and-push.yaml:
name: Build and Push Docker Image

# This workflow runs on every push to the 'main' branch
# (The docs you sent use `on: release:`, but for our
# CI/CD project, running on *every push* is what we want)
on:
  push:
    branches: [ "main" ]

jobs:
  build:
    runs-on: ubuntu-latest

    steps:
      # 1. Check out your code from the repo
      - name: Check out the repo
        uses: actions/checkout@v4

      # 2. Log in to Docker Hub
      - name: Log in to Docker Hub
        uses: docker/login-action@v3
        with:
          # Use the secrets we created in Step 1.4
          username: ${{ secrets.DOCKERHUB_USERNAME }}
          password: ${{ secrets.DOCKERHUB_TOKEN }}

      # 3. NEW: Extract metadata (tags and labels)
      # This is the modern helper action from the docs you shared.
      # It automatically creates smart tags based on the Git event.
      - name: Extract metadata for Docker
        id: meta
        uses: docker/metadata-action@v5 # <-- The new, smart helper
        with:
          # This tells the action what to name your image
          images: ${{ secrets.DOCKERHUB_USERNAME }}/k8s-hello-world

      # 4. Build and push the image
      - name: Build and push Docker image
        uses: docker/build-push-action@v5 # <-- Updated to v5
        with:
          context: .
          push: true
          # This line is the magic!
          # It uses the smart tags and labels generated by the 'meta' step above
          tags: ${{ steps.meta.outputs.tags }}
          labels: ${{ steps.meta.outputs.labels }}
Plain English: This file tells GitHub: « When someone pushes to main, spin up a new Linux server. On that server, check out the code, log in to Docker Hub using the secrets I gave you, and then build the Dockerfile in this repo. Finally, push that new image to my Docker Hub account with two tags: latest and a unique one based on the Git commit. »
Commit and Push the Workflow:
git commit -a -m "Add GitHub Actions CI workflow"
Then push :
git push origin main
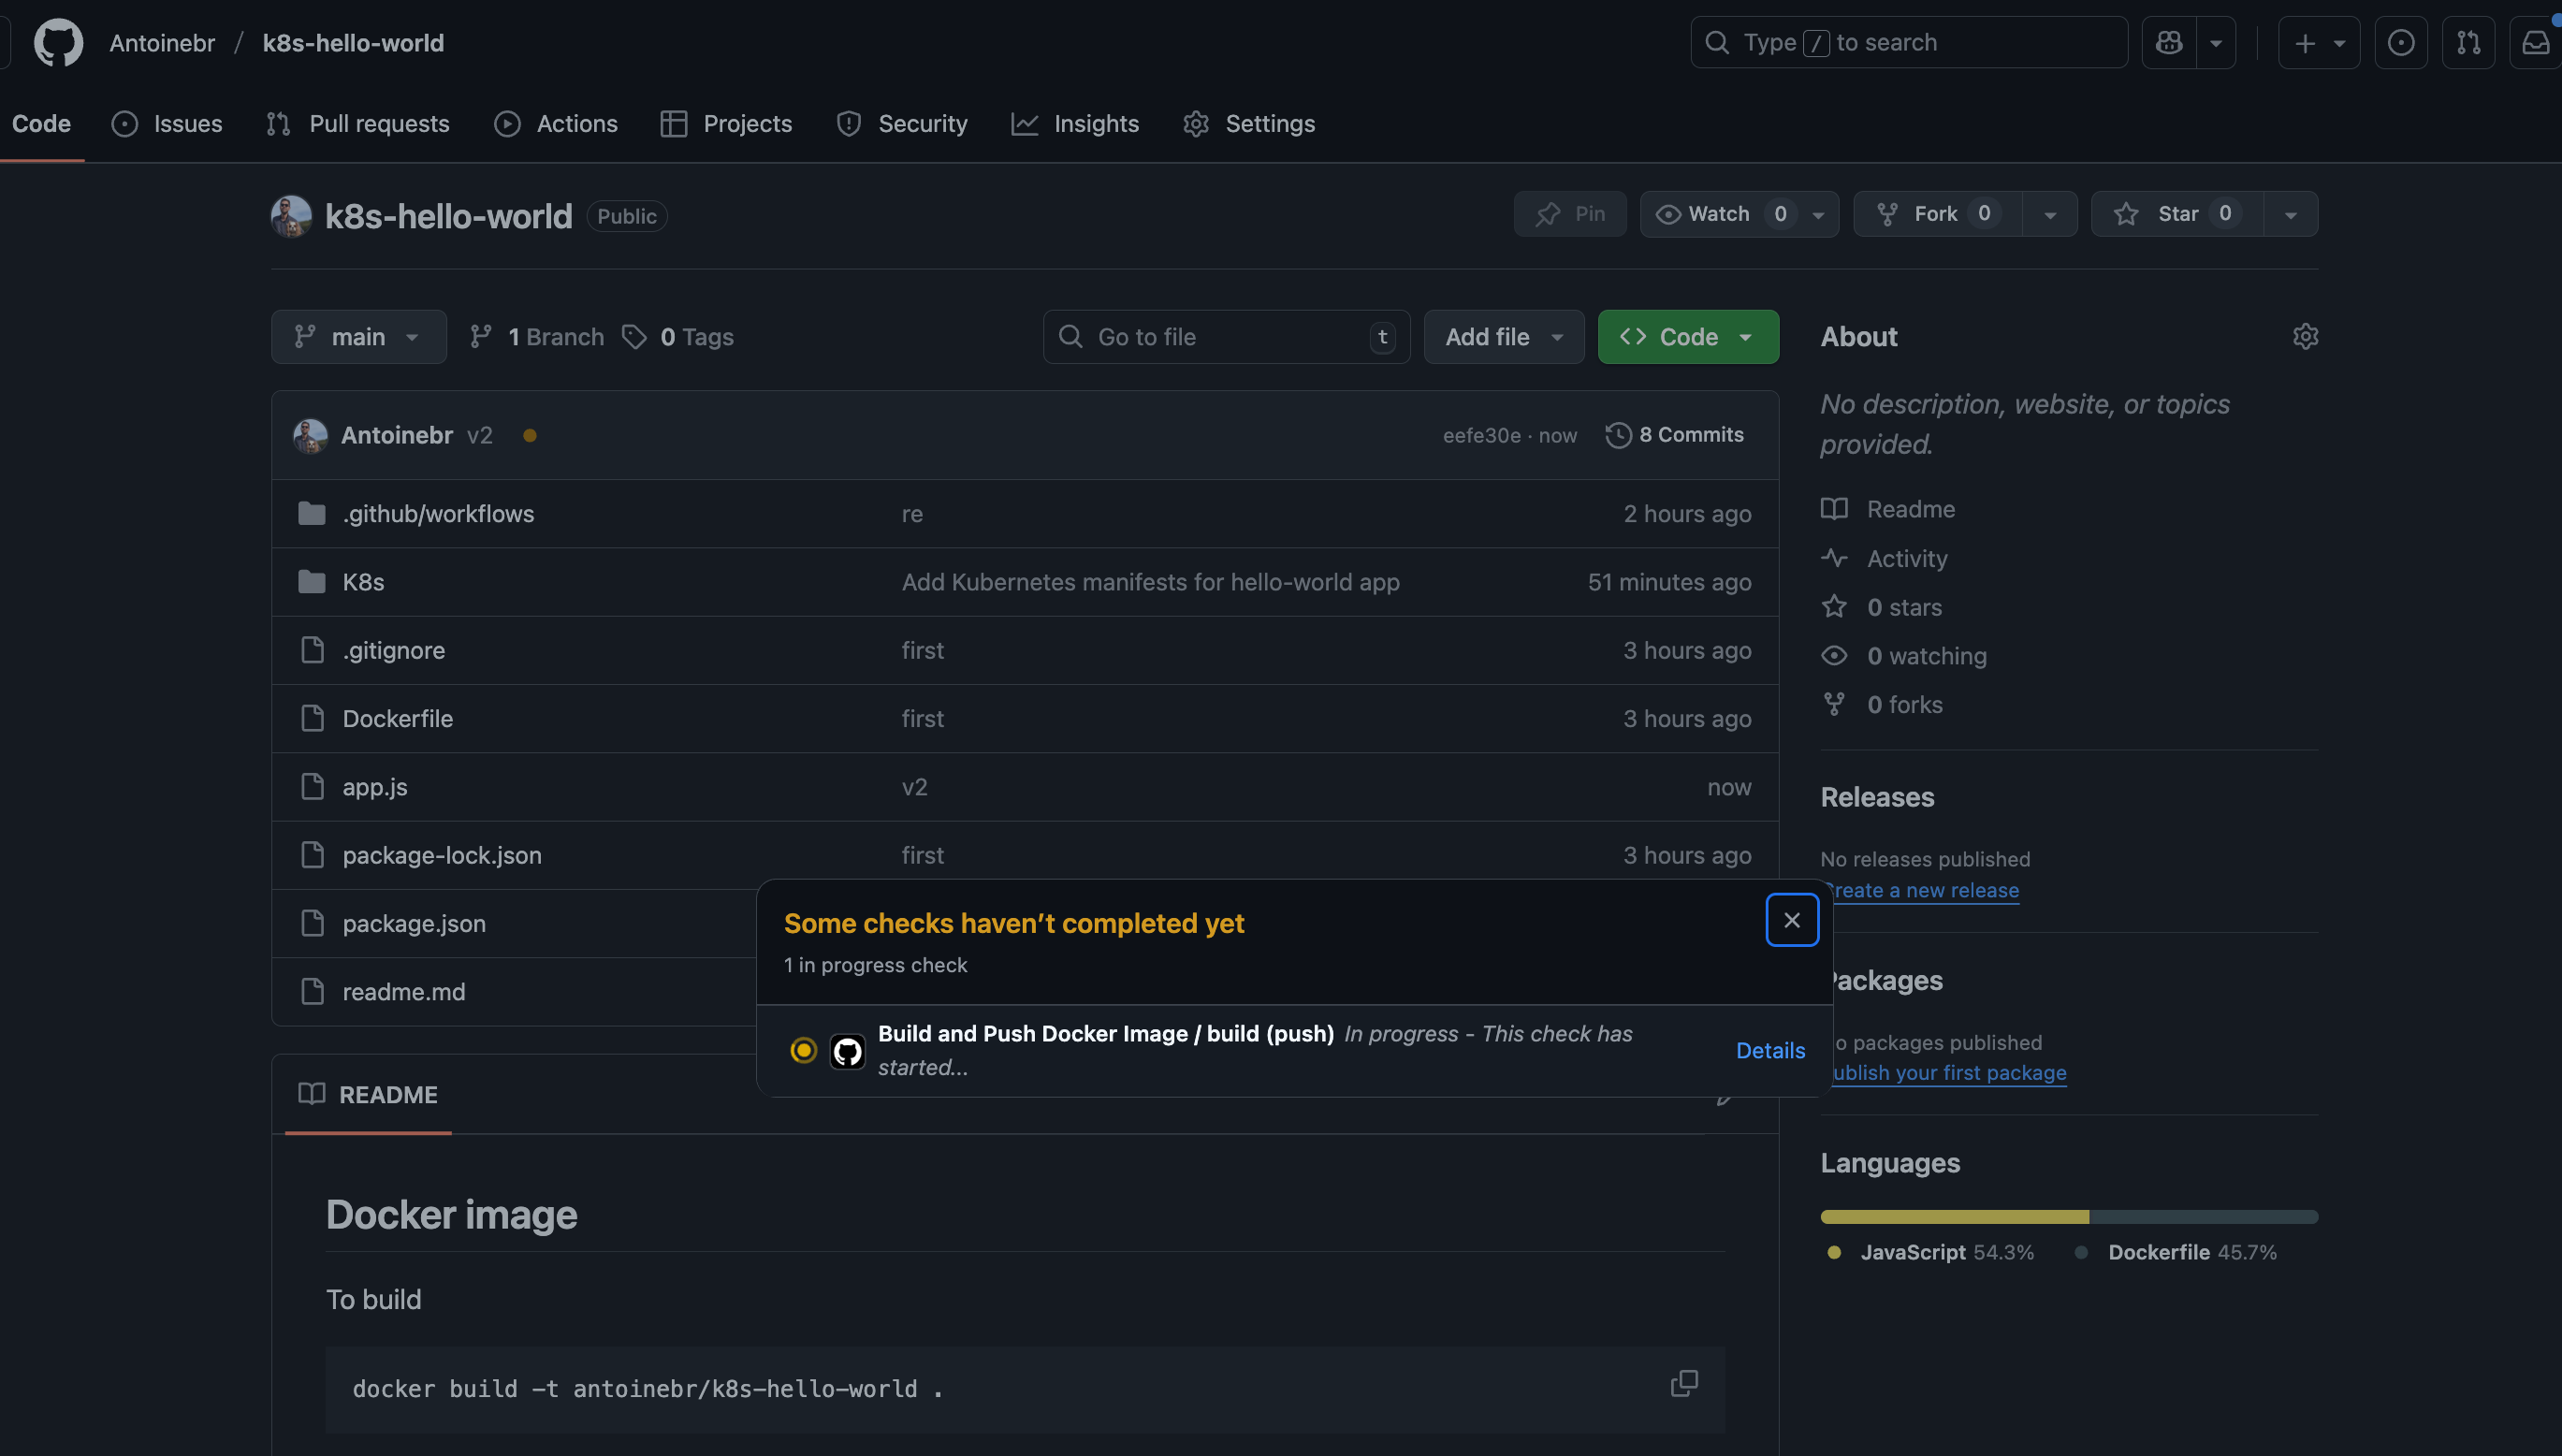
Now, go to your GitHub repo and click the « Actions » tab. You should see your workflow running!


If it’s successful (it might take a minute or two), you’ll see a green checkmark.
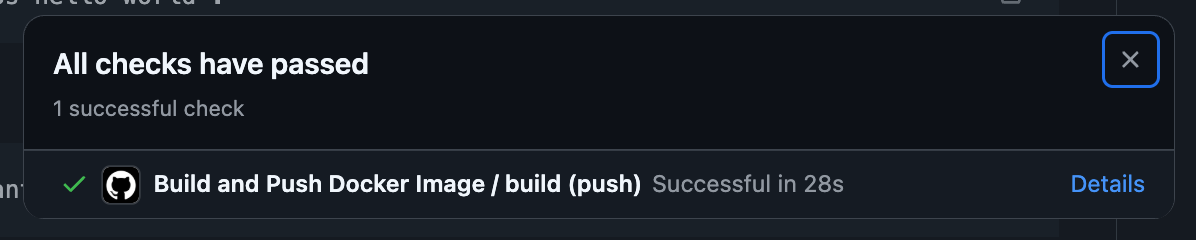
our code is now automatically being built and published to the world (or at least, to Docker Hub). You have the CI (Continuous Integration) part of CI/CD all set.
Let’s set up the CD (Continuous Deployment).
Phase 2: Continuous Deployment (Git to Live App)
Right now, your workflow is a « push » system. You git push your code, and GitHub pushes a Docker image to Docker Hub.
We’re about to build a « pull » system in the K3s cluster. We will install a « robot » inside your cluster called ArgoCD.
This robot’s only job is to watch your Git repository. The moment it sees a change in your YAML files, it will « pull » those changes into the cluster and make it happen automatically.
You will never have to run kubectl apply -f ... for your app again. Your Git repo becomes the single source of truth. This is GitOps.
Here’s the plan:
- Step 2.1: Create the Kubernetes YAML files (Deployment, Service, Ingress) for your new app.
-
Step 2.2: Push those new YAML files to your GitHub repo.
-
Step 2.3: Install ArgoCD (the « robot ») into your K3s cluster.
-
Step 2.4: Configure ArgoCD to watch your repo.
-
Step 2.5: Test the complete loop by making a change and watching it deploy.
Step 2.1: Create Your App’s Kubernetes Files
Just like what we have done with WordPress, our app needs a Deployment, a Service, and an Ingress.
- On our local machine, in your
k8s-hello-worldproject, create a new folder namedk8s. -
Inside that
k8sfolder, create a new file namedapp.yaml. -
Paste all of this into that new
app.yamlfile:
Before you save!
- Change
YOUR_DOCKERHUB_USERNAMEto your actual Docker Hub username. -
Change
hello.hometo whatever domain you want to use (e.g.,hello-k8s.local).
This file bundle contains the « instructions » for Kubernetes, telling it how to run your app.
Step 2.2: Push the YAML to GitHub
Now, let’s commit our new k8s folder to the repo. This puts our app code and our infrastructure code in the same place.
git add k8s/app.yaml
git commit -m "Add Kubernetes manifests for hello-world app"
git push
Great! Your repo now has everything needed to run the app.
git add --all
git commit -a -m "Add Kubernetes manifests for hello-world app"
git push origin main
Step 2.3: Install ArgoCD in K3s
Time to install our « robot. » These two commands will install ArgoCD into its own argocd namespace in your cluster.
Create the namespace:
kubectl create namespace argocd
It should return :
namespace/argocd created
Apply the official installation YAML (this is a big one!)
kubectl apply -n argocd -f https://raw.githubusercontent.com/argoproj/argo-cd/stable/manifests/install.yaml
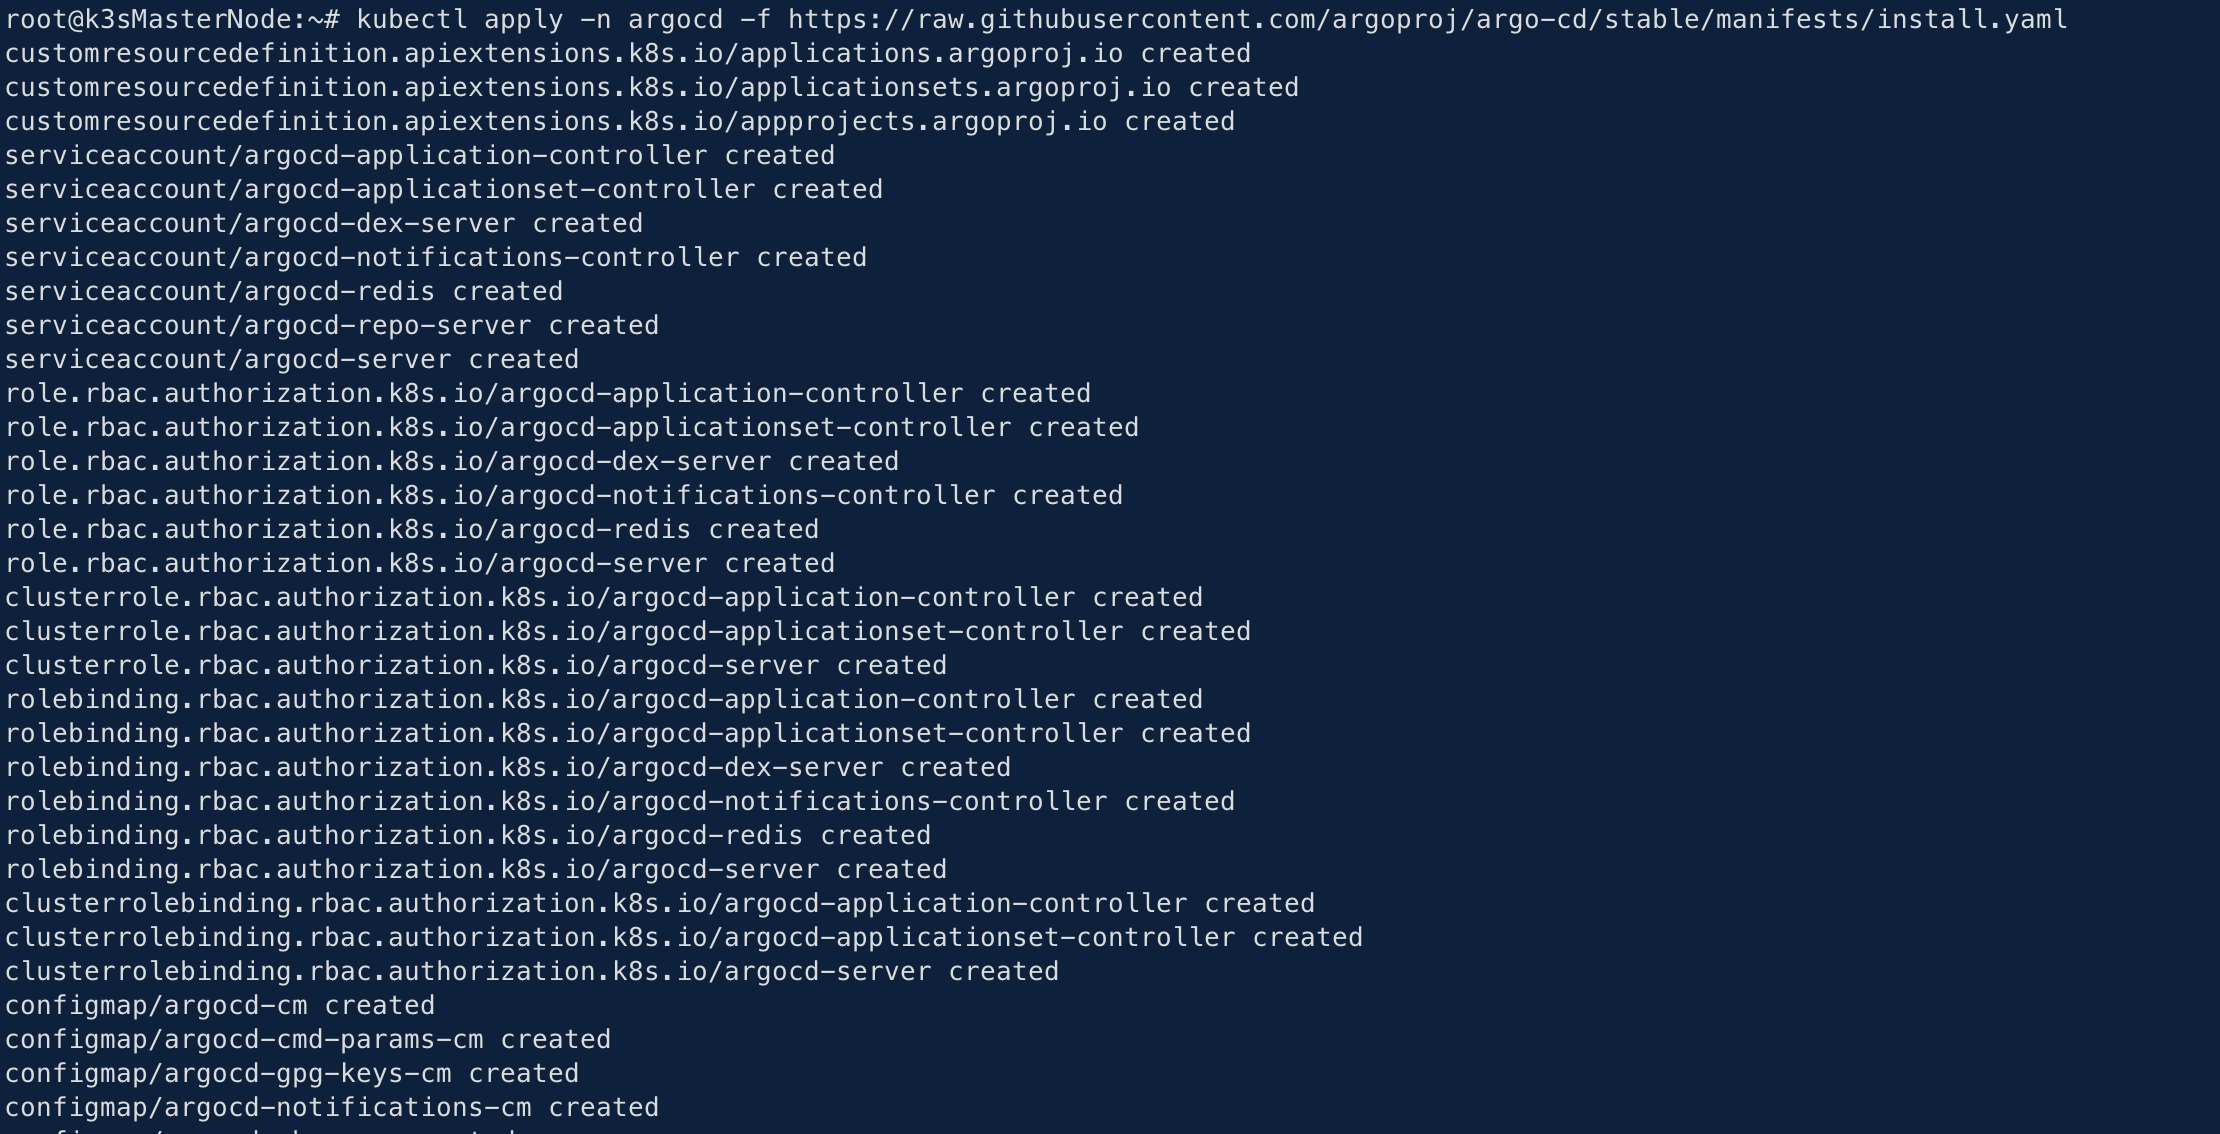
This will create a bunch of new Deployments, Services, and CRDs (Custom Resource Definitions), which are what make ArgoCD work.
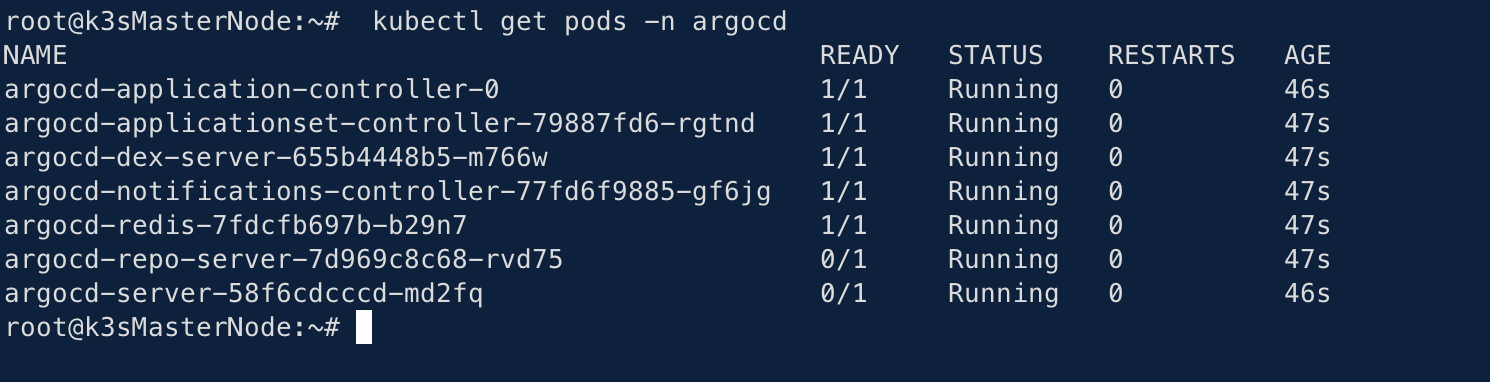
You can check on its progress by running: kubectl get pods -n argocd Wait until all the pods show Running.
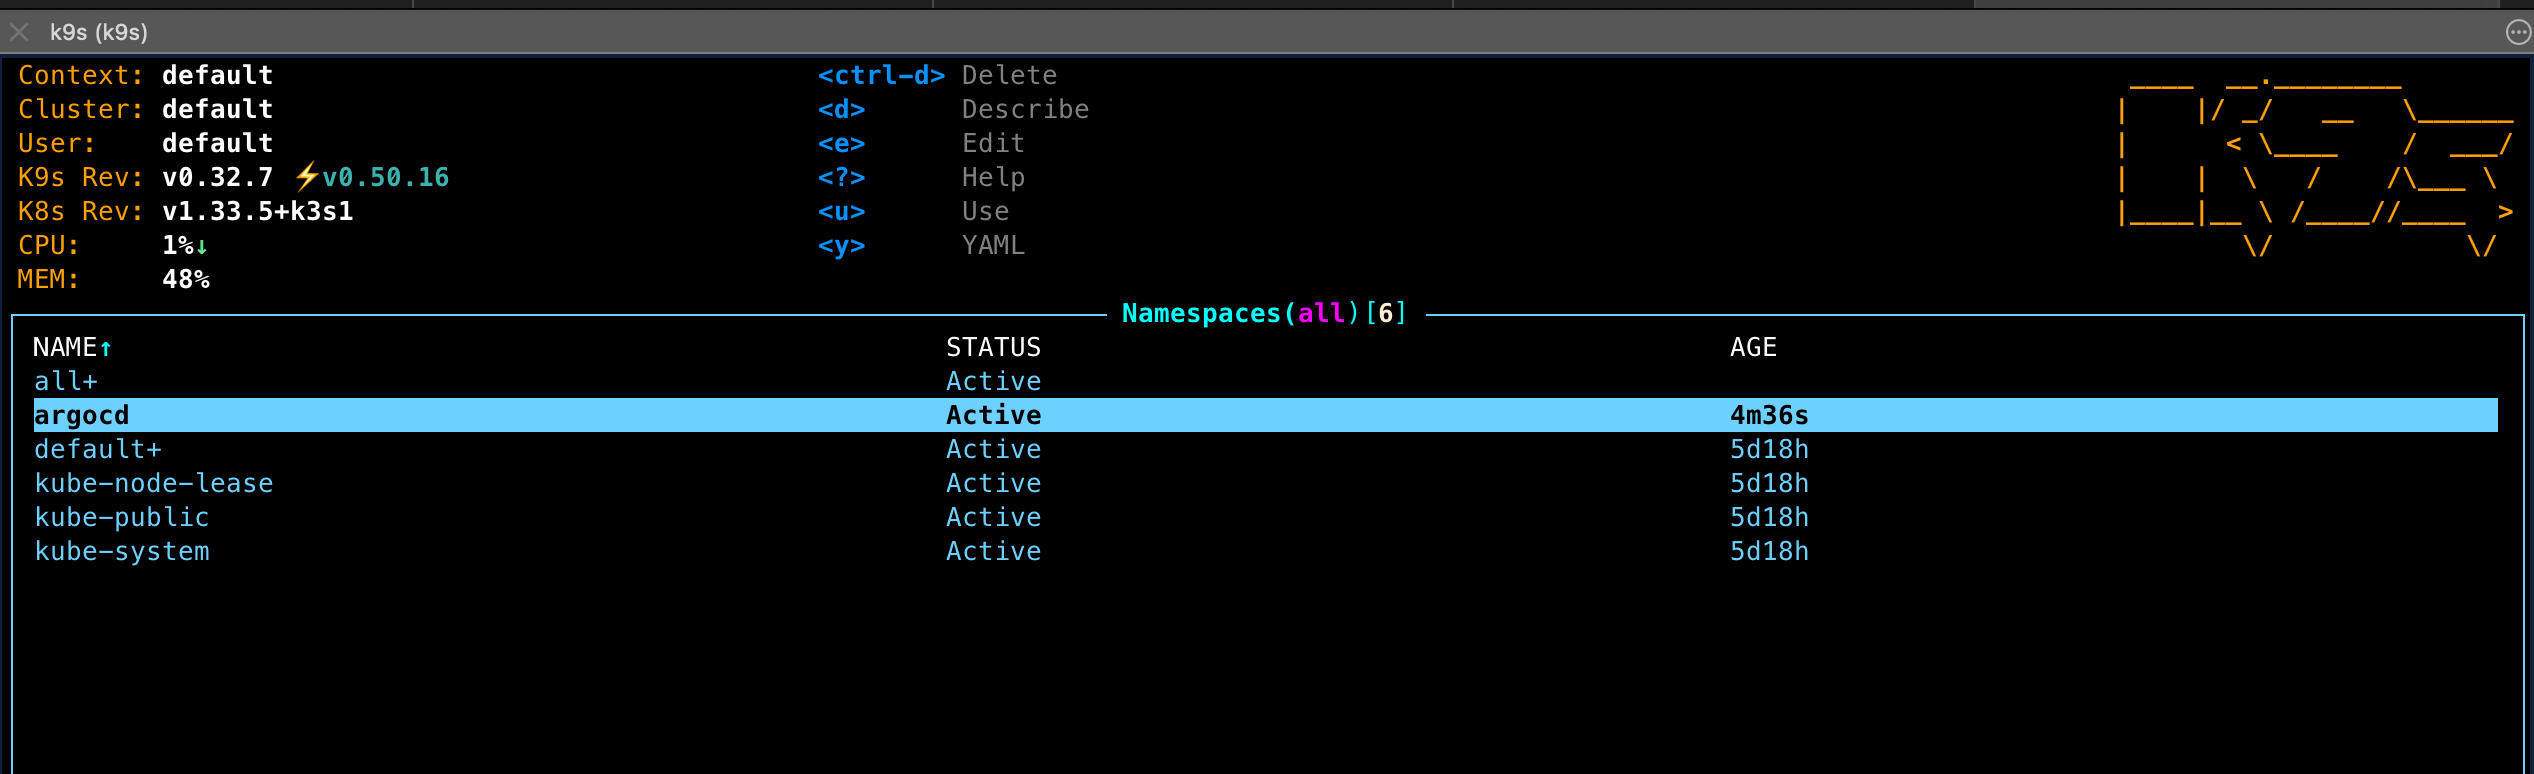
In K9s we can see our new namespace too
Step 2.4: Log In to the ArgoCD Dashboard
ArgoCD has a great web UI. By default, it’s not exposed by an Ingress. The most secure and simple way to access it is with kubectl port-forward.
First, get the admin password: ArgoCD generates a default password and stores it in a Secret. Run this command to get it
kubectl -n argocd get secret argocd-initial-admin-secret -o jsonpath="{.data.password}" | base64 -d
It will print out a long, weird string. Copy that password!
Second, access the UI: Open a new terminal (you need to leave this one running) and execute:
kubectl port-forward --address 0.0.0.0 -n argocd svc/argocd-server 8080:443

Now, open your browser and go to: `https://localhost:8080`
Your browser will give you a safety warning (it’s a self-signed certificate). Just click « Advanced » and « Proceed. »
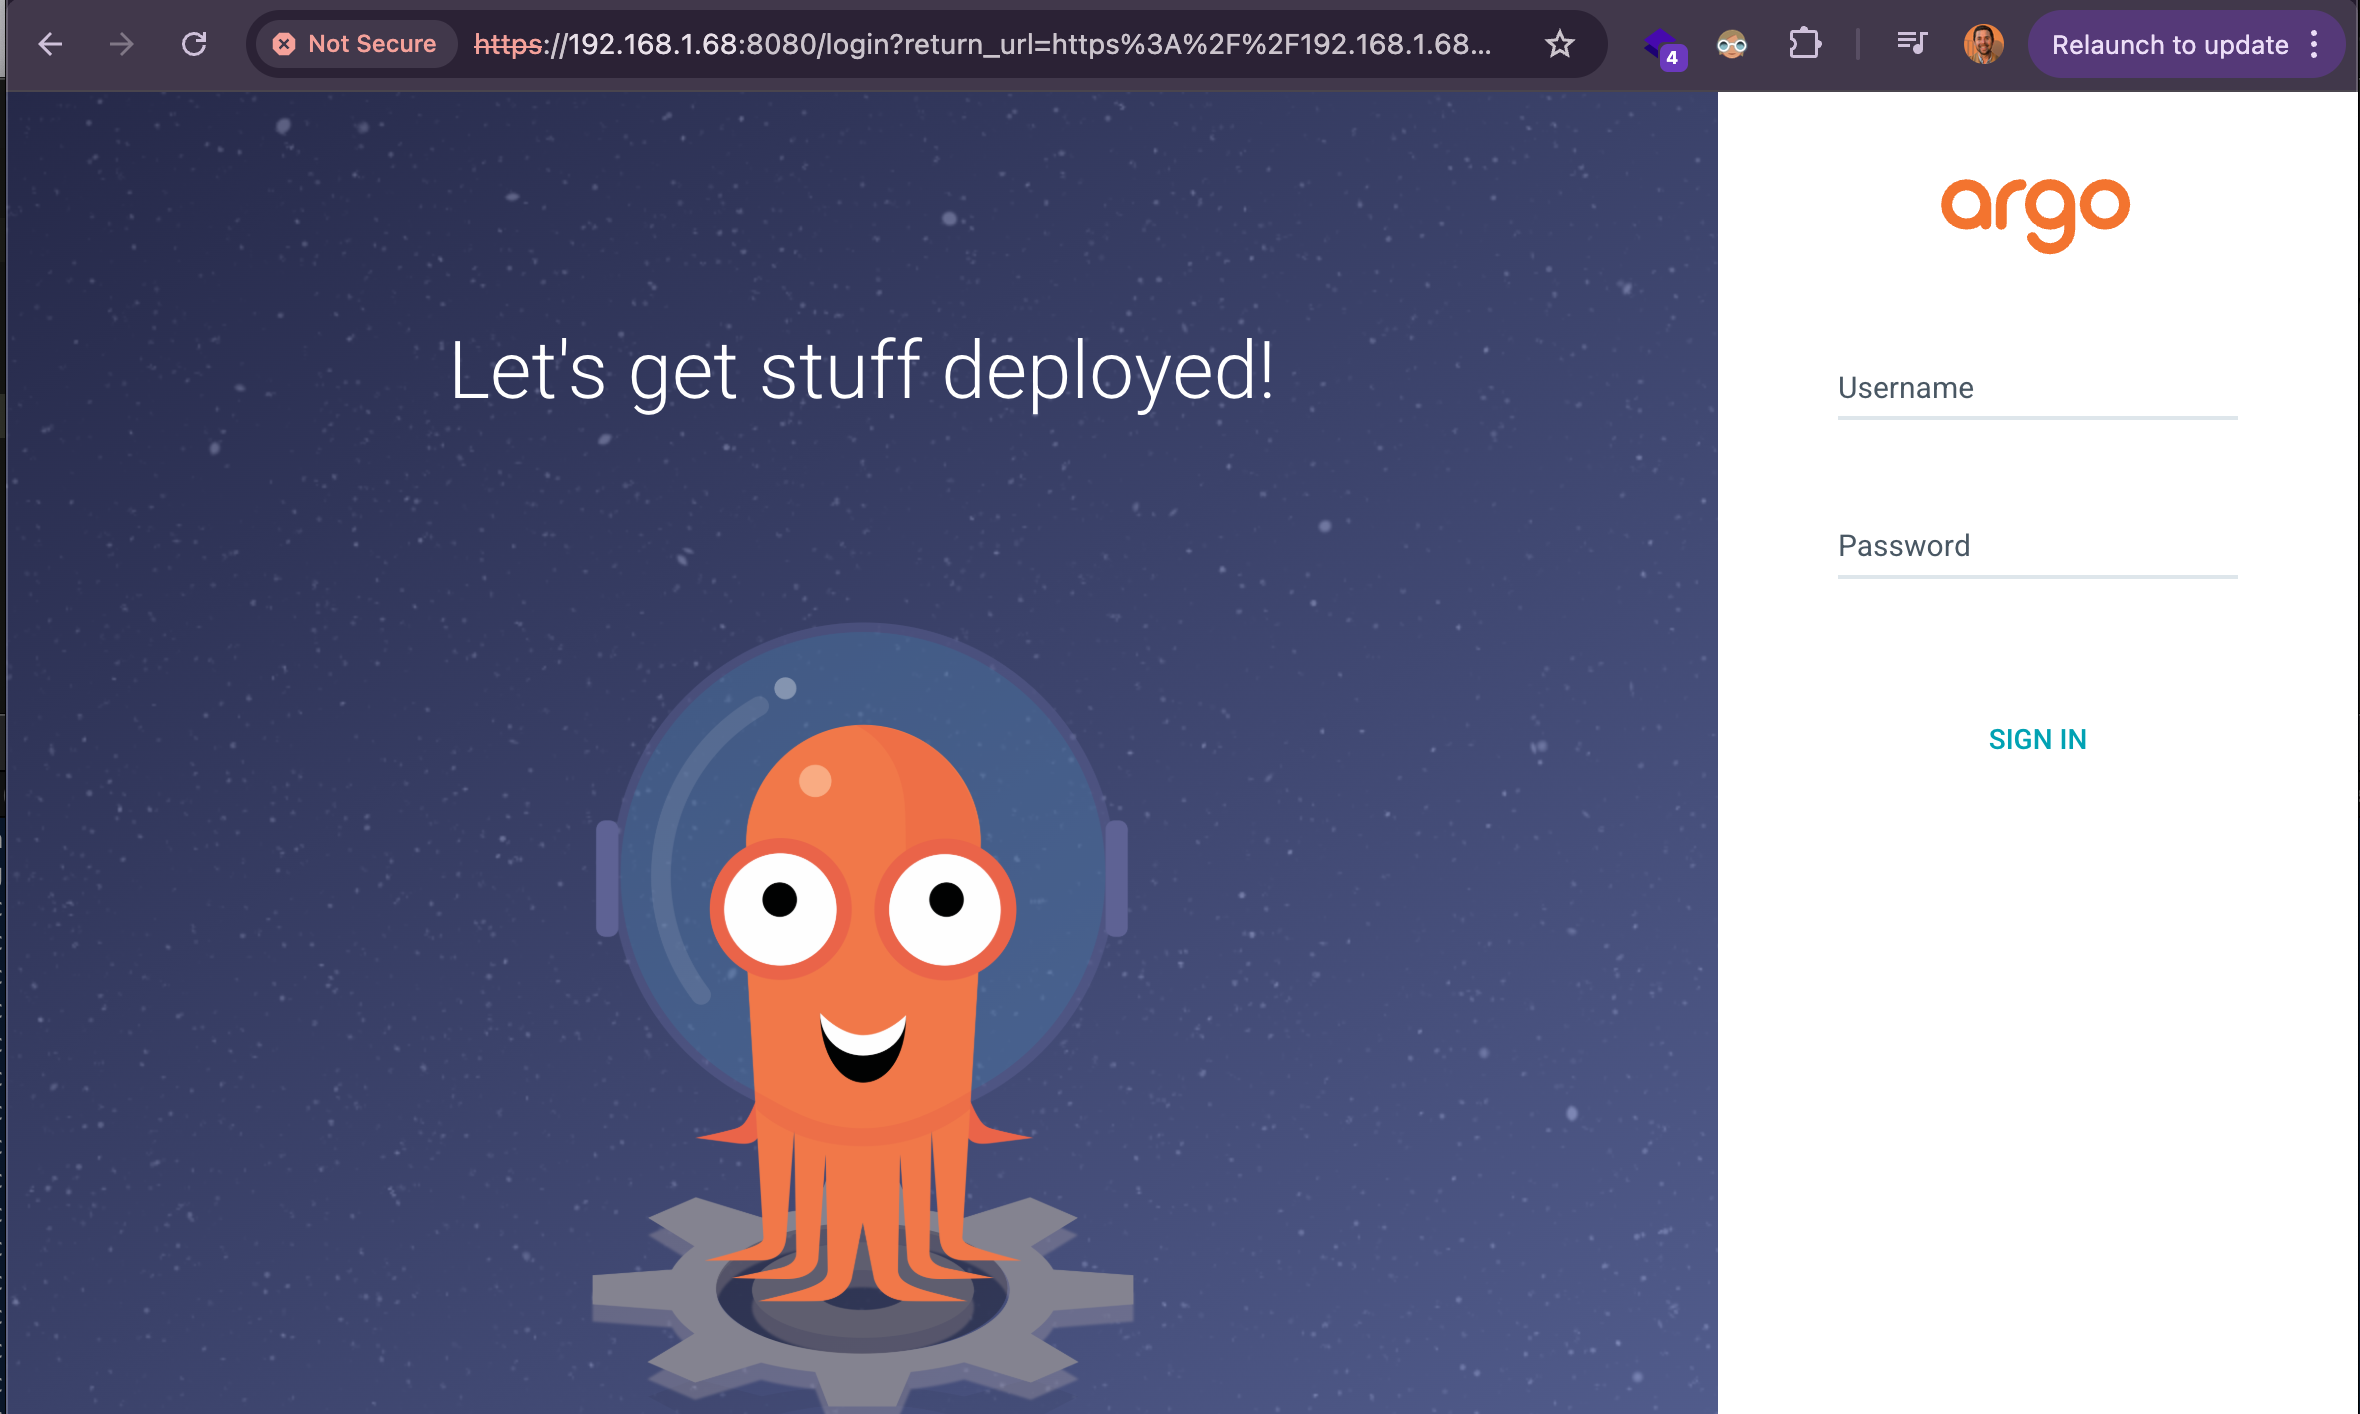
- Username:
admin -
Password: The password you just copied.
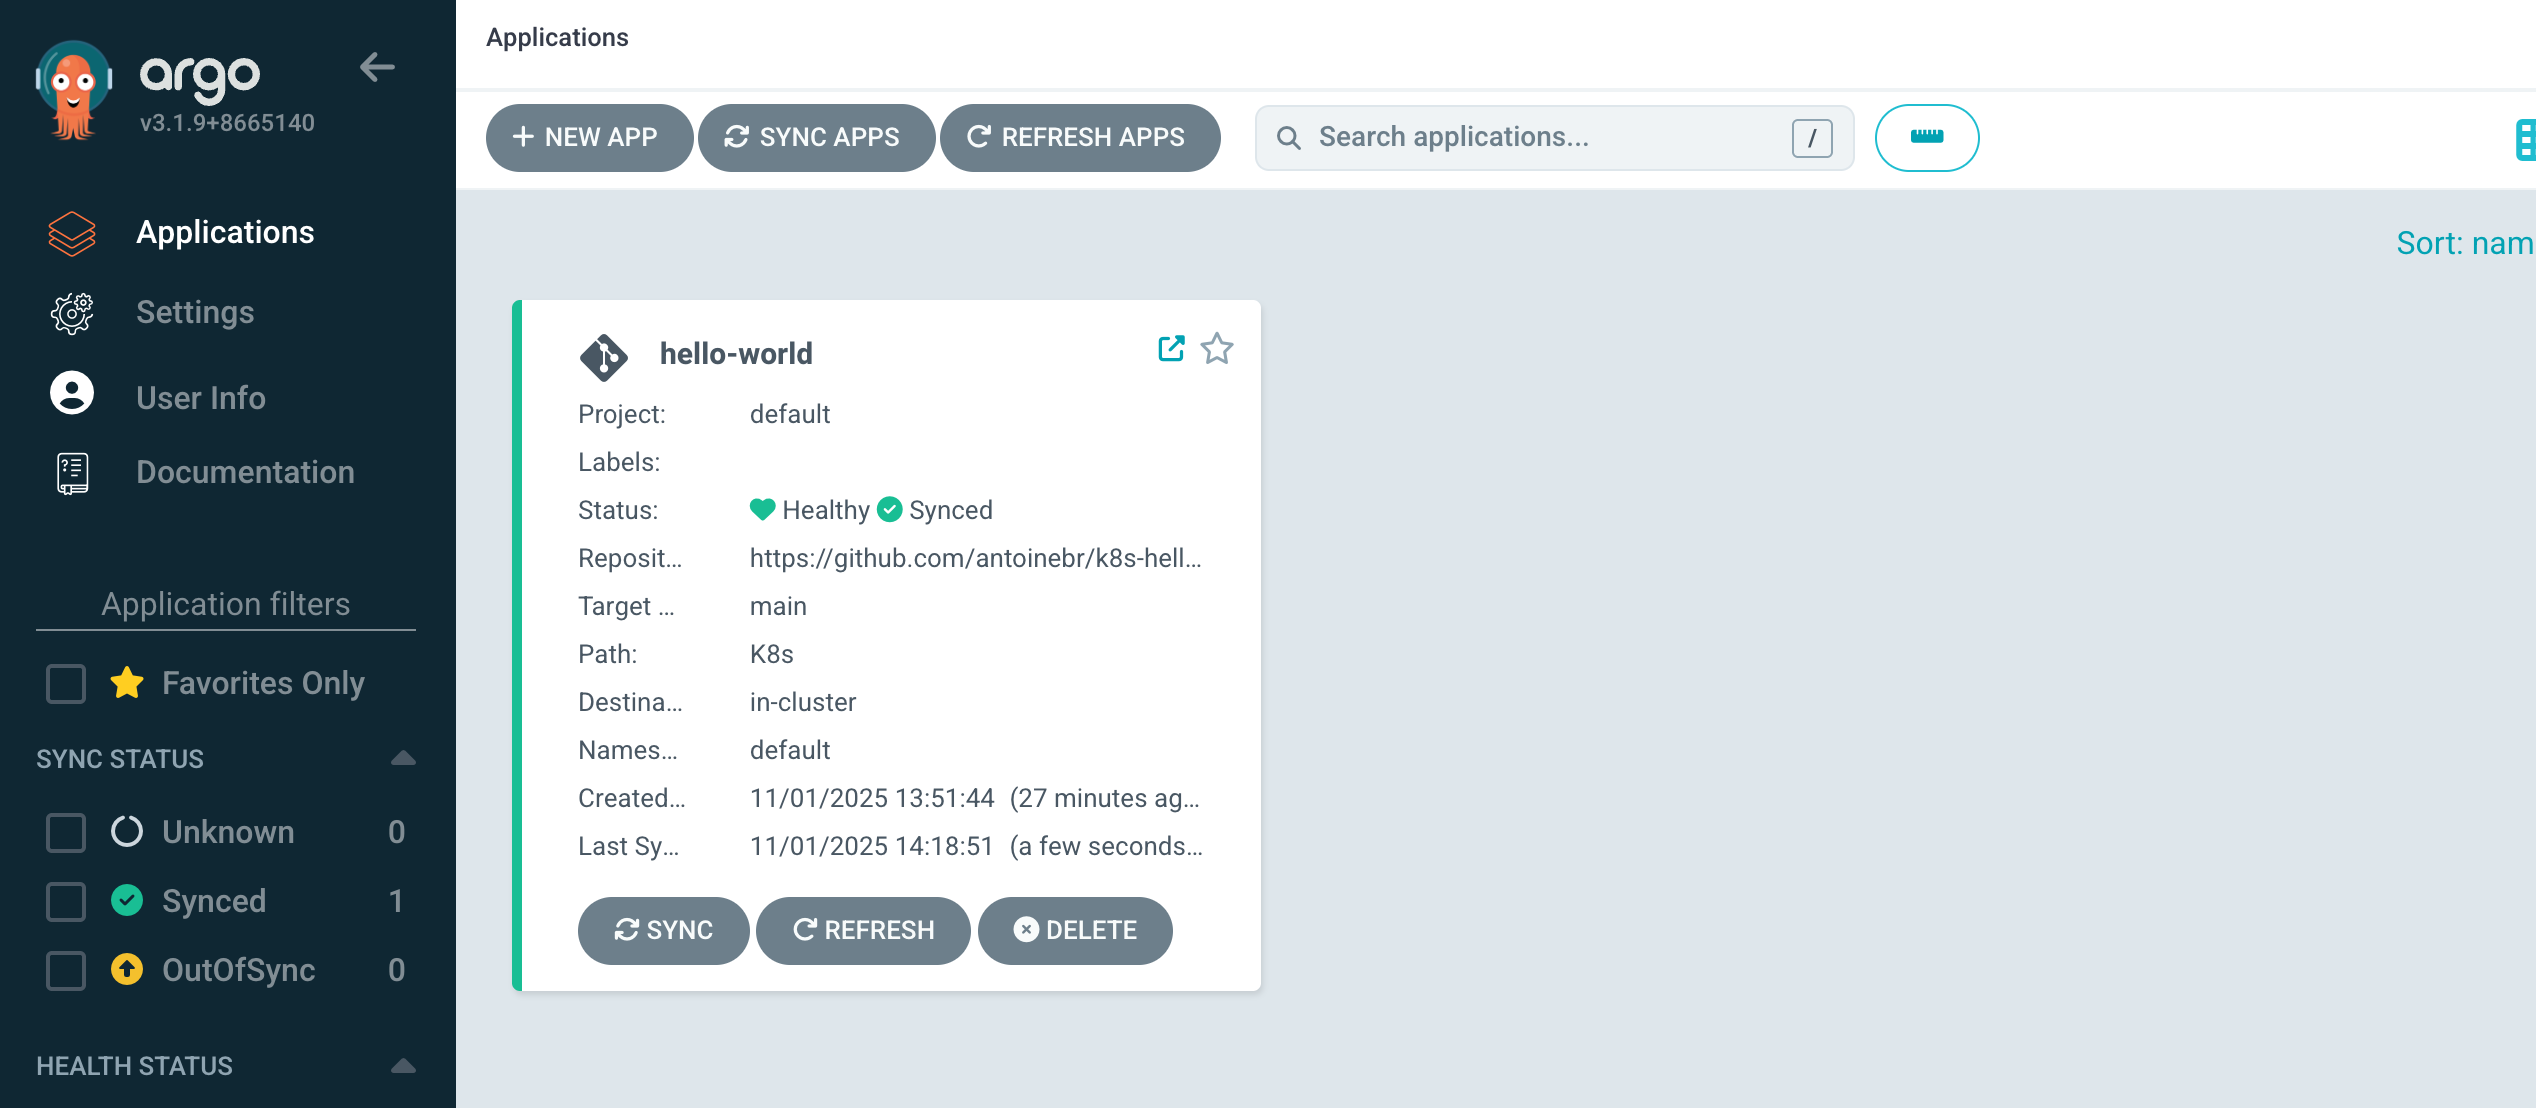
You are now in the ArgoCD dashboard!
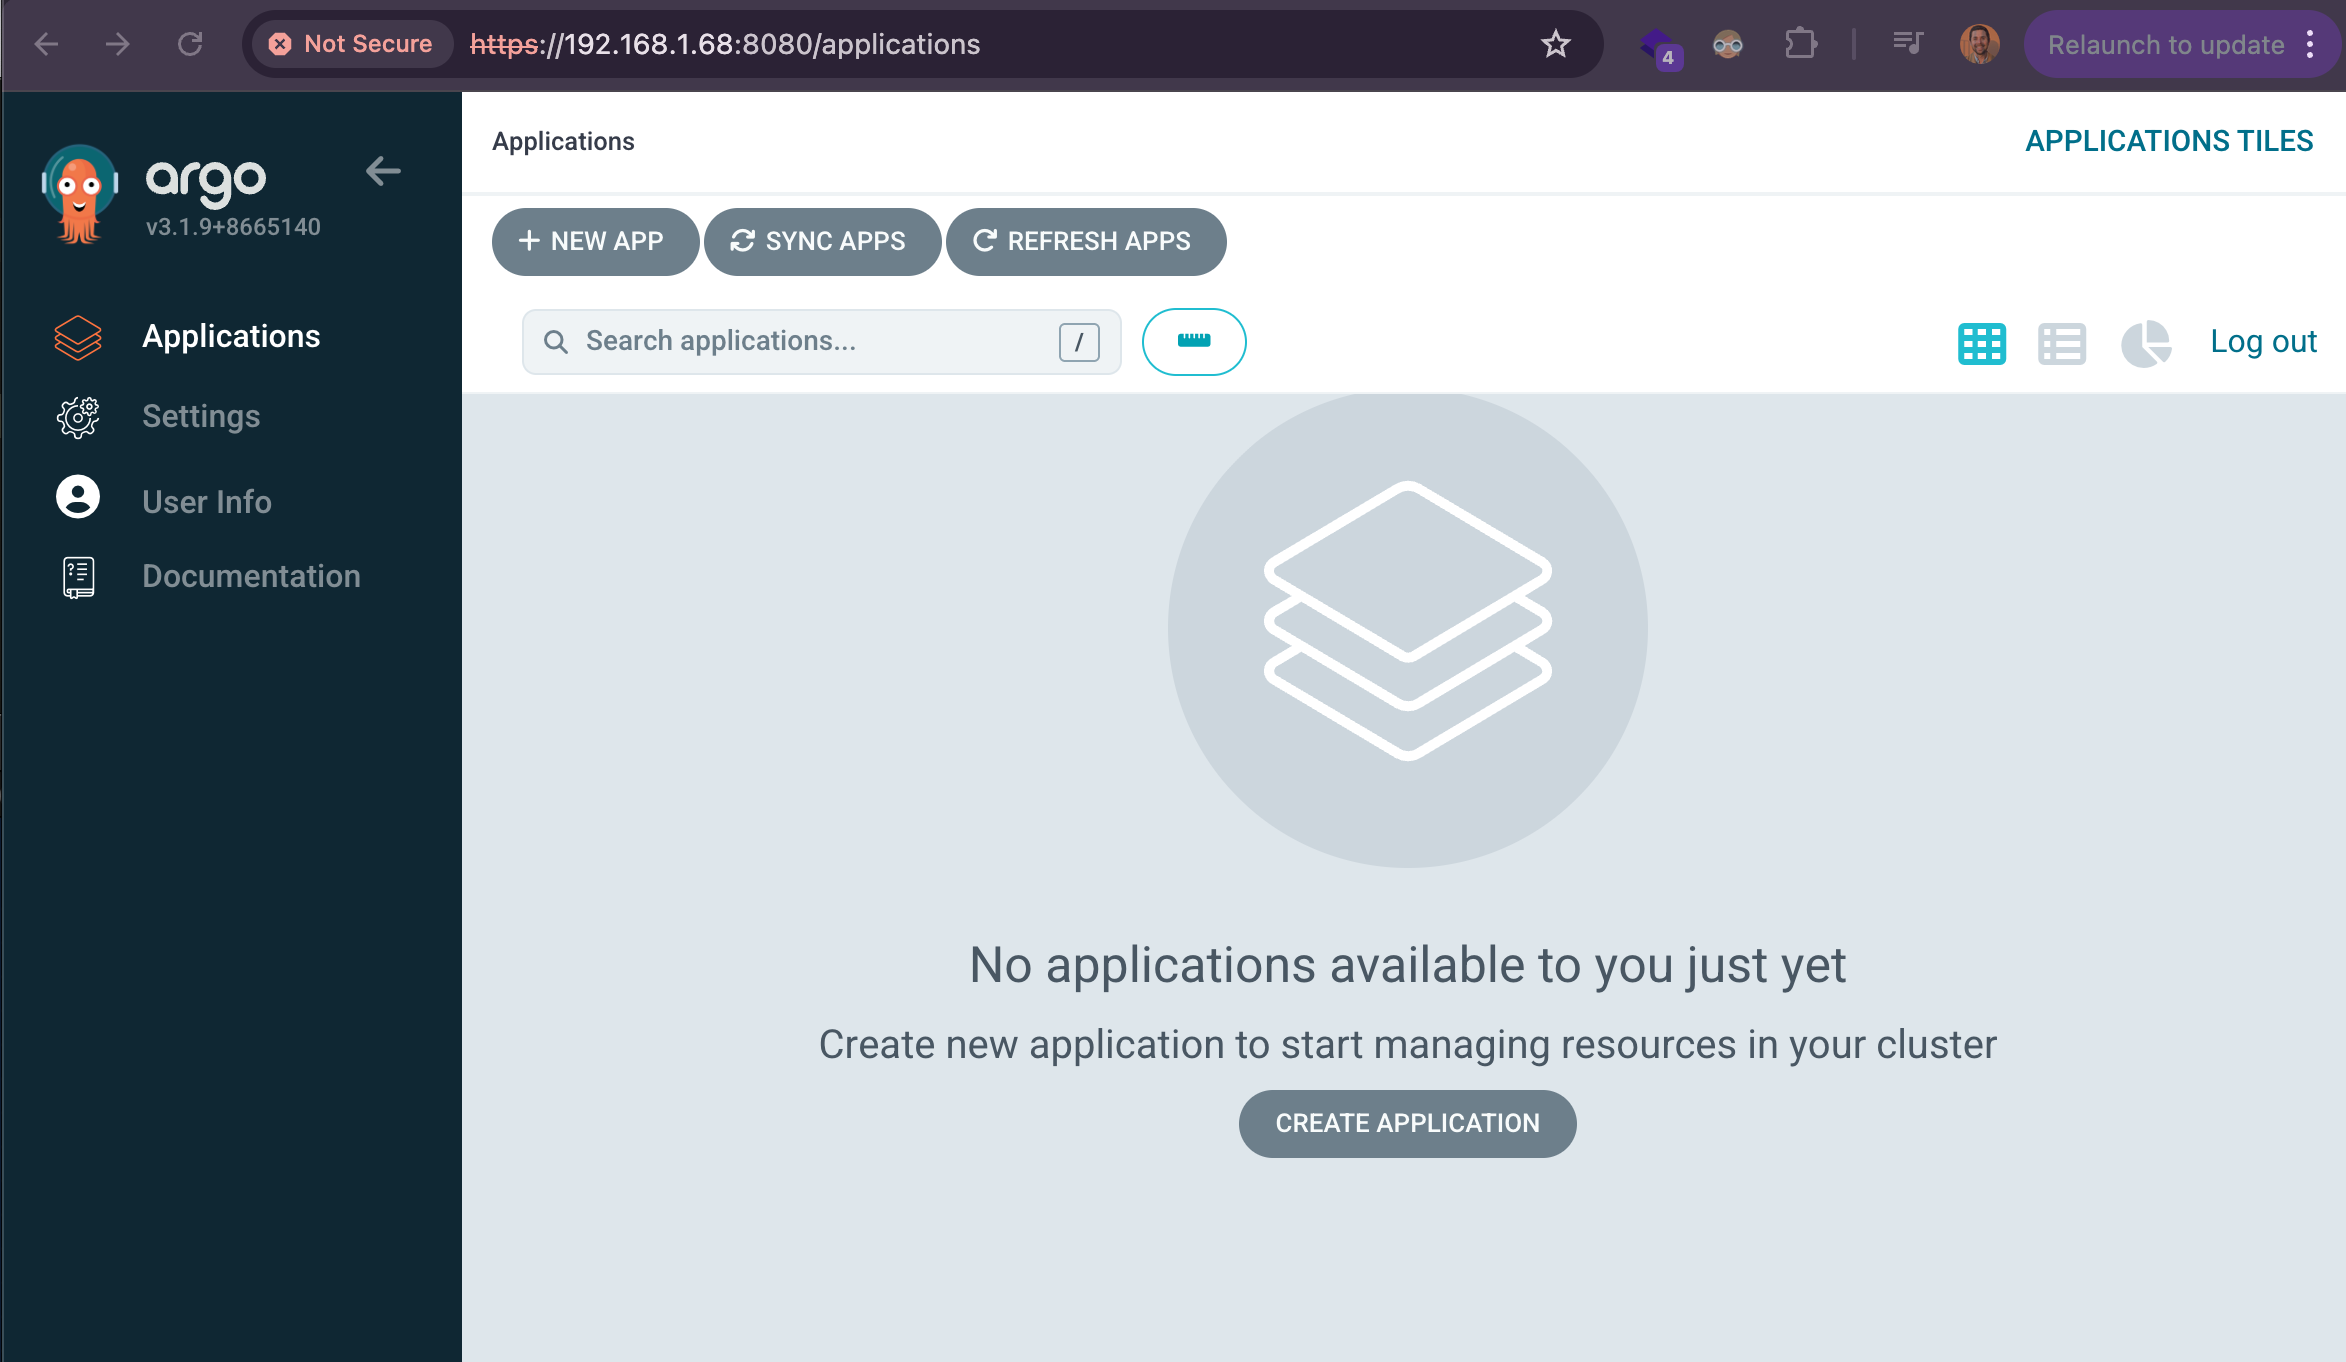
Step 2.5: Create the « Application »
This is the final step. We need to give our « robot » its instruction sheet. We’ll tell it: « Watch this Git repo, in this folder, and deploy it to this cluster. »
We’ll do this the GitOps way, by creating one more YAML file.
- On your local machine, create one last file. You can call it
argo-application.yaml(save it anywhere, this is just for you to run). -
Paste this code into it:
# MAKE SURE to change your repo URL below!

apiVersion: argoproj.io/v1alpha1
kind: Application
metadata:
  # This is the name of the "card" in the ArgoCD UI
  name: hello-world
  # Deploy this Application *into* the argocd namespace
  namespace: argocd
spec:
  project: default

  # Source: Where is the code?
  source:
    # ==========================================================
    # !! IMPORTANT !!
    # Change this to your GitHub repo's URL
    repoURL: https://github.com/antoinebr/k8s-hello-world.git
    # ==========================================================

    # This is the folder it should look inside
    path: k8s

    # It will watch the 'main' branch
    targetRevision: main

  # Destination: Where should it deploy?
  destination:
    # This means "the same cluster ArgoCD is running in"
    server: https://kubernetes.default.svc

    # Deploy the app into the 'default' namespace
    namespace: default

  # This is the magic!
  # It tells ArgoCD to automatically sync when it sees a change.
  syncPolicy:
    automated:
      prune: true    # Deletes things that are no longer in Git
      selfHeal: true # Fixes any manual changes (drift)
-
Change the
repoURLto your repo’s URL. -
Apply this one file to your cluster. This is the last time you’ll use
kubectl applyfor this app!
Run :
kubectl apply -f argo-application.yaml
Step 2.6: 🤩 Watch the Magic
Go back to your ArgoCD dashboard in your browser.
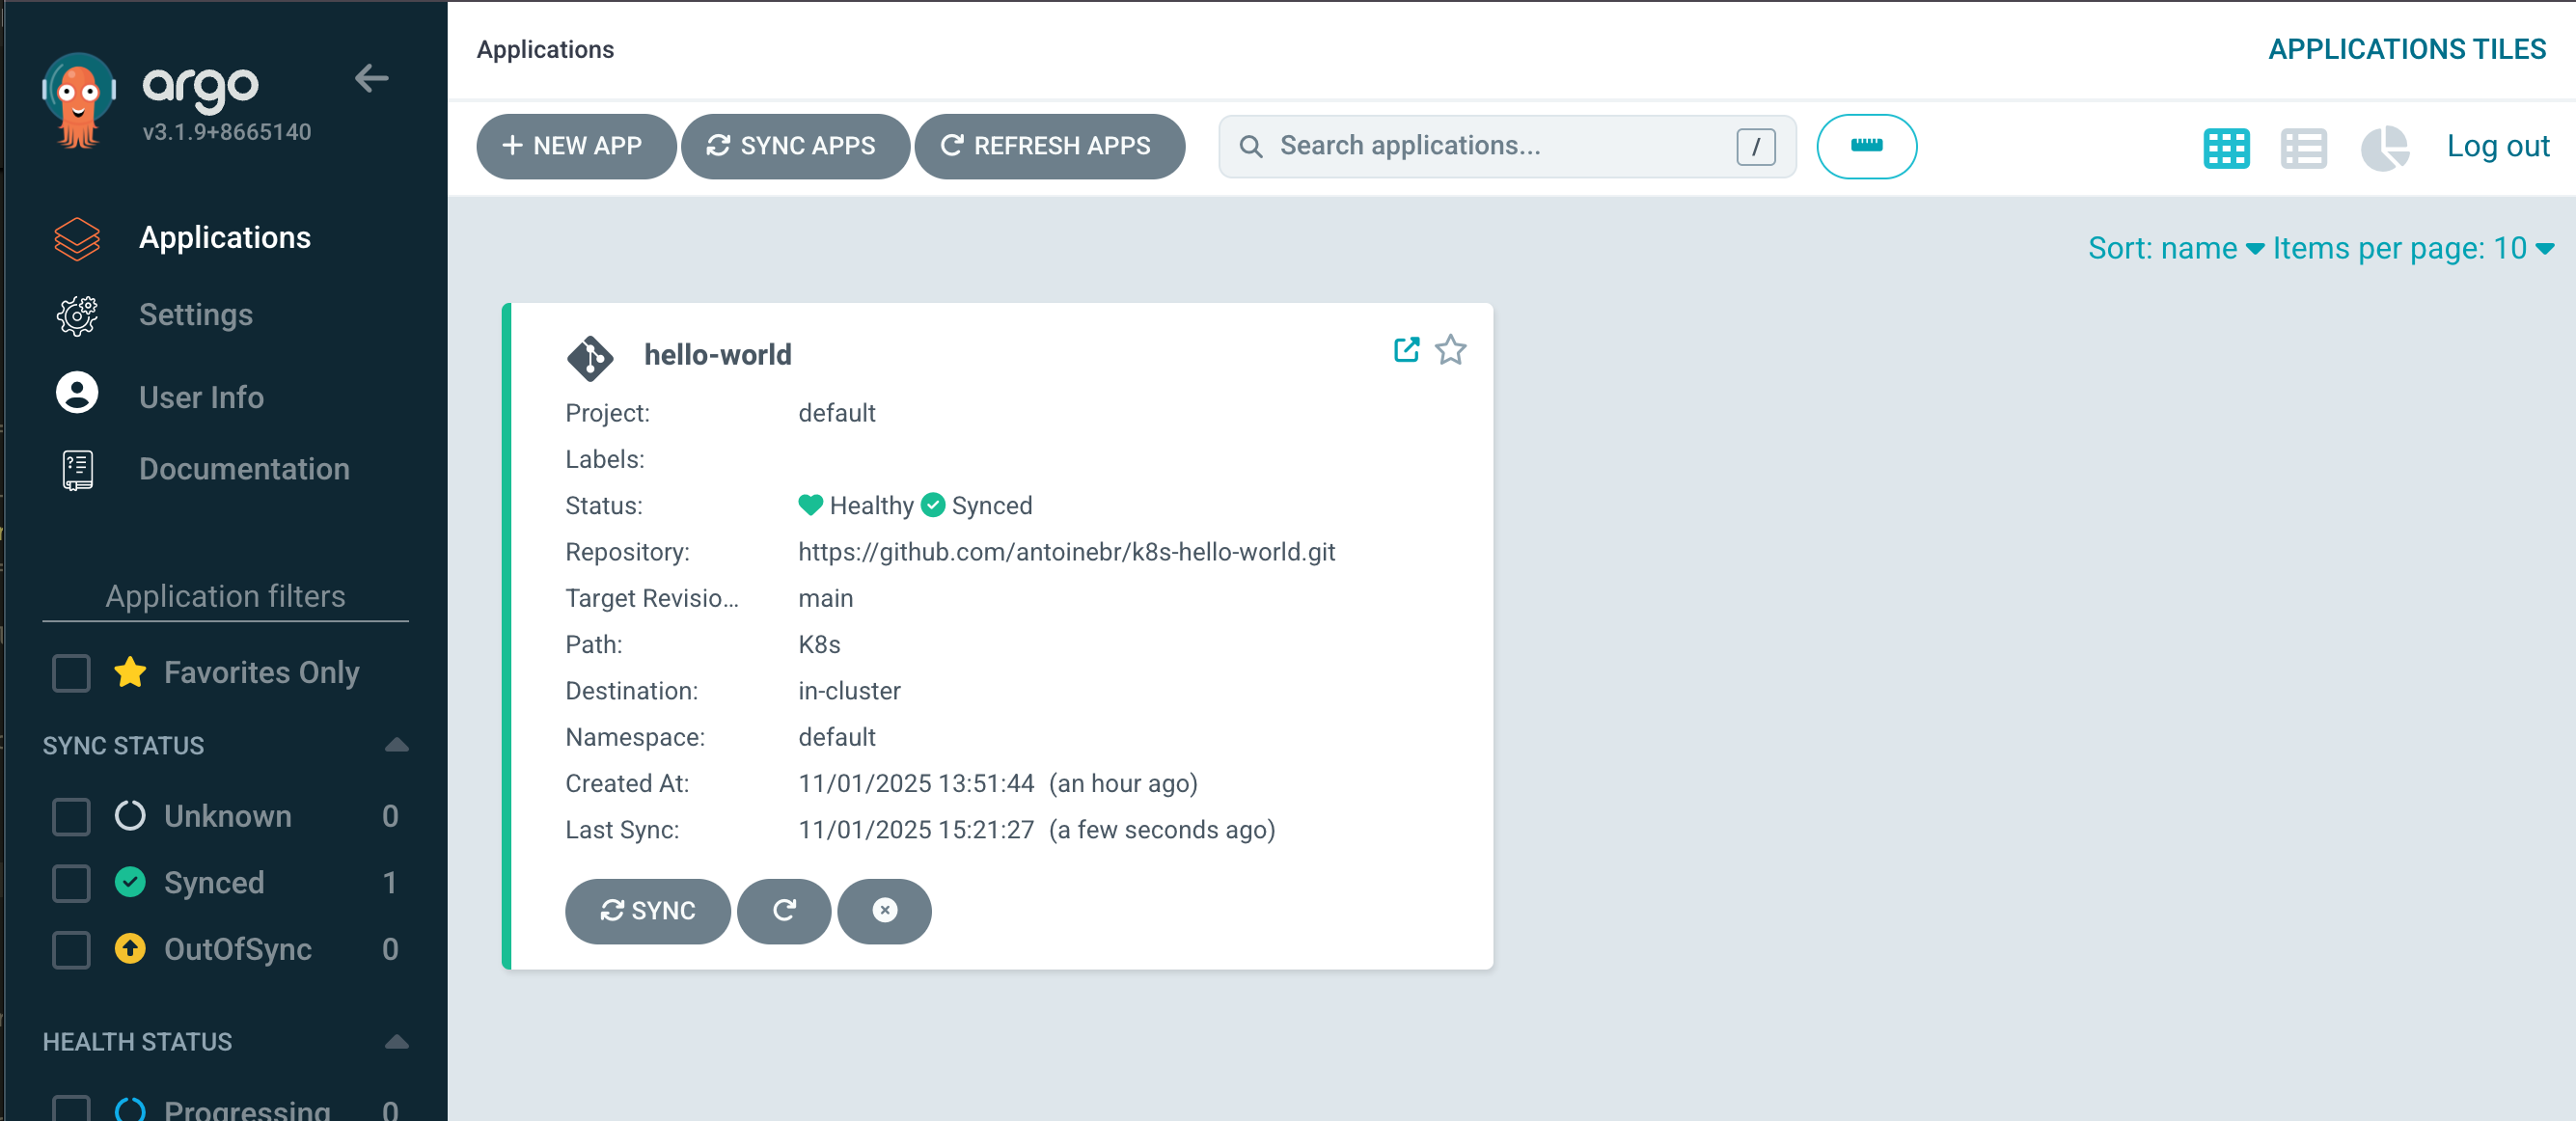
You will see a new « card » named hello-world. At first, it will say Missing and OutOfSync.
Within a few moments, ArgoCD will see the new Application. It will:
- Clone your Git repo.
-
Read the
k8s/app.yamlfile. -
Compare it to what’s in your cluster (nothing).
-
It will automatically start applying the Deployment, Service, and Ingress.
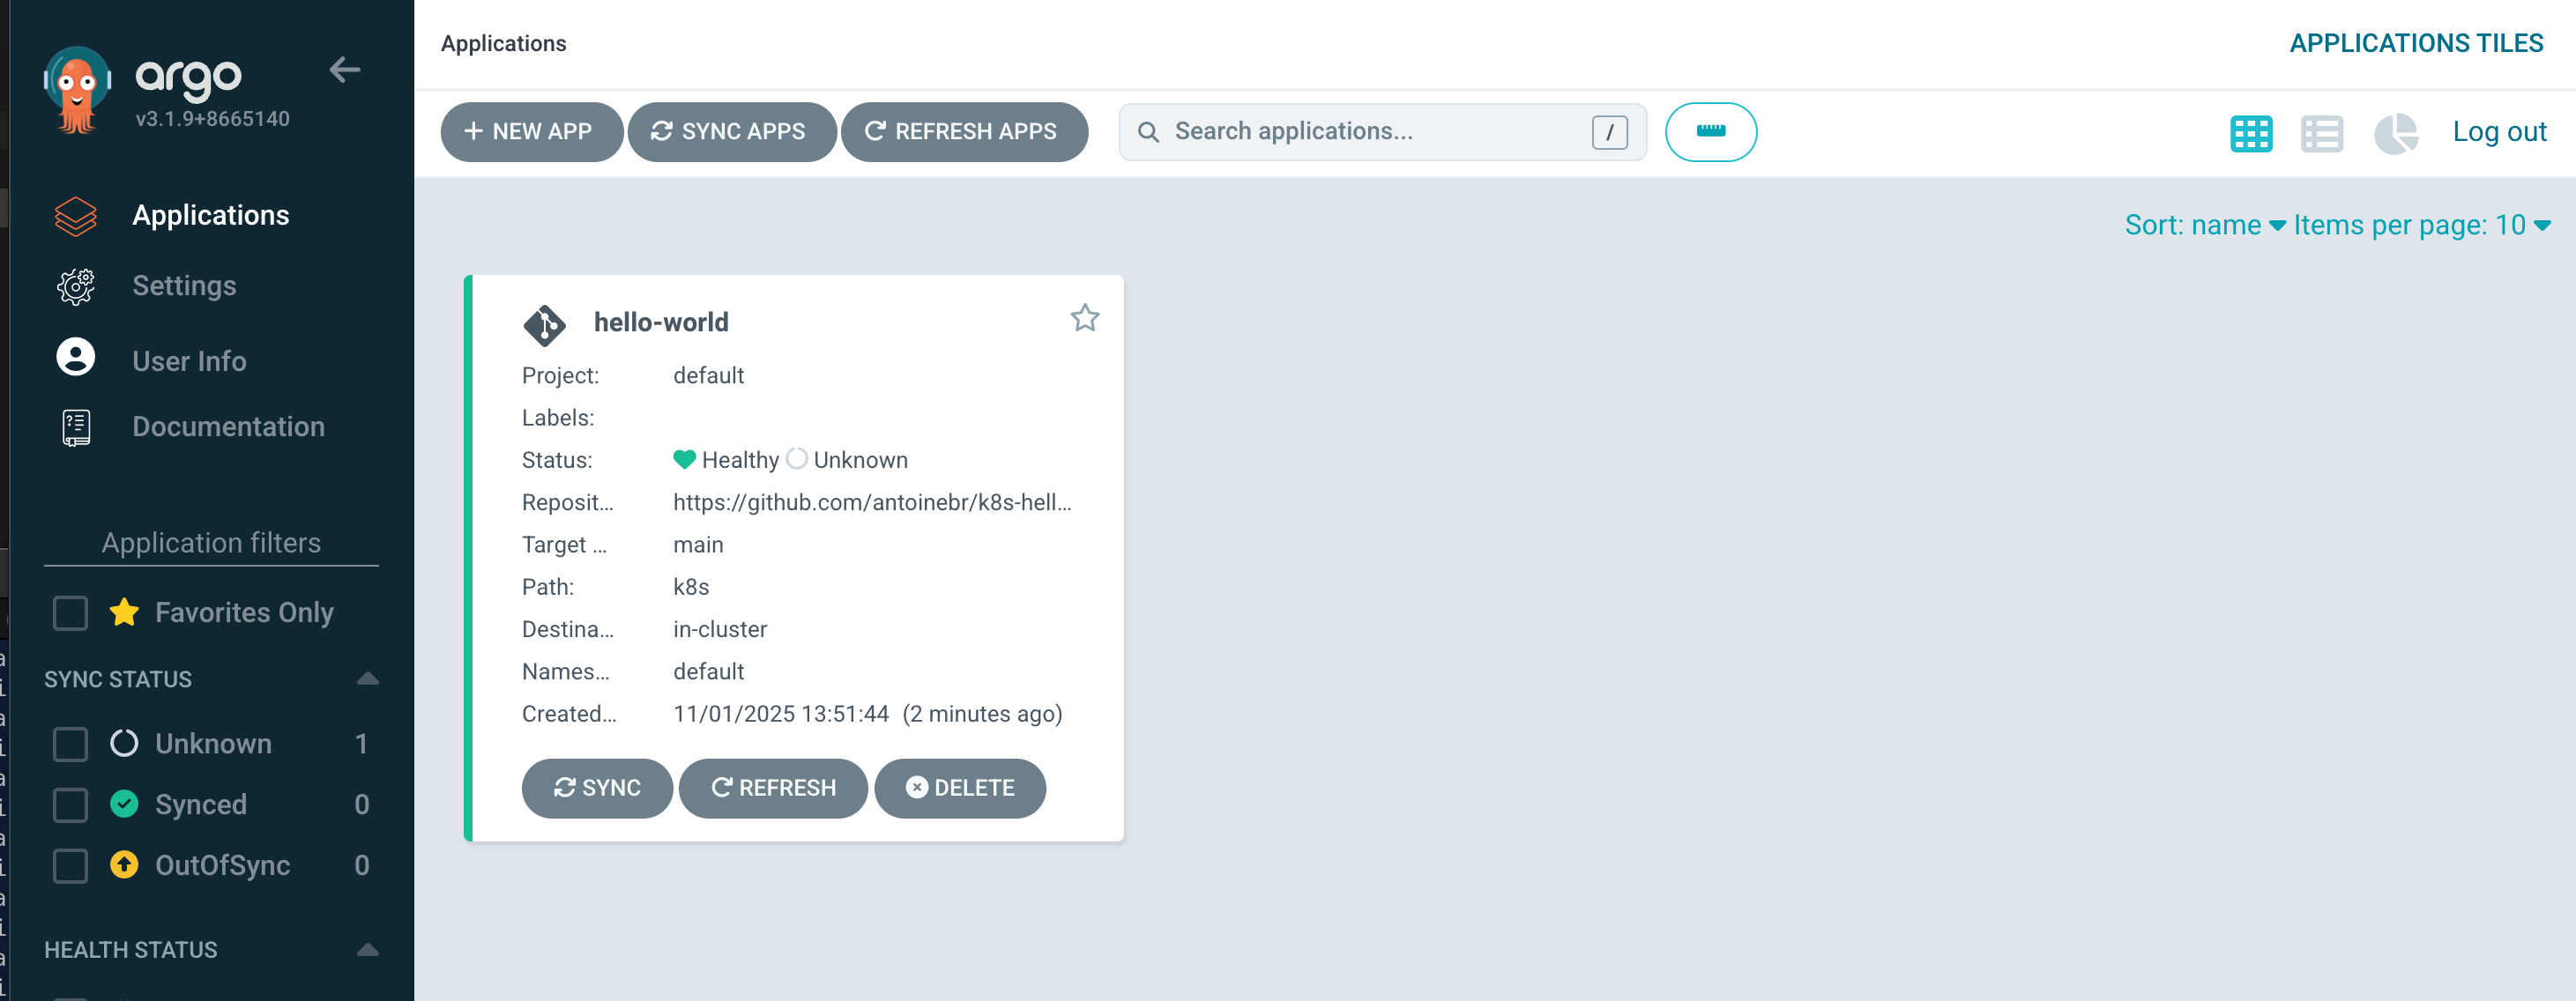
The status will change to Progressing and then, finally, to Healthy and Synced.
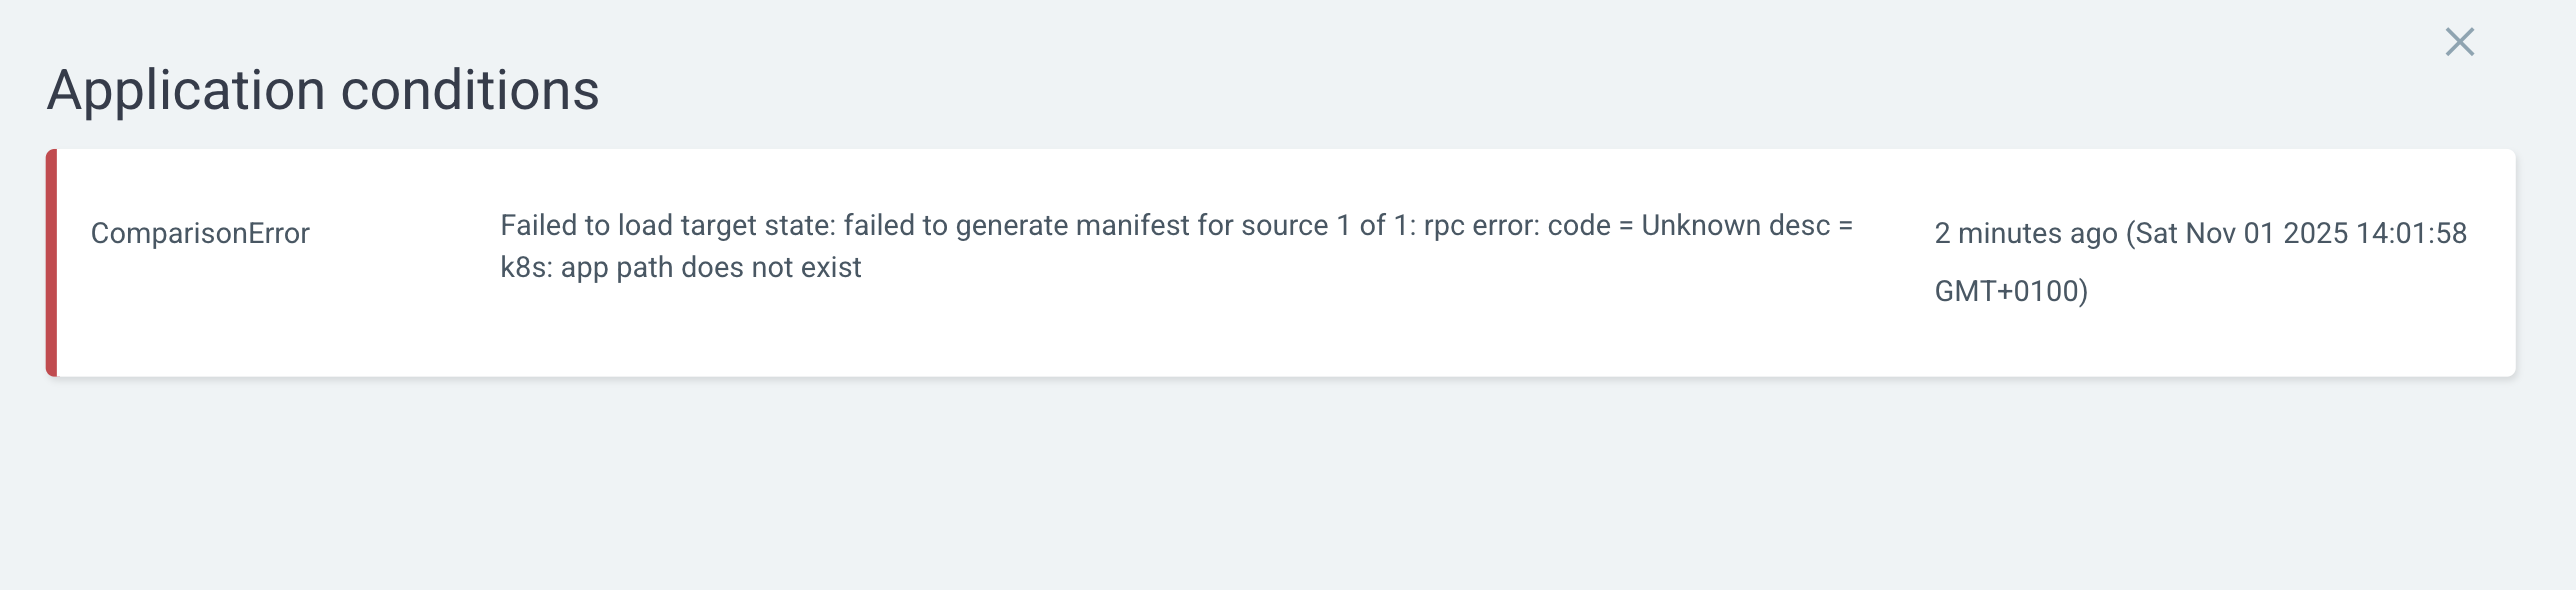
If it doesn’t Sync and the error message looks like :
ComparisonError

Failed to load target state: failed to generate manifest for source 1 of 1: rpc error: code = Unknown desc = failed to list refs: authentication required: Repository not found.
It’s because your GitHub repository is private. You can create SSH keys for Argo CD, but for this guide, let’s keep our repository public.
It means
Okay, I’m inside your GitHub repository! But you told me to look for a folder named k8s… and there’s no folder here with that name.
Let’s double check the path
path: k8s # <-- THIS LINE!
After any modification, re-run the command:
kubectl apply -f argo-application.yaml
Ok now it should look like this :
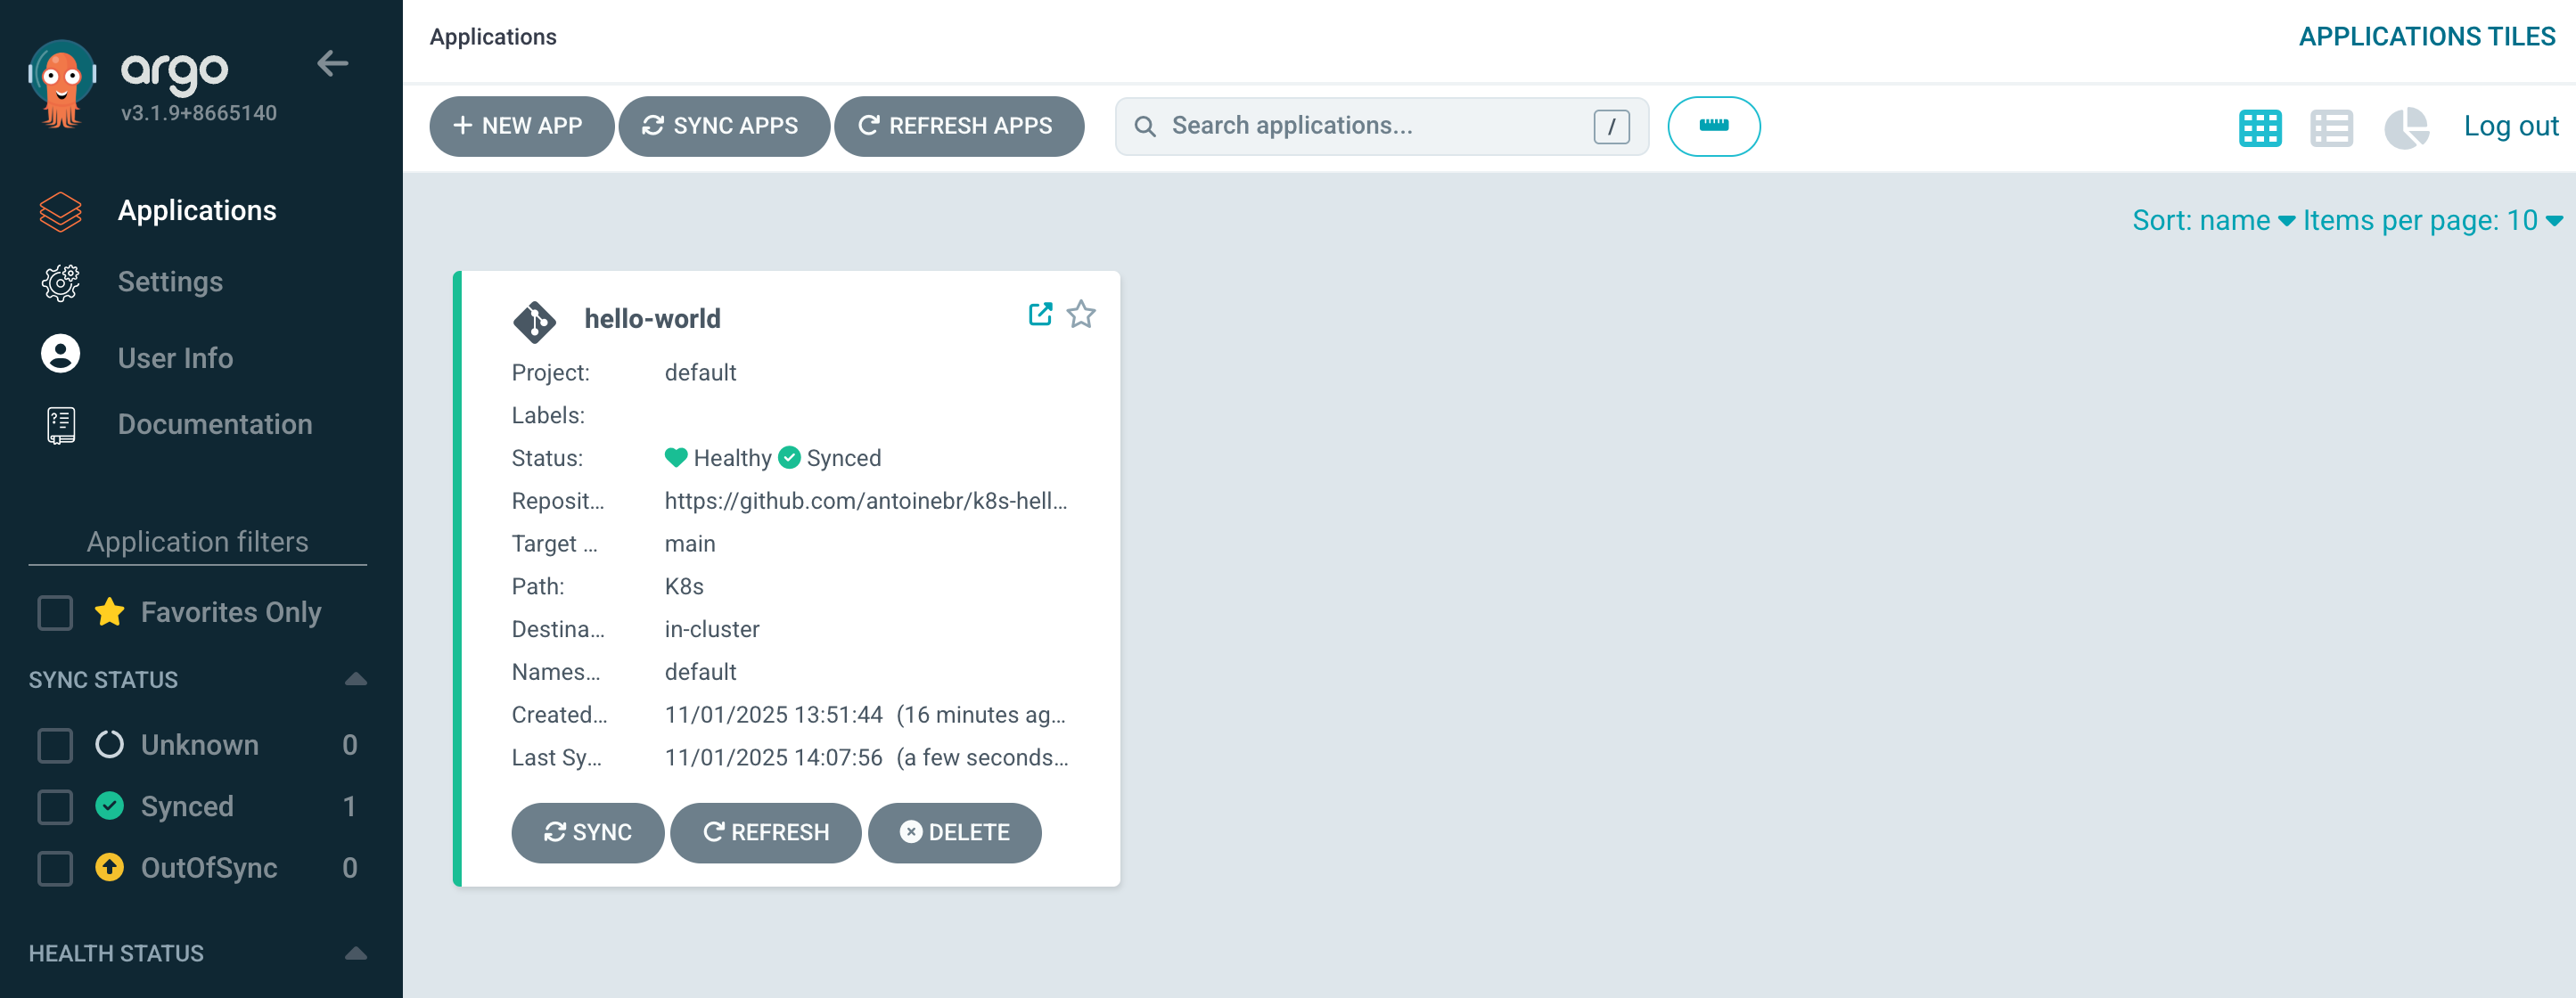
You are now deployed!
To see your app, just:
- Add your domain (e.g.,
hello.home) to your/etc/hostsfile, pointing to your K3s node’s IP. -
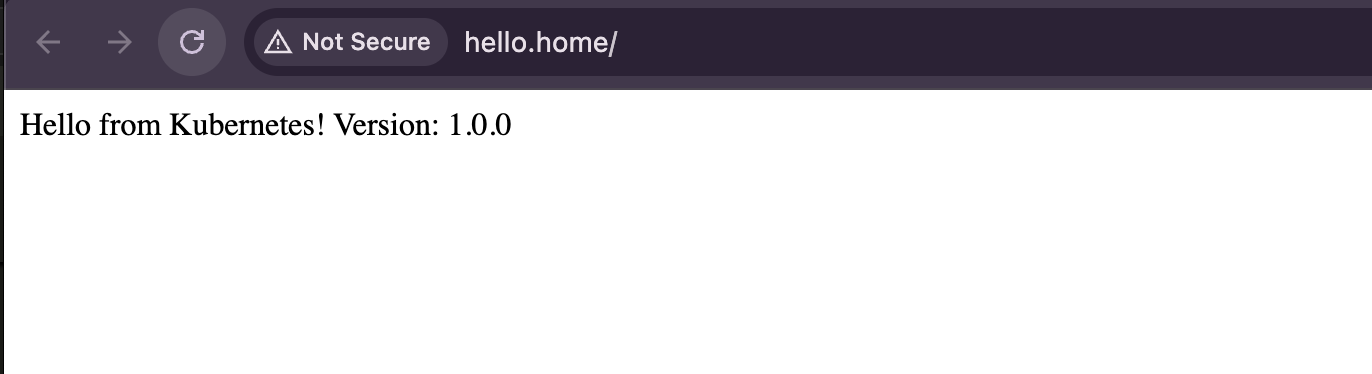
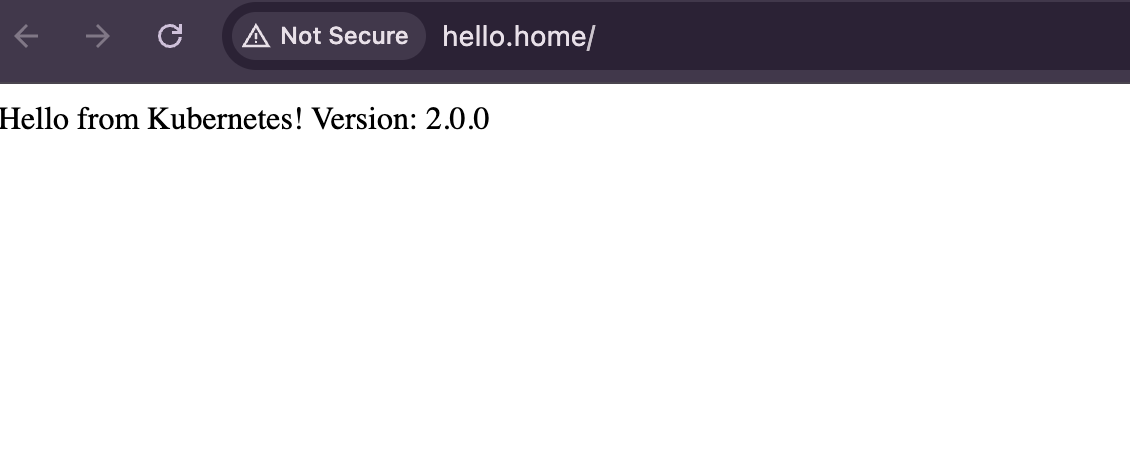
Visit `http://hello.home` in your browser.
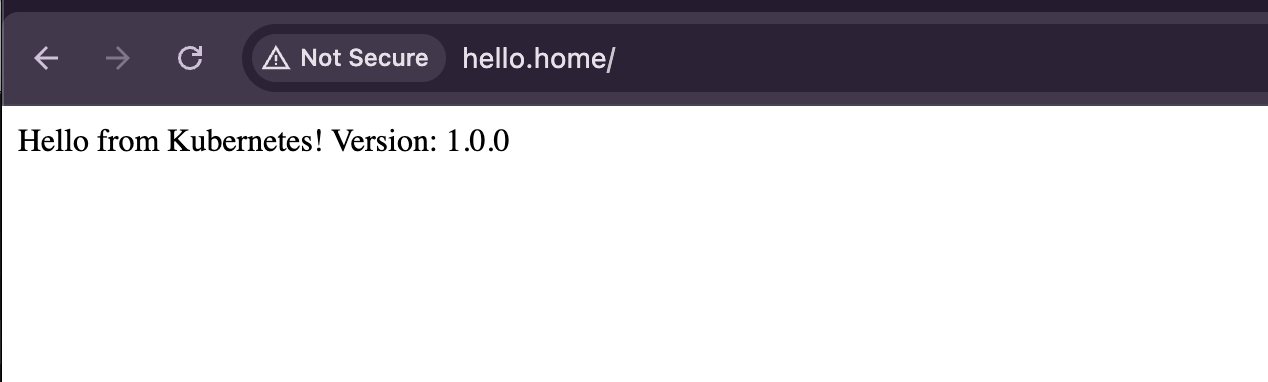
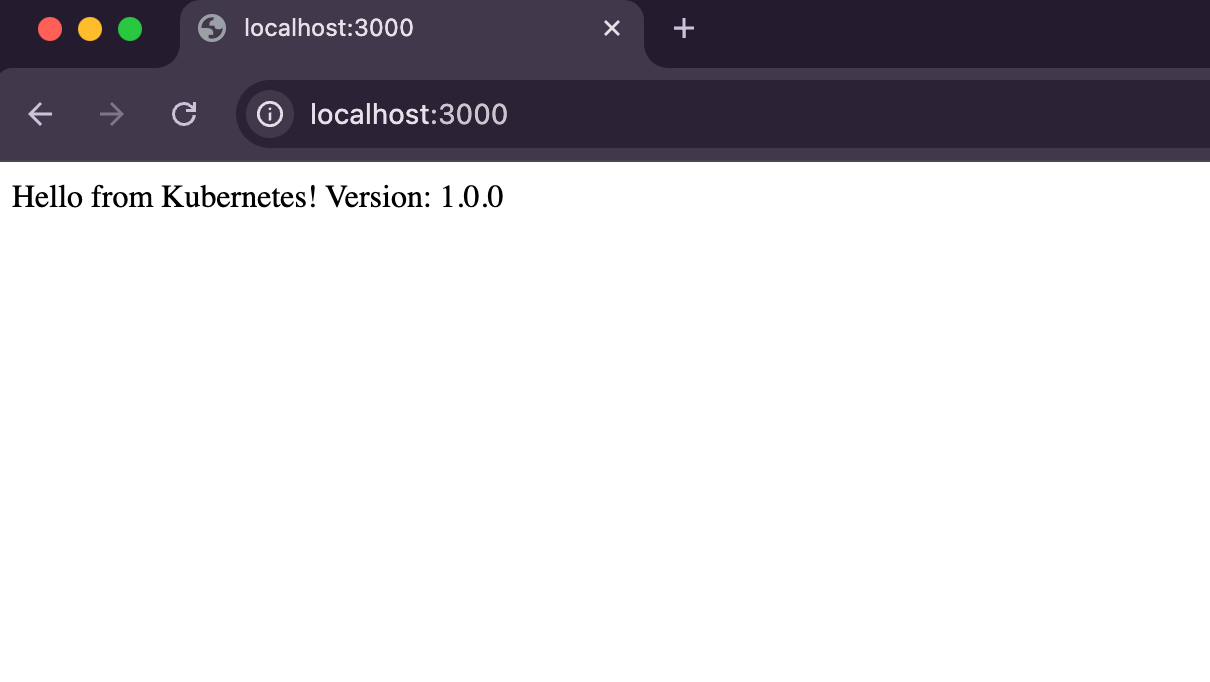
You should see: Hello from Kubernetes! Version: 1.0.0
Step 2.7: The Final Test (The Full Loop)
This is the whole point. Let’s make a change and watch it deploy automatically.
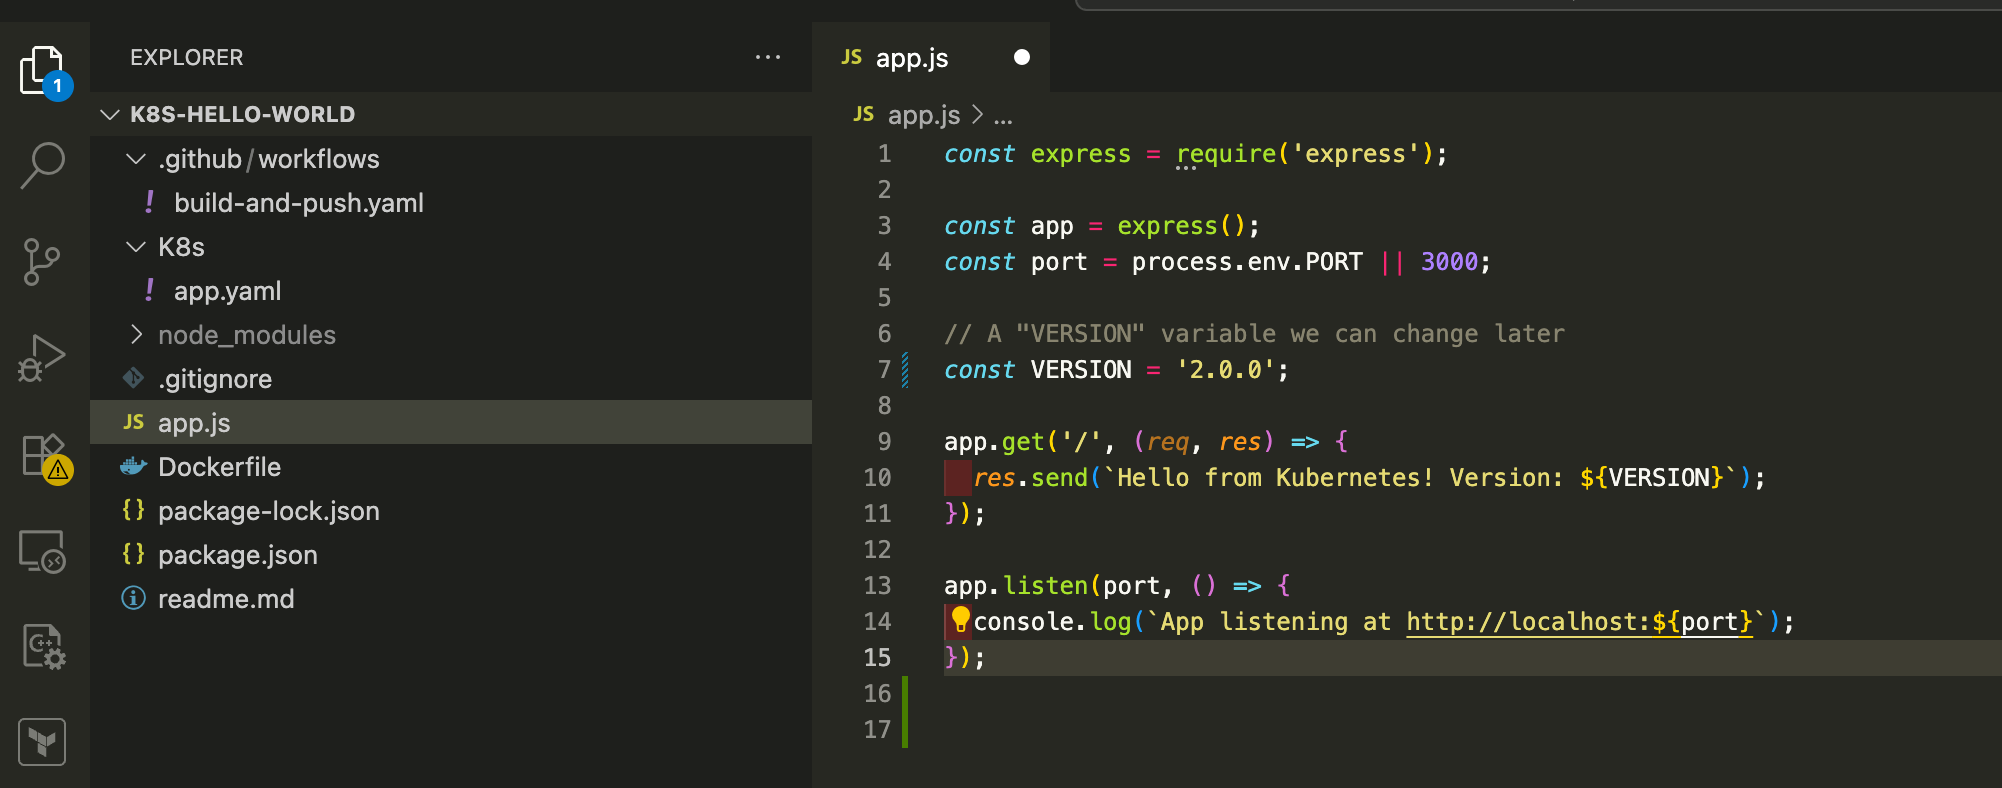
- On your local machine, open
app.js. -
Change the version:
const VERSION = '2.0.0'; -
Commit and push the change:
Now, watch what happens:
- GitHub Actions: Go to your repo’s « Actions » tab. You’ll see your
build-and-pushworkflow kick off. It’s building your v2.0.0 image and pushing it to Docker Hub with the:maintag.
ArgoCD: Wait for the GitHub Action to finish. ArgoCD checks your repo for changes every 3 minutes (by default). Because we used imagePullPolicy: Always in our Deployment, ArgoCD will detect a new version of the :main image and trigger a new sync
Now it’s in sync but maybe you noticed that we are still on Version 1.0.0 while our code is on Version 2.0.0
What happened here?
We published a new Image on the Docker hub :
antoinebr/k8s-hello-world:main
But in K8s/app.yaml the image didn’t change. So for Argo CD there’s noting to do…
image: antoinebr/k8s-hello-world:main
We need to find a way to first change our version of the image.
Run the GitHub workflow to push the image to the Docker registry.
Tell Argo CD to deploy the new image.
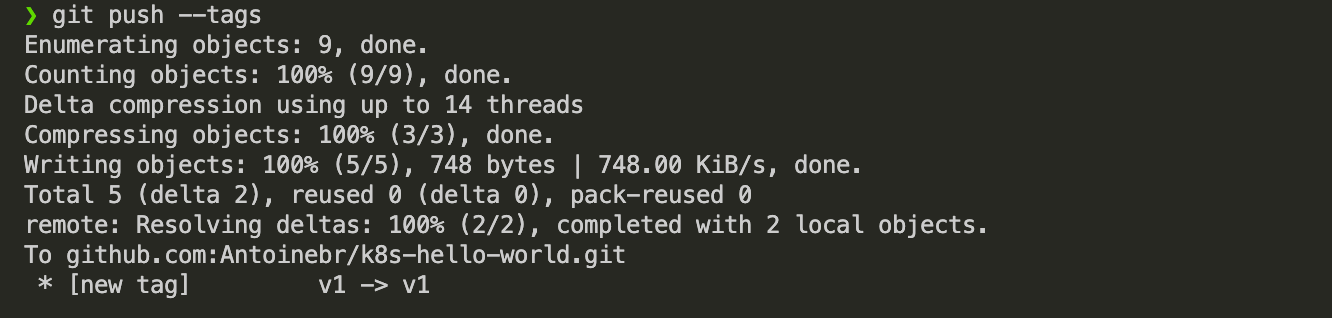
To make this happen, we will tag our code version with git tags to create new version tags.
# Make sure your main branch is up to date
git checkout main
git pull

# Create the new version tag
git tag v2

# Push all your tags to GitHub
git push --tags
The Robot’s Action (GitHub Actions): The workflow file below will see this v2 tag, build your app, and push the new Docker image: antoinebr/k8s-hello-world:v2.
Part 2: The « Deploy » Manager (You + CD)
This part is your manual « Go » button. You do this after the build in Part 1 is finished.
Your Action:
- You know the
v2image is now on Docker Hub. -
You open your
k8s/app.yamlfile. -
You manually change the
image:line to tell your cluster which version to use:
apiVersion: apps/v1
kind: Deployment
metadata:
  name: hello-world
spec:
  template:
    spec:
      containers:
      - name: app
        # You manually update this line
        image: antoinebr/k8s-hello-world:v2
...
You commit and push this one file change:
git add k8s/app.yaml
git commit -m "Deploy: Promote v2 to production"
git push
Your Final Workflow File
This is the only file you need. This code is « smart »—it creates a :main tag when you push to main (for testing) and a :v2 tag when you push a v2 tag.
File: .github/workflows/build-and-push.yaml
name: Build and Push Docker Image

on:
  push:
    # Run on pushes to the 'main' branch
    branches: [ "main" ]
    # ALSO run on pushes of tags that start with 'v' (e.g., v1, v2.0, v1.2.3)
    tags: [ 'v*' ]

jobs:
  build:
    runs-on: ubuntu-latest
    steps:
      - name: Check out the repo
        uses: actions/checkout@v4

      - name: Log in to Docker Hub
        uses: docker/login-action@v3
        with:
          username: ${{ secrets.DOCKERHUB_USERNAME }}
          password: ${{ secrets.DOCKERHUB_TOKEN }}

      # This step is smart!
      - name: Extract metadata for Docker
        id: meta
        uses: docker/metadata-action@v5
        with:
          images: ${{ secrets.DOCKERHUB_USERNAME }}/k8s-hello-world
          tags: |
            # This creates the ':main' tag on a push to main
            type=ref,event=branch

            # This creates the ':v2' tag on a push of a tag 'v2'
            type=ref,event=tag

      - name: Build and push
        uses: docker/build-push-action@v5
        with:
          context: .
          push: true
          # This 'meta' step will output the correct tag automatically
          tags: ${{ steps.meta.outputs.tags }}
          labels: ${{ steps.meta.outputs.labels }}
Step 1 : Push Your New Workflow File
First, make sure the new build-and-push.yaml file (the one that builds based on tags) is in your main branch.
### Push Your New Workflow File
git add .github/workflows/build-and-push.yaml git commit -m "Update CI to build from Git tags" git push
Step 2 : Create Your First « Release » (Build the v1 Image)
Now, let’s play the role of the developer releasing « Version 1 » of your app.
On your local machine, create a Git tag named v1:
git tag v1
Push your tags to GitHub. This is the trigger for your CI build.
Bash
git push --tags
Watch the « Build » Robot (GitHub Actions):
- Go to your GitHub repo’s « Actions » tab.
-
You will see a new workflow run, triggered by your
v1tag.


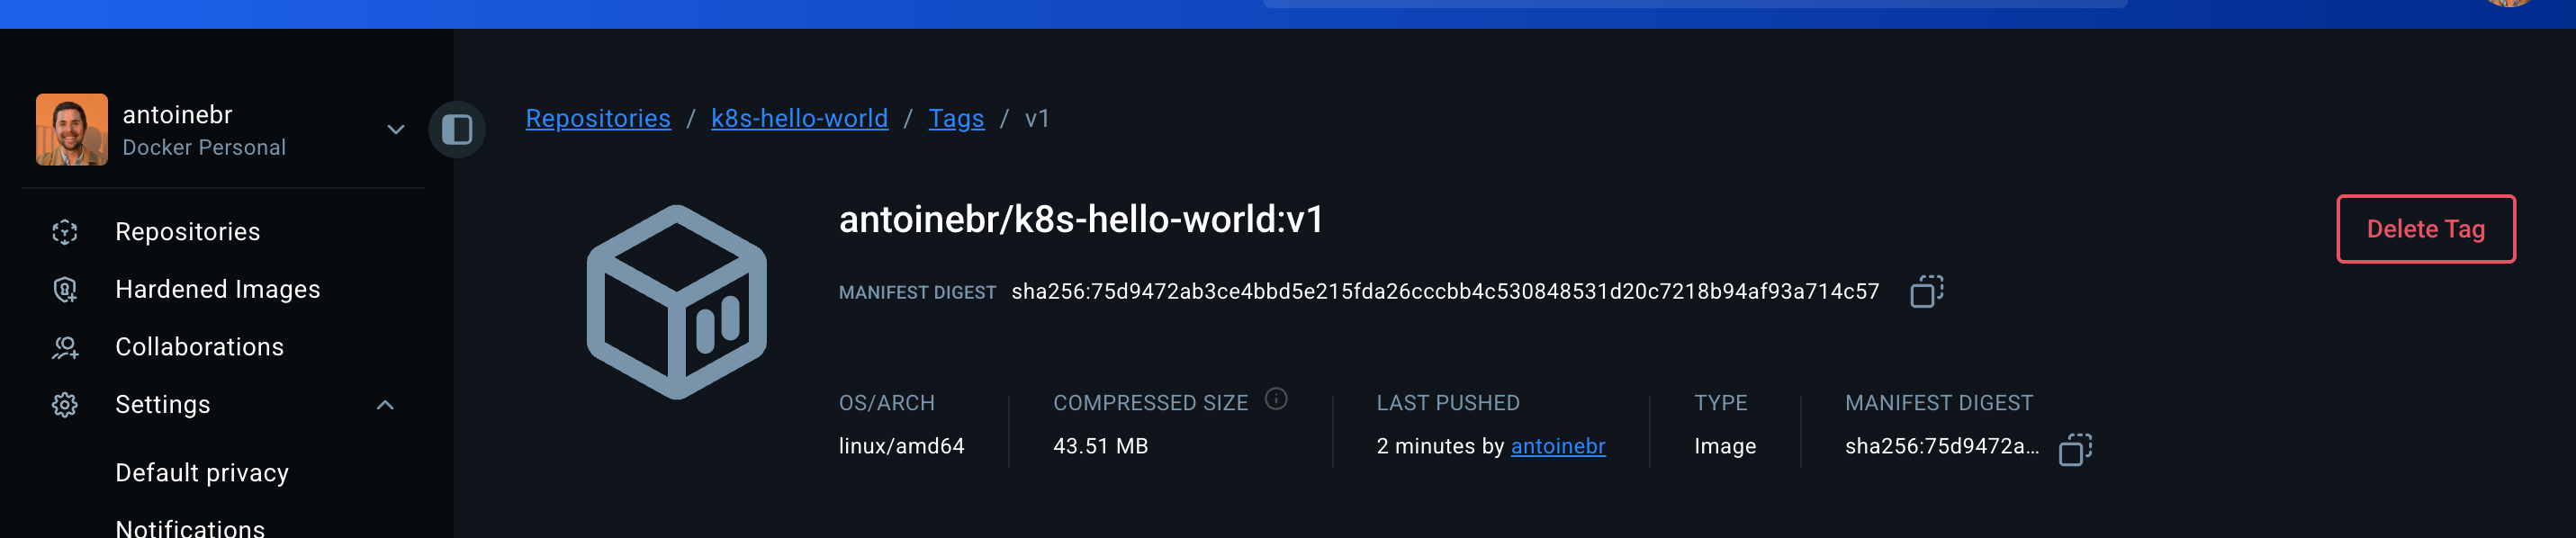
- Wait for it to finish. When it’s done, your
v1image (antoinebr/k8s-hello-world:v1) is now on Docker Hub.
Step 3: « Deploy » Your v1 Release
You are now the « Release Manager. » The build is done. It’s time to tell ArgoCD to deploy it.
- On your local machine, manually edit
k8s/app.yaml. -
Change the
image:line to point to the new, permanentv1tag:
  spec:
    containers:
    - name: app
      # Before: image: antoinebr/k8s-hello-world:main (or something else)
      # After:
      image: antoinebr/k8s-hello-world:v1
Commit and push this change. This is your « Go » button.
git add k8s/app.yaml
git commit -m "Deploy: Promote v1 to production"
git push origin main
Step 4: Watch the « Deploy » Robot (ArgoCD)
- Open your ArgoCD dashboard.
-
You will see your
hello-worldapplication change toOutOfSync(because the Gitimage:is now different from the cluster’simage:). -
ArgoCD will automatically start syncing. It will see the new
v1tag. -
It will perform a rolling update in your K3s cluster. The status will go to
Progressingand thenHealthyandSyncedagain.
Step 5: Verify Your v1 App is Live!
- Add your domain (e.g.,
hello.home) to your/etc/hostsfile (if you haven’t already). -
Go to `http://hello.home` in your browser.
CheatSheet : How to Publish & Deploy a New Version
Step 0: Code a new version
Code you version then commit
git commit -a -m "My new feature for v3"

git push
Step 1: Build a New Release (Your Job -> GitHub)
This tells your CI « robot » (GitHub Actions) to build and publish a new, permanent Docker image.
- Tag your code: (Replace
v2with your new version, e.g.,v3)
git tag v3
Push the tag:
git push --tags
Verify: Go to your GitHub Actions tab and watch the build finish. Check Docker Hub to see your new v2 image.
Step 2: Deploy the New Release (Your Job -> ArgoCD)
This tells your CD « robot » (ArgoCD) to pull the new image and update your cluster.
- Edit
k8s/app.yaml: Manually change theimage:line to the new tag you just built.
...
  spec:
    containers:
    - name: app
      # Change this line
      image: antoinebr/k8s-hello-world:v2
...
Commit and push the change:
git add K8s/app.yaml
git commit -m "Deploy: Promote v2"
git push
Verify: Go to your ArgoCD dashboard. Watch your app sync up. Refresh your website to see the change!