03/11/2025
Why Helm Charts are So Useful
Think of Helm as apt or brew for Kubernetes.
You’ve just seen that deploying even a « simple » app like WordPress requires at least 5-6 separate YAML files (Deployment, Service for WP, Deployment, Service for MySQL, Secret, PVCs, Ingress).
Helm bundles all of those YAML files into a single package called a Chart.
This gives you three huge advantages:
- Simple Installs: Instead of
kubectl apply -f ...six times, you just run one command:helm install my-wordpress .... -
Easy Configuration: You don’t have to edit 5 different YAML files to change a password or domain name. The chart provides one single
values.yamlfile to set all your options. -
Clean Lifecycle: When you’re done, you don’t have to remember to delete the
Deployment,Service,Secret, andIngress. You just runhelm uninstall my-wordpress, and Helm removes everything it created.
Install
It’s important to understand that it makes more sense to install and execute Helm on your workstation instead of the master node.
curl https://raw.githubusercontent.com/helm/helm/main/scripts/get-helm-3 | bash
Let’s Deploy a Basic App: Nginx
Let’s use Helm to deploy a simple Nginx server. This chart will install Nginx and automatically expose it with a Service.
Step 1: Add the Chart Repository
A « repository » is just a place that hosts charts. We’ll add the bitnami repository, which has thousands of popular apps.
helm repo add bitnami https://charts.bitnami.com/bitnami
helm repo update
This just tells Helm where to find the « bitnami » charts.
Step 2: Install the App
This one command will download the chart, configure all the YAML files in the background, and apply them to your cluster.
Bash
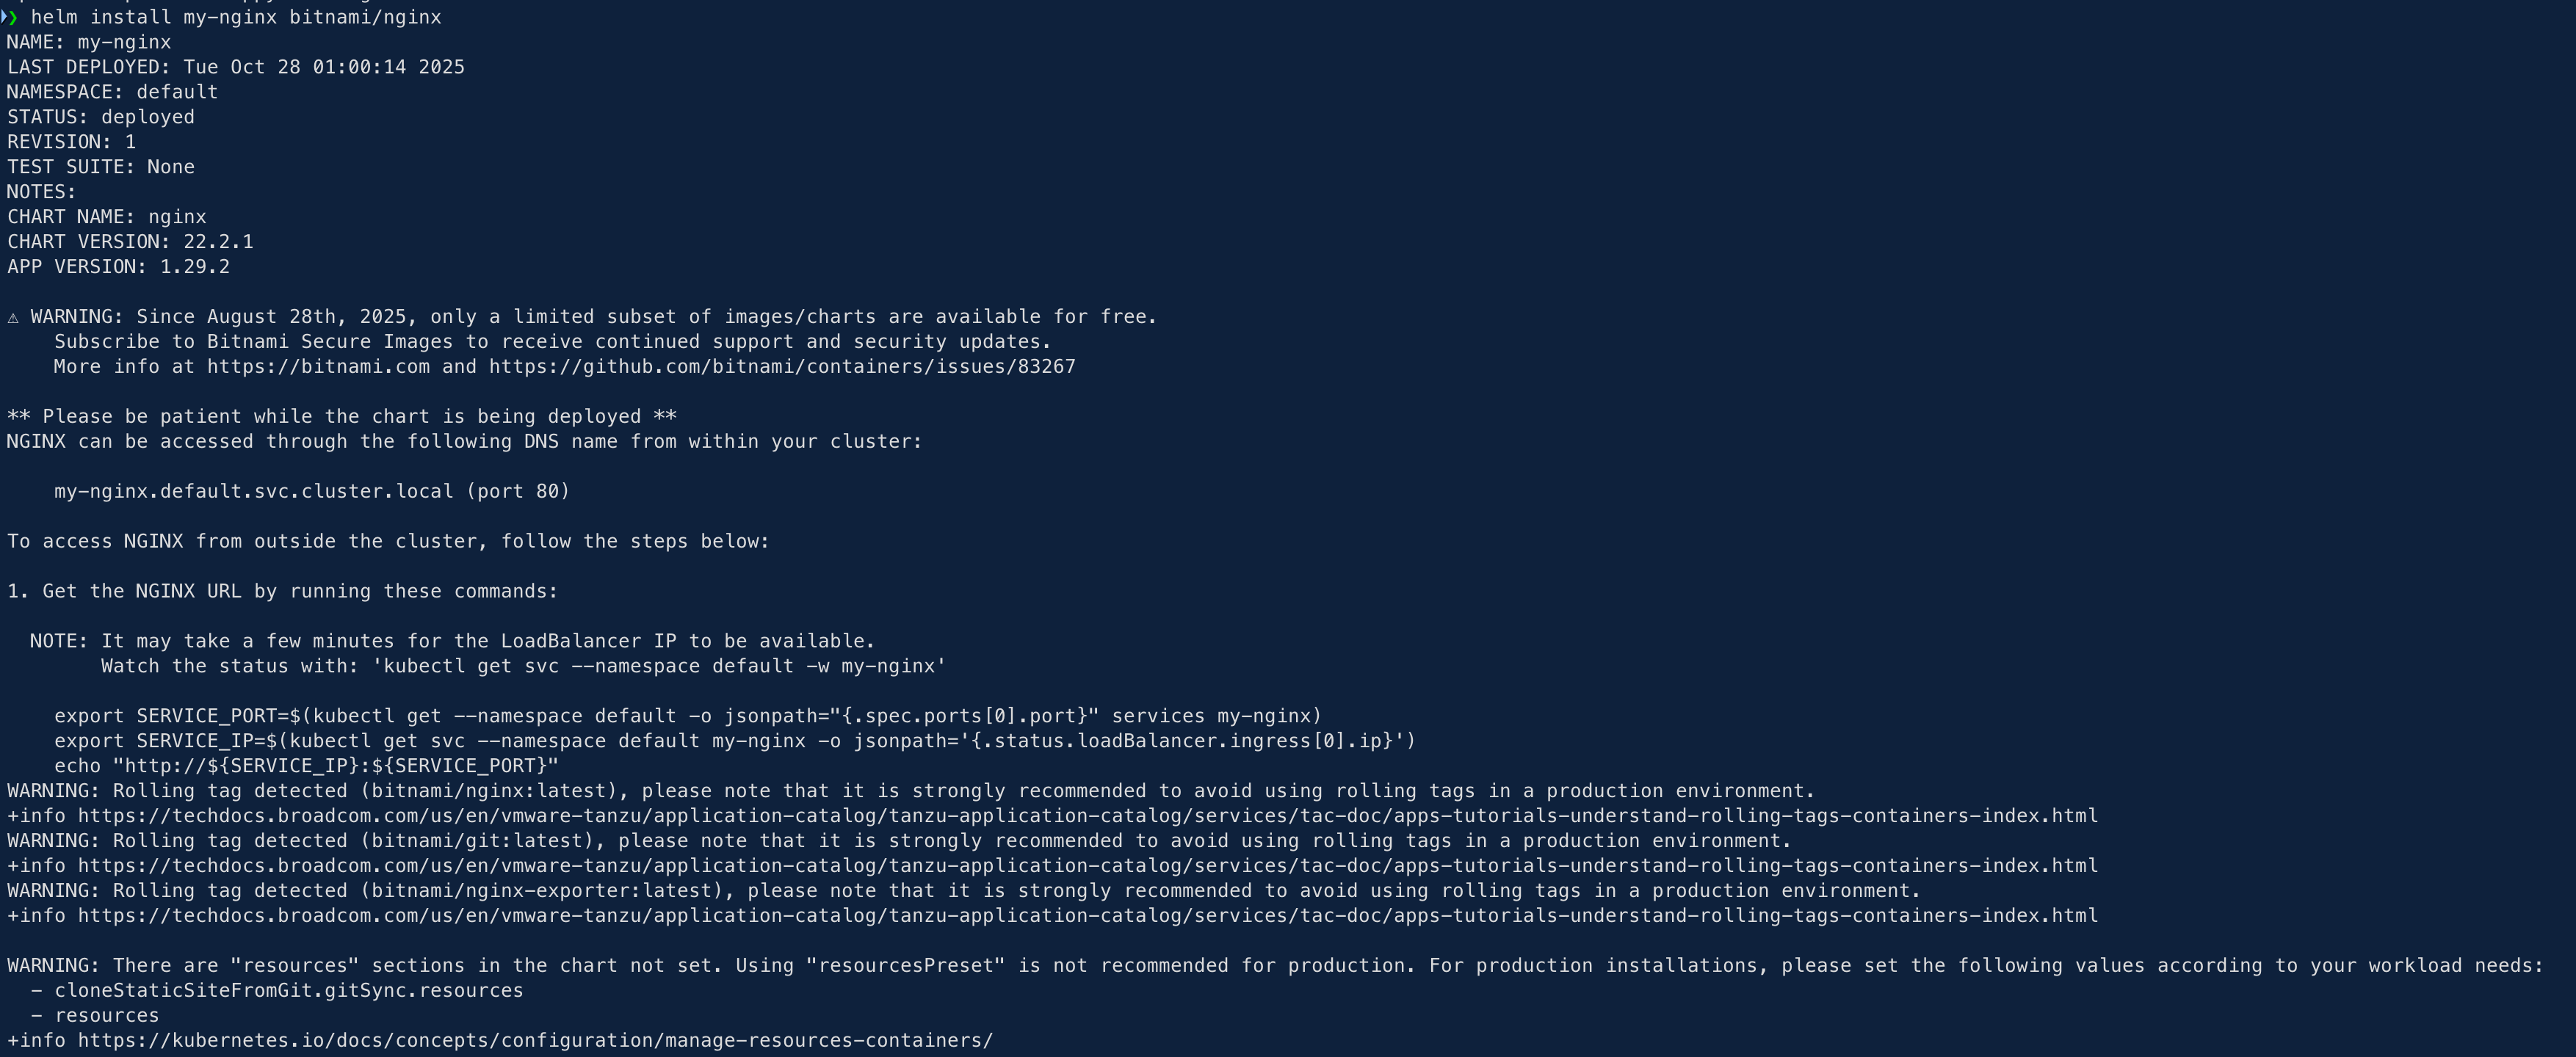
helm install my-nginx bitnami/nginx
You’ll see a big output, but the important part is: NAME: my-nginx STATUS: deployed
Step 3: See What Helm Did
First, you can ask Helm what it’s managing:
Bash
helm ls
You’ll see your new « release » named my-nginx.
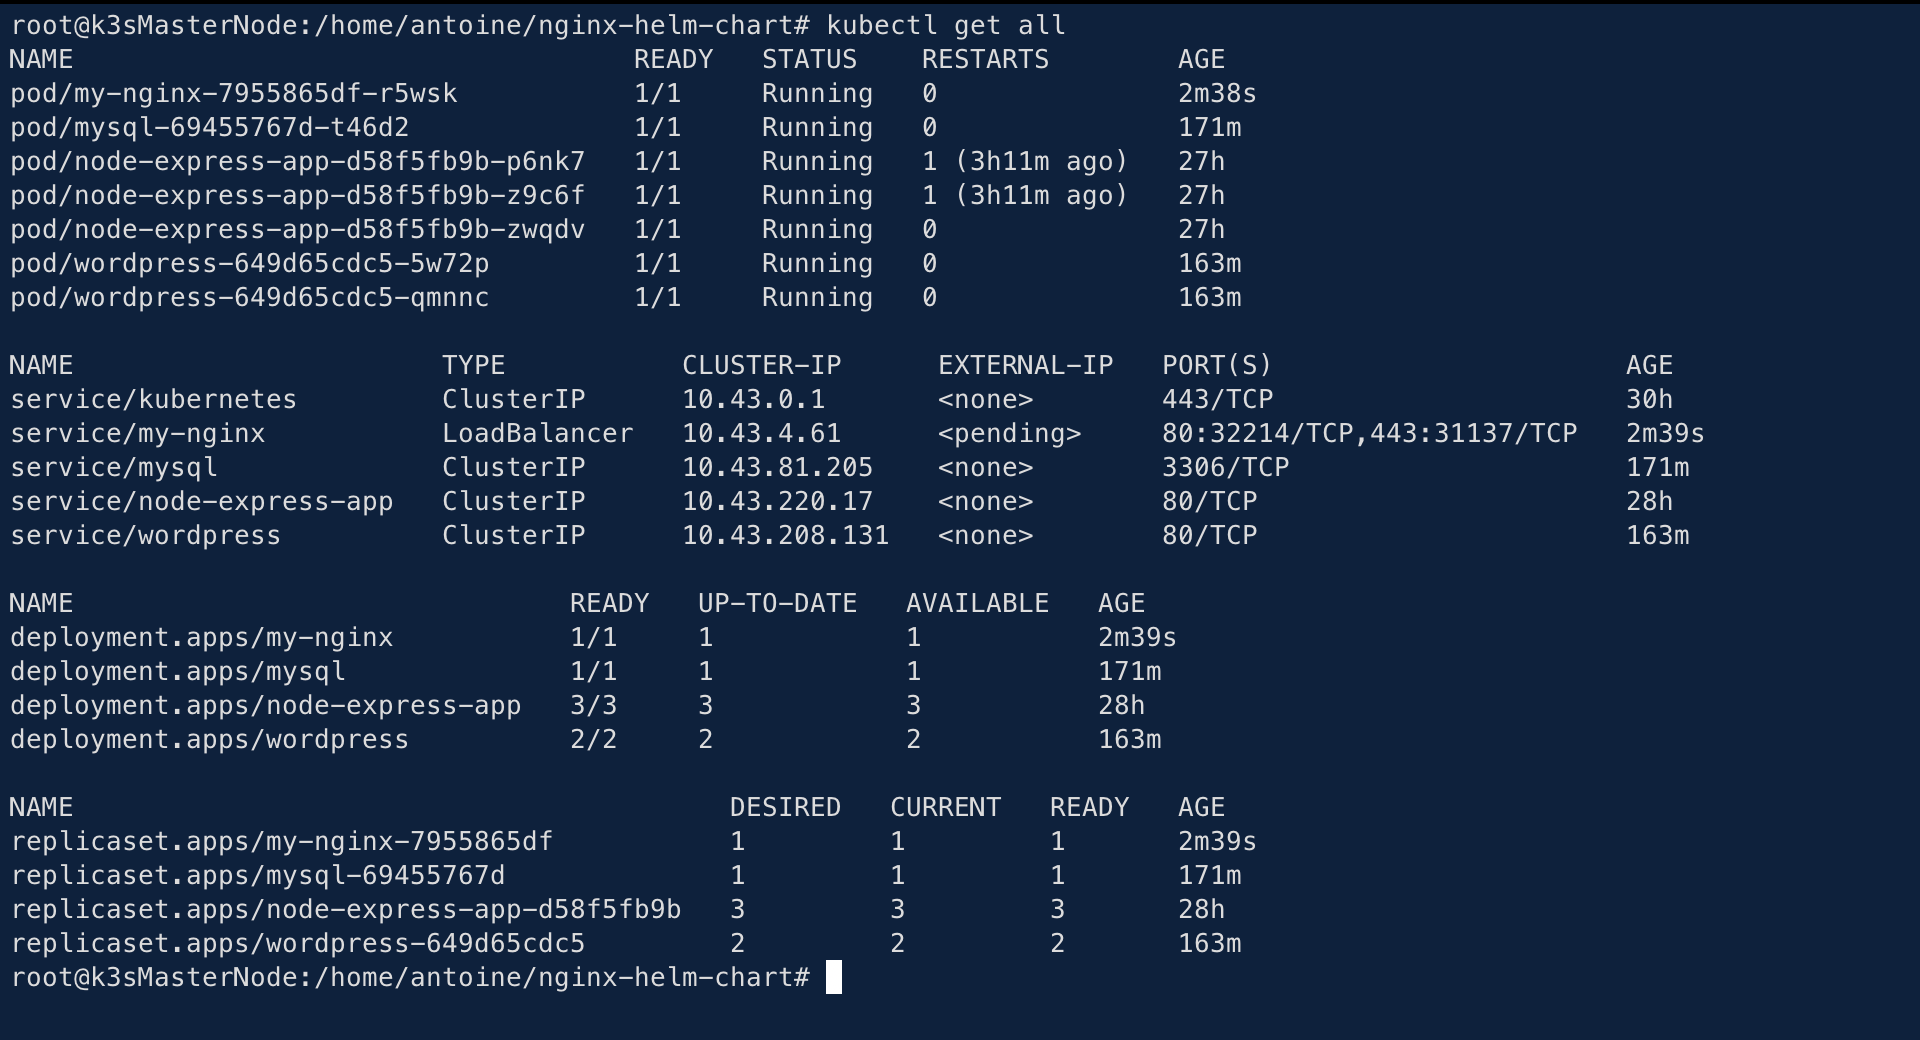
Now, let’s see the Kubernetes objects it created for us (just like we did before):
❯ helm ls
NAME        NAMESPACE   REVISION    UPDATED                                 STATUS      CHART           APP VERSION
my-nginx    default     1           2025-10-28 01:00:14.346439 +0100 CET    deployed    nginx-22.2.1    1.29.2
Now, let’s see the Kubernetes objects it created for us (just like we did before):
Bash
kubectl get all
You’ll see that Helm automatically created:
- A
pod/my-nginx-.... -
A
service/my-nginx -
A
deployment.apps/my-nginx -
A **`replicaset.apps/my-nginx-…
It did all that work for us!
Step 4: Access Your App
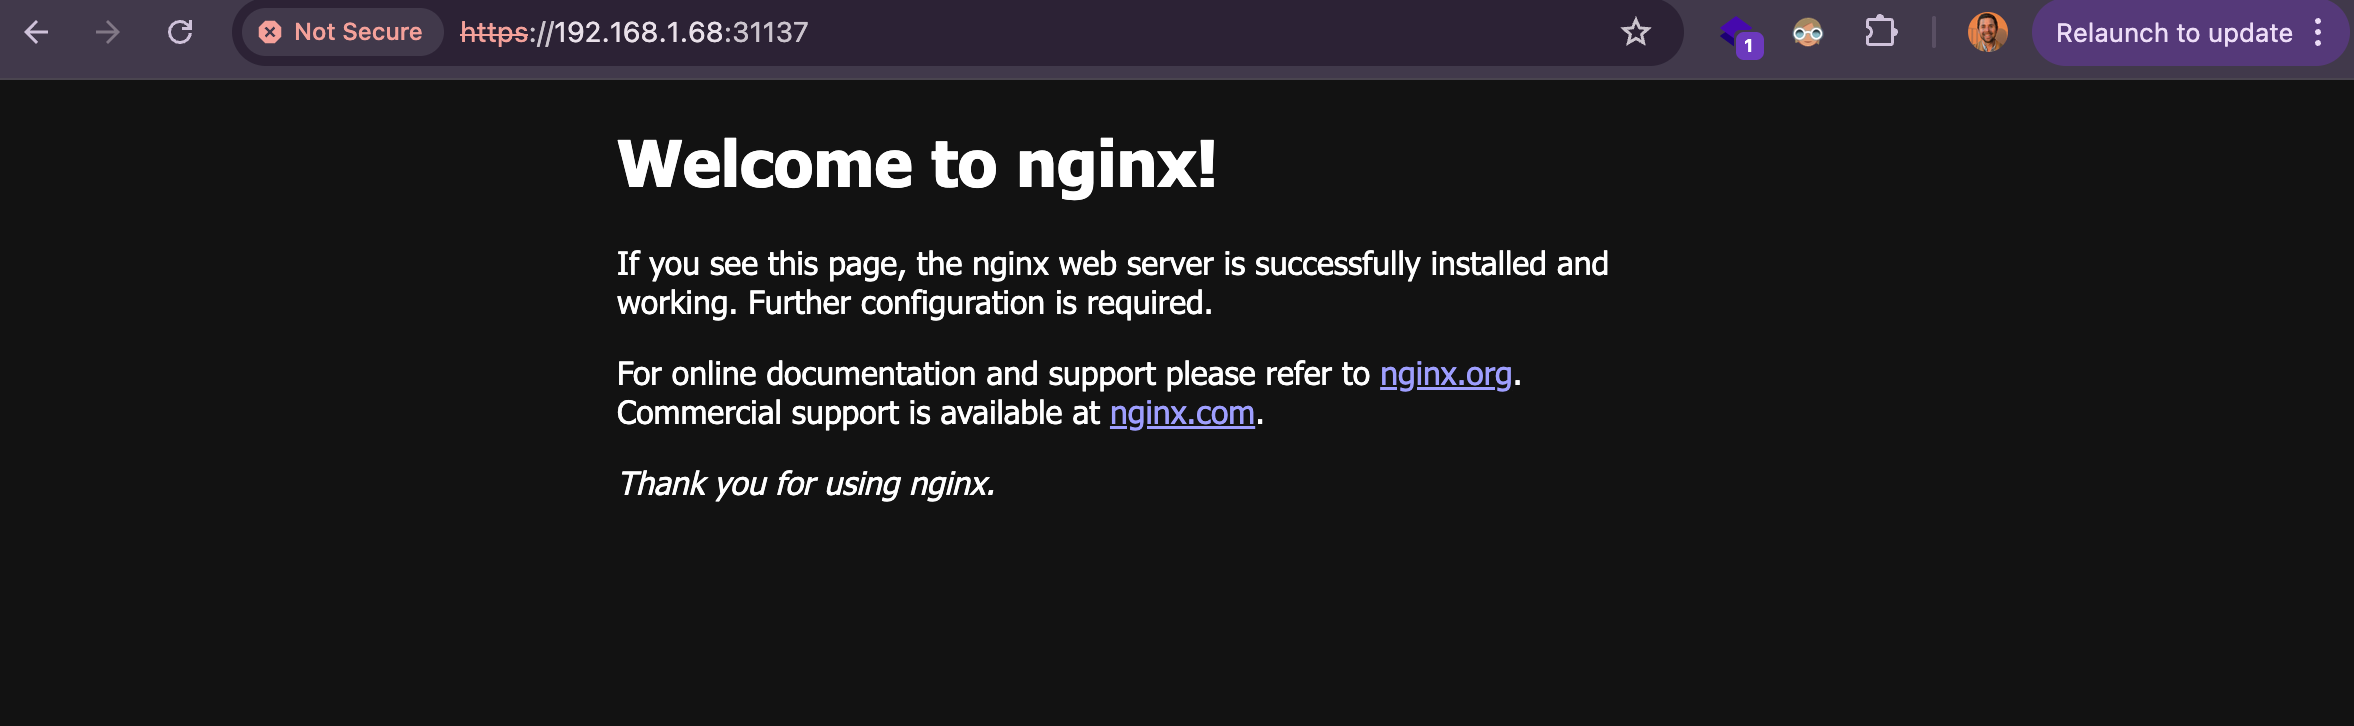
The Bitnami chart, by default, creates a Service of type LoadBalancer. In K3s, the built-in service load balancer (Klipper) will automatically assign it an external IP from your node’s IP.
Let’s find that IP:
Bash
kubectl get svc my-nginx
Output:
NAME       TYPE           CLUSTER-IP      EXTERNAL-IP    PORT(S)        AGE
my-nginx   LoadBalancer   10.43.144.156   192.168.1.68   80:31123/TCP   2m
(Note: If your EXTERNAL-IP stays <pending>, it might be because your K3s setup doesn’t have an IP pool. In that case, you can still use the NODEPORT 31123 just like in your first Nginx test.)
Like here :

You can now access your app at the external IP:
Step 5: Clean Up
This is the best part. To delete everything we just created—the deployment, the service, the pod—you just run one command:
helm uninstall my-nginx
It will say release "my-nginx" uninstalled.
If you run kubectl get all again, you’ll see all the my-nginx objects are gone. It’s a perfect, clean uninstallation.
Install jellyseerr
To fin helm charts there’s this site : https://artifacthub.io/
I decided to use the following helm chart :
https://artifacthub.io/packages/helm/loeken-at-home/jellyseerr
Add repository
helm repo add loeken-at-home https://loeken.github.io/helm-charts
Install chart
helm install my-jellyseerr loeken-at-home/jellyseerr --version 2.7.3
# jellyseerr-values.yaml

ingress:
  main:
    enabled: true
    hosts:
      - host: jellyseerr.home
        paths:
          - path: /

persistence:
  config:
    enabled: true
    type: persistentVolumeClaim
    accessMode: ReadWriteOnce
    size: 1Gi
    storageClass: "local-path"
There’s options that can be used to set the persistence and other : Link to values.yaml